

I’ve been running Home Assistant on a Raspberry Pi 4 for around 7 months or so, and have been very happy with it. That being said there were things that were a bit frustrating, such as slow reboot times, and the constant fear of killing the micro SD card. A friend of mine moved his setup over to a NUC (mini pc or whatever it’s called) and had nothing but great things to say, so I decided to make the move.
I’m going to walk through the steps I took to build and setup the NUC, enable SSH, install Docker and Portainer, and finally get Home Assistant running. I opted for Home Assistant Supervised (formerly Hassio), not Home Assistant Core, so that I would continue to have the ease of updates, and add ons that I’ve become accustomed to.
Putting together the NUC
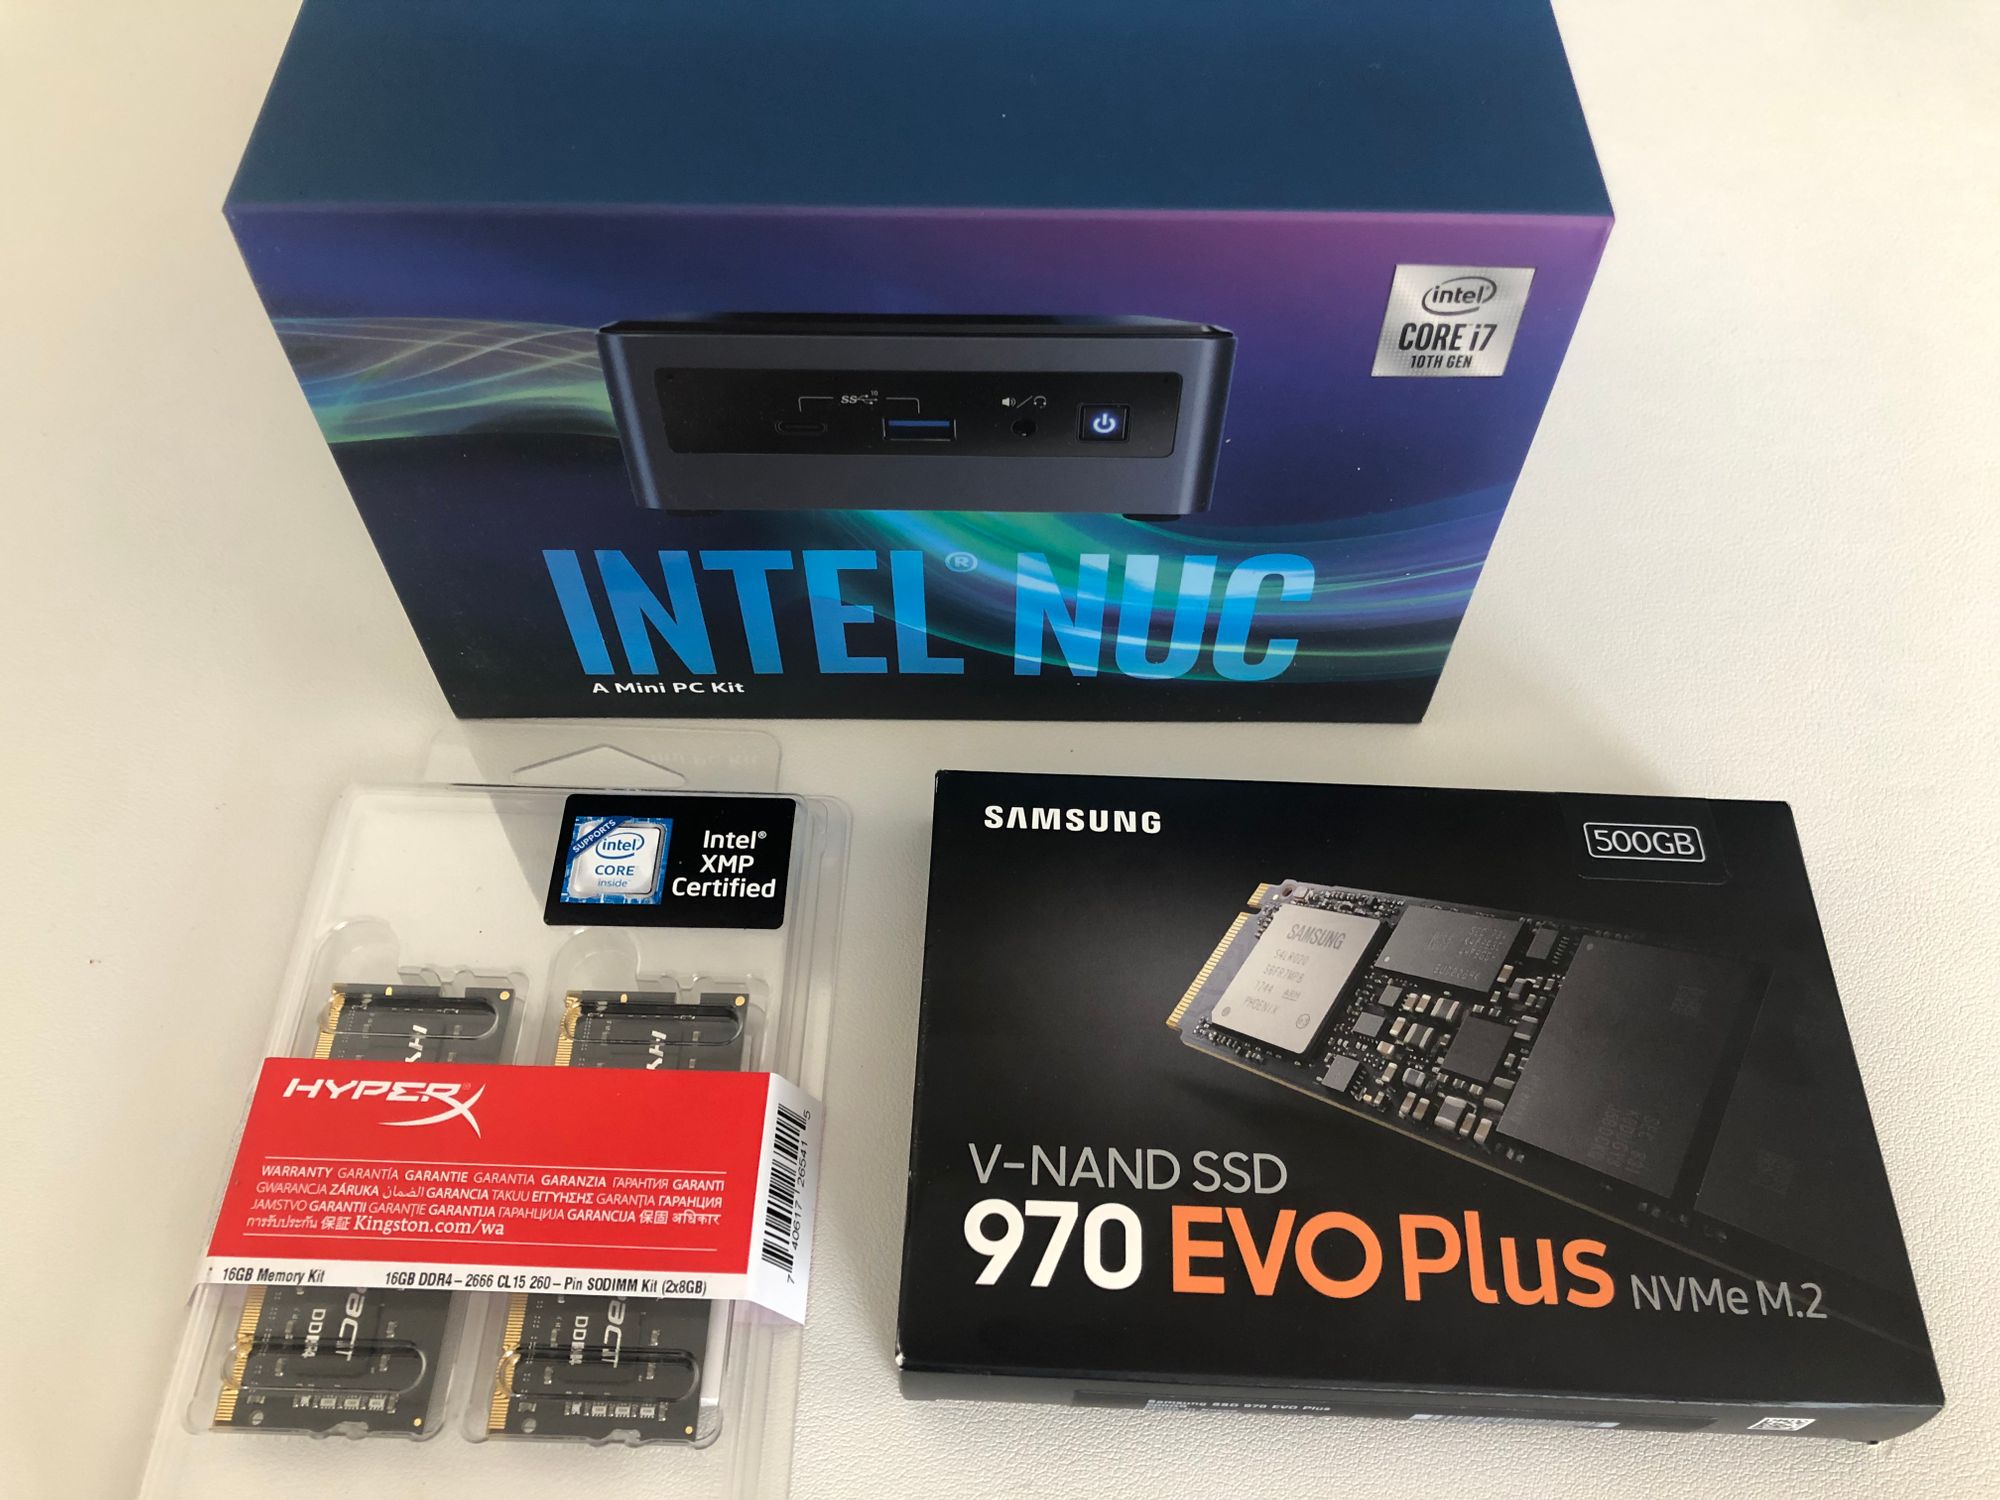
I went around in circles trying to figure out what hardware to buy. Do I want an i3, i5, or i7? Should I get an 10th, 8th, or older generation? Should I just go with the same machine my friend used? At the end of the day I decided to get some current powerful hardware that would allow for me to easily run Home Assistant and any other number of services I might want, as well as just have a more future proof machine to mess with. Heres the hardware I ended up choosing:
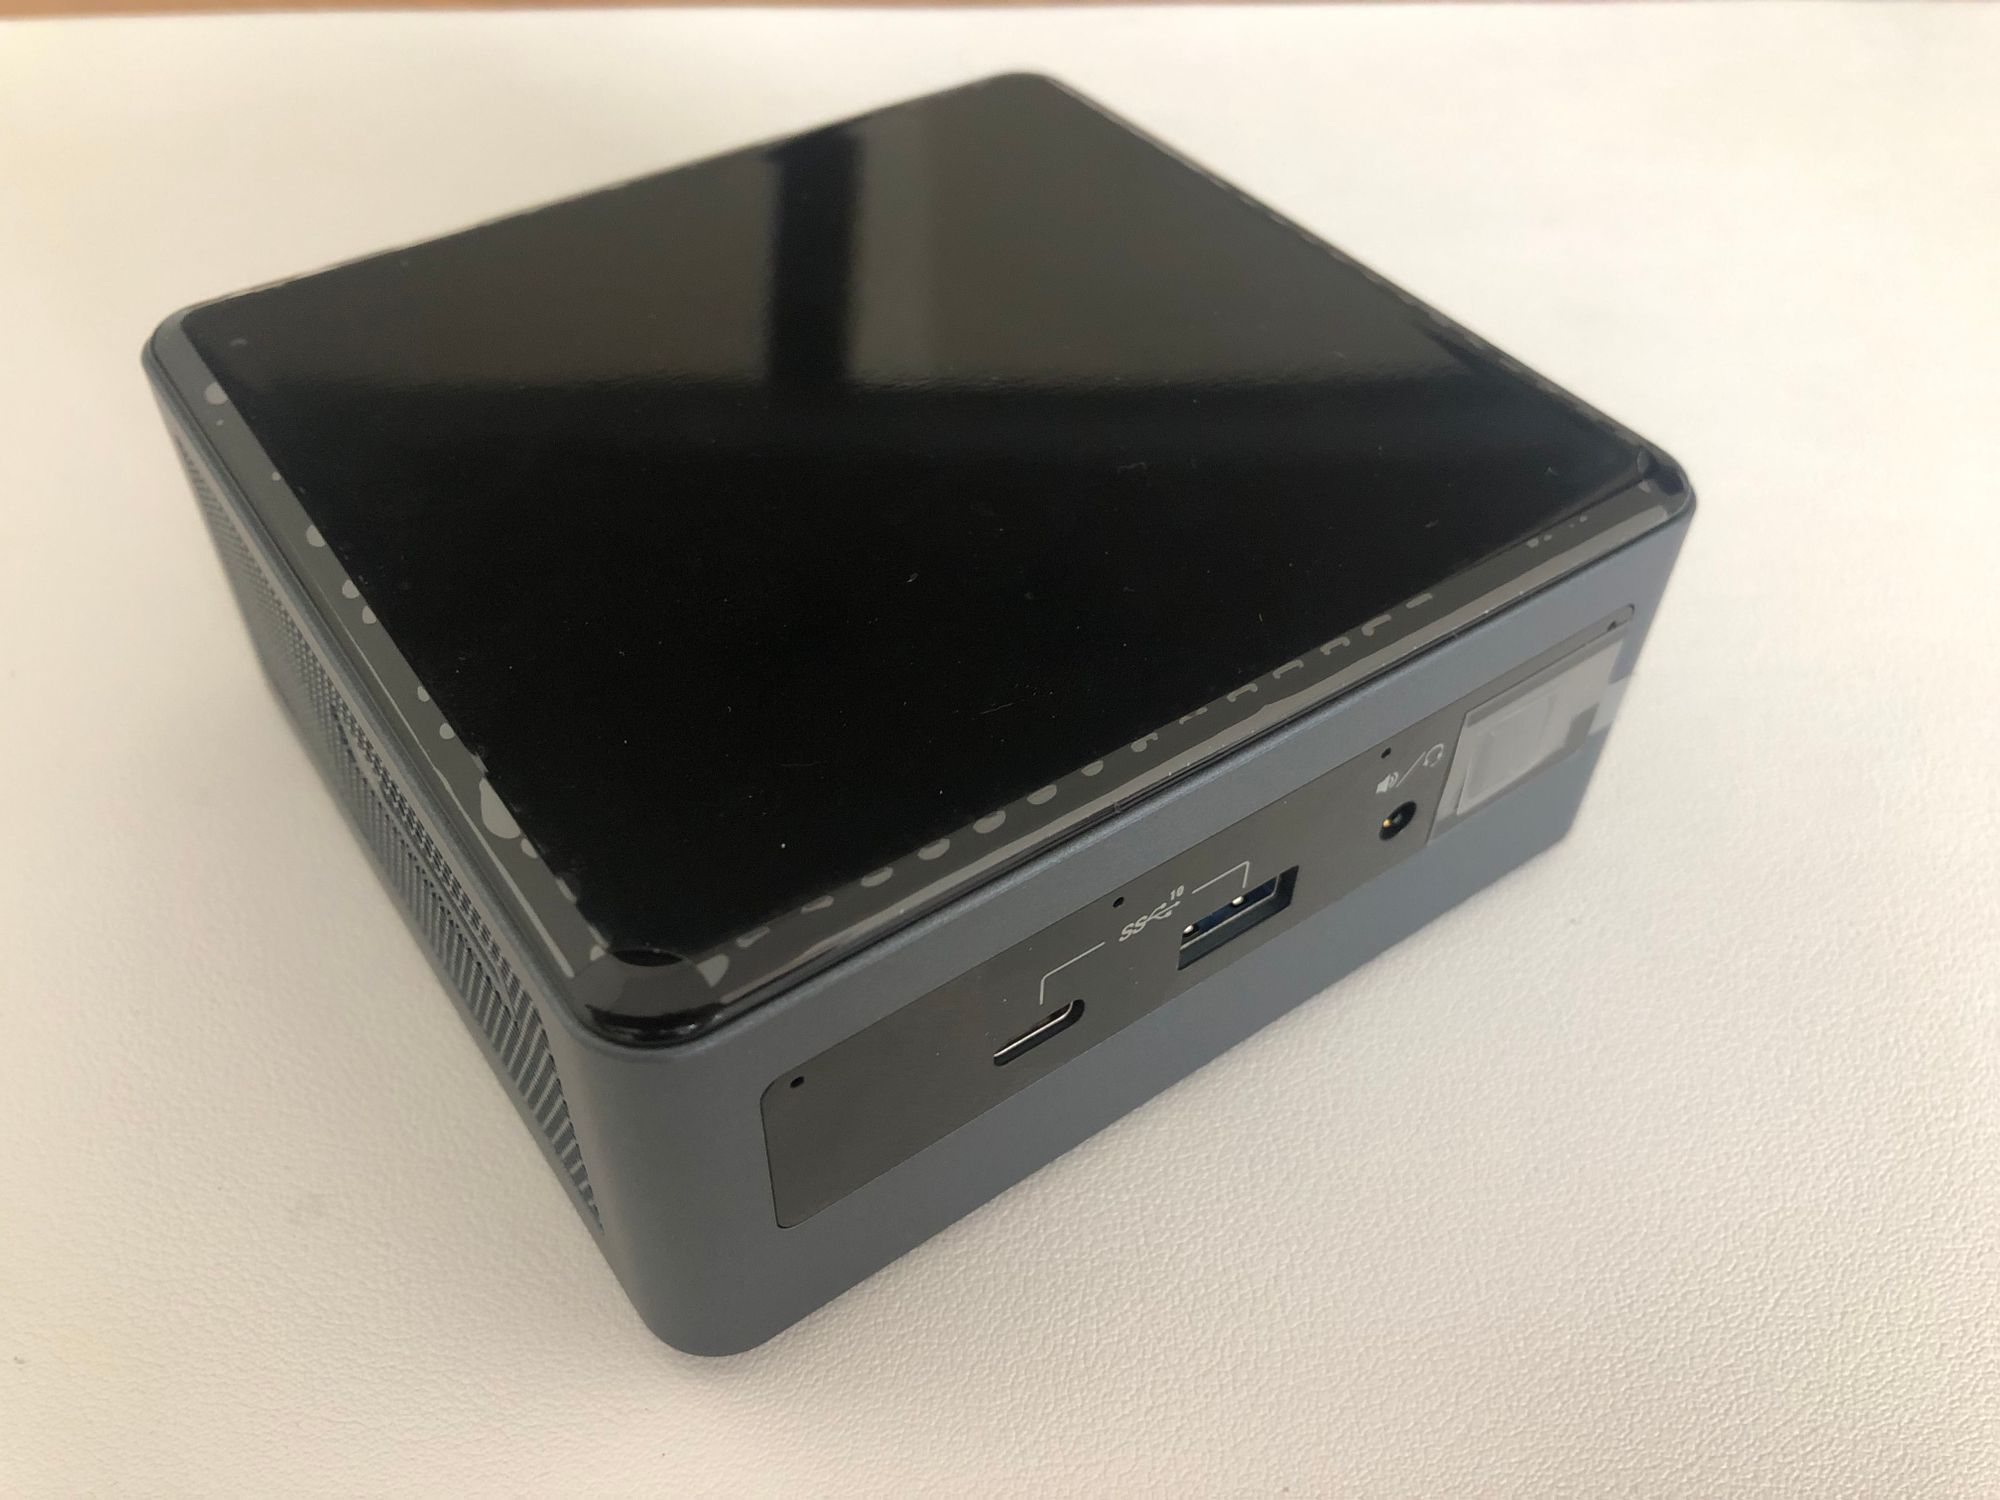
- Intel Nuc 10 (NUC10i7FNH1)
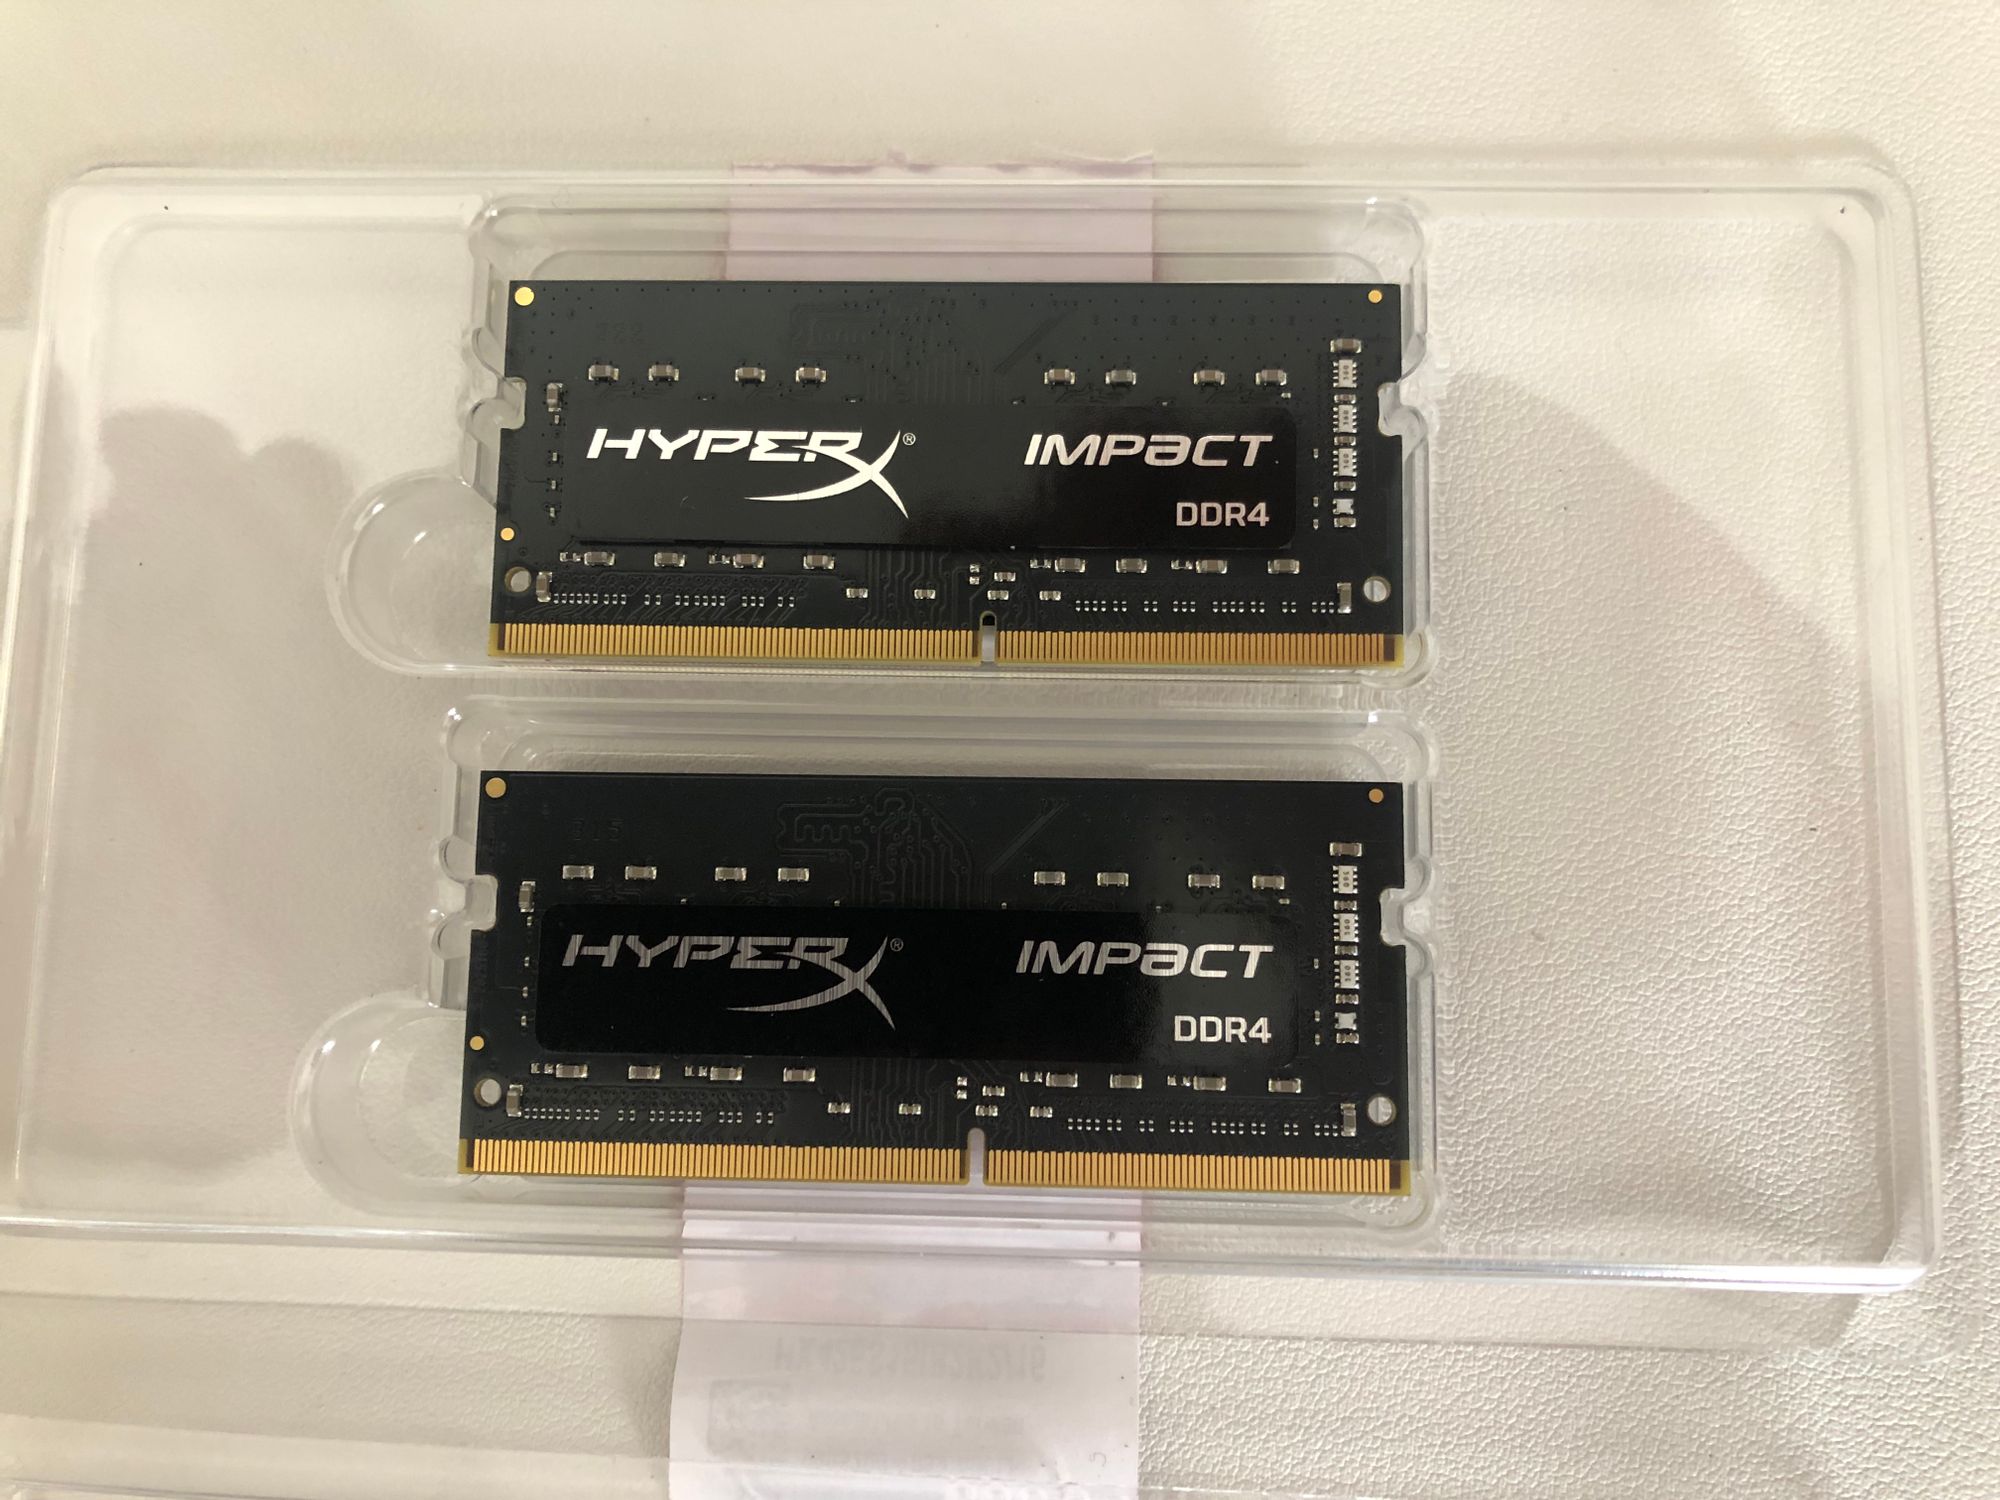
- Kingston HyperX Impact 16GB Memory
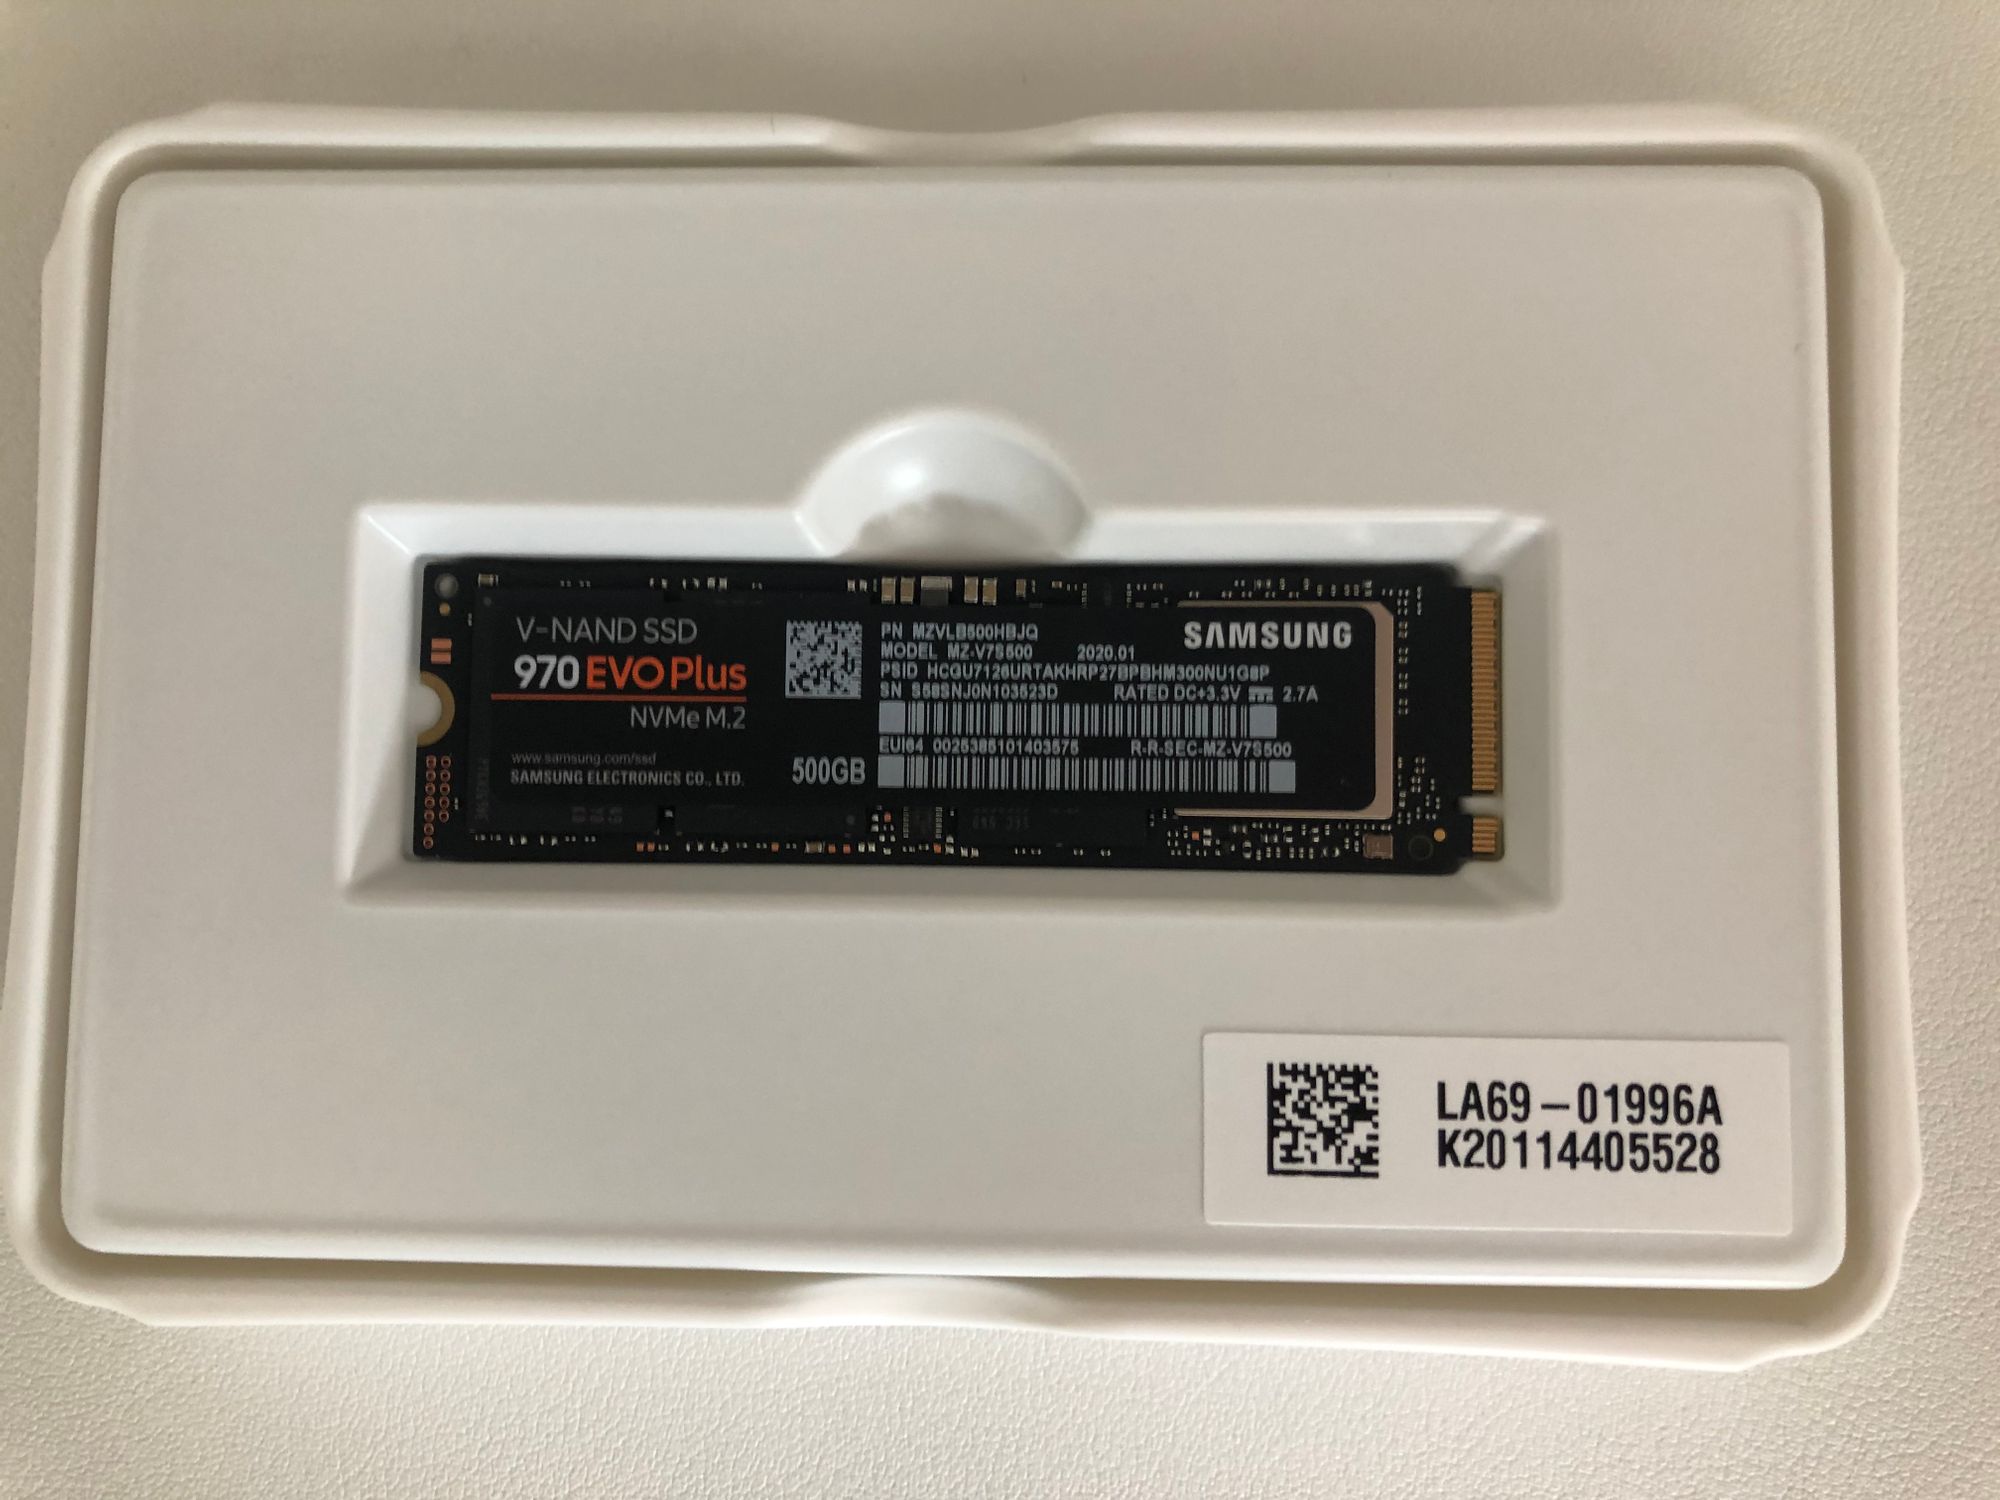
- Samsung 970 EVO Plus SSD 500GB — M.2 NVMe
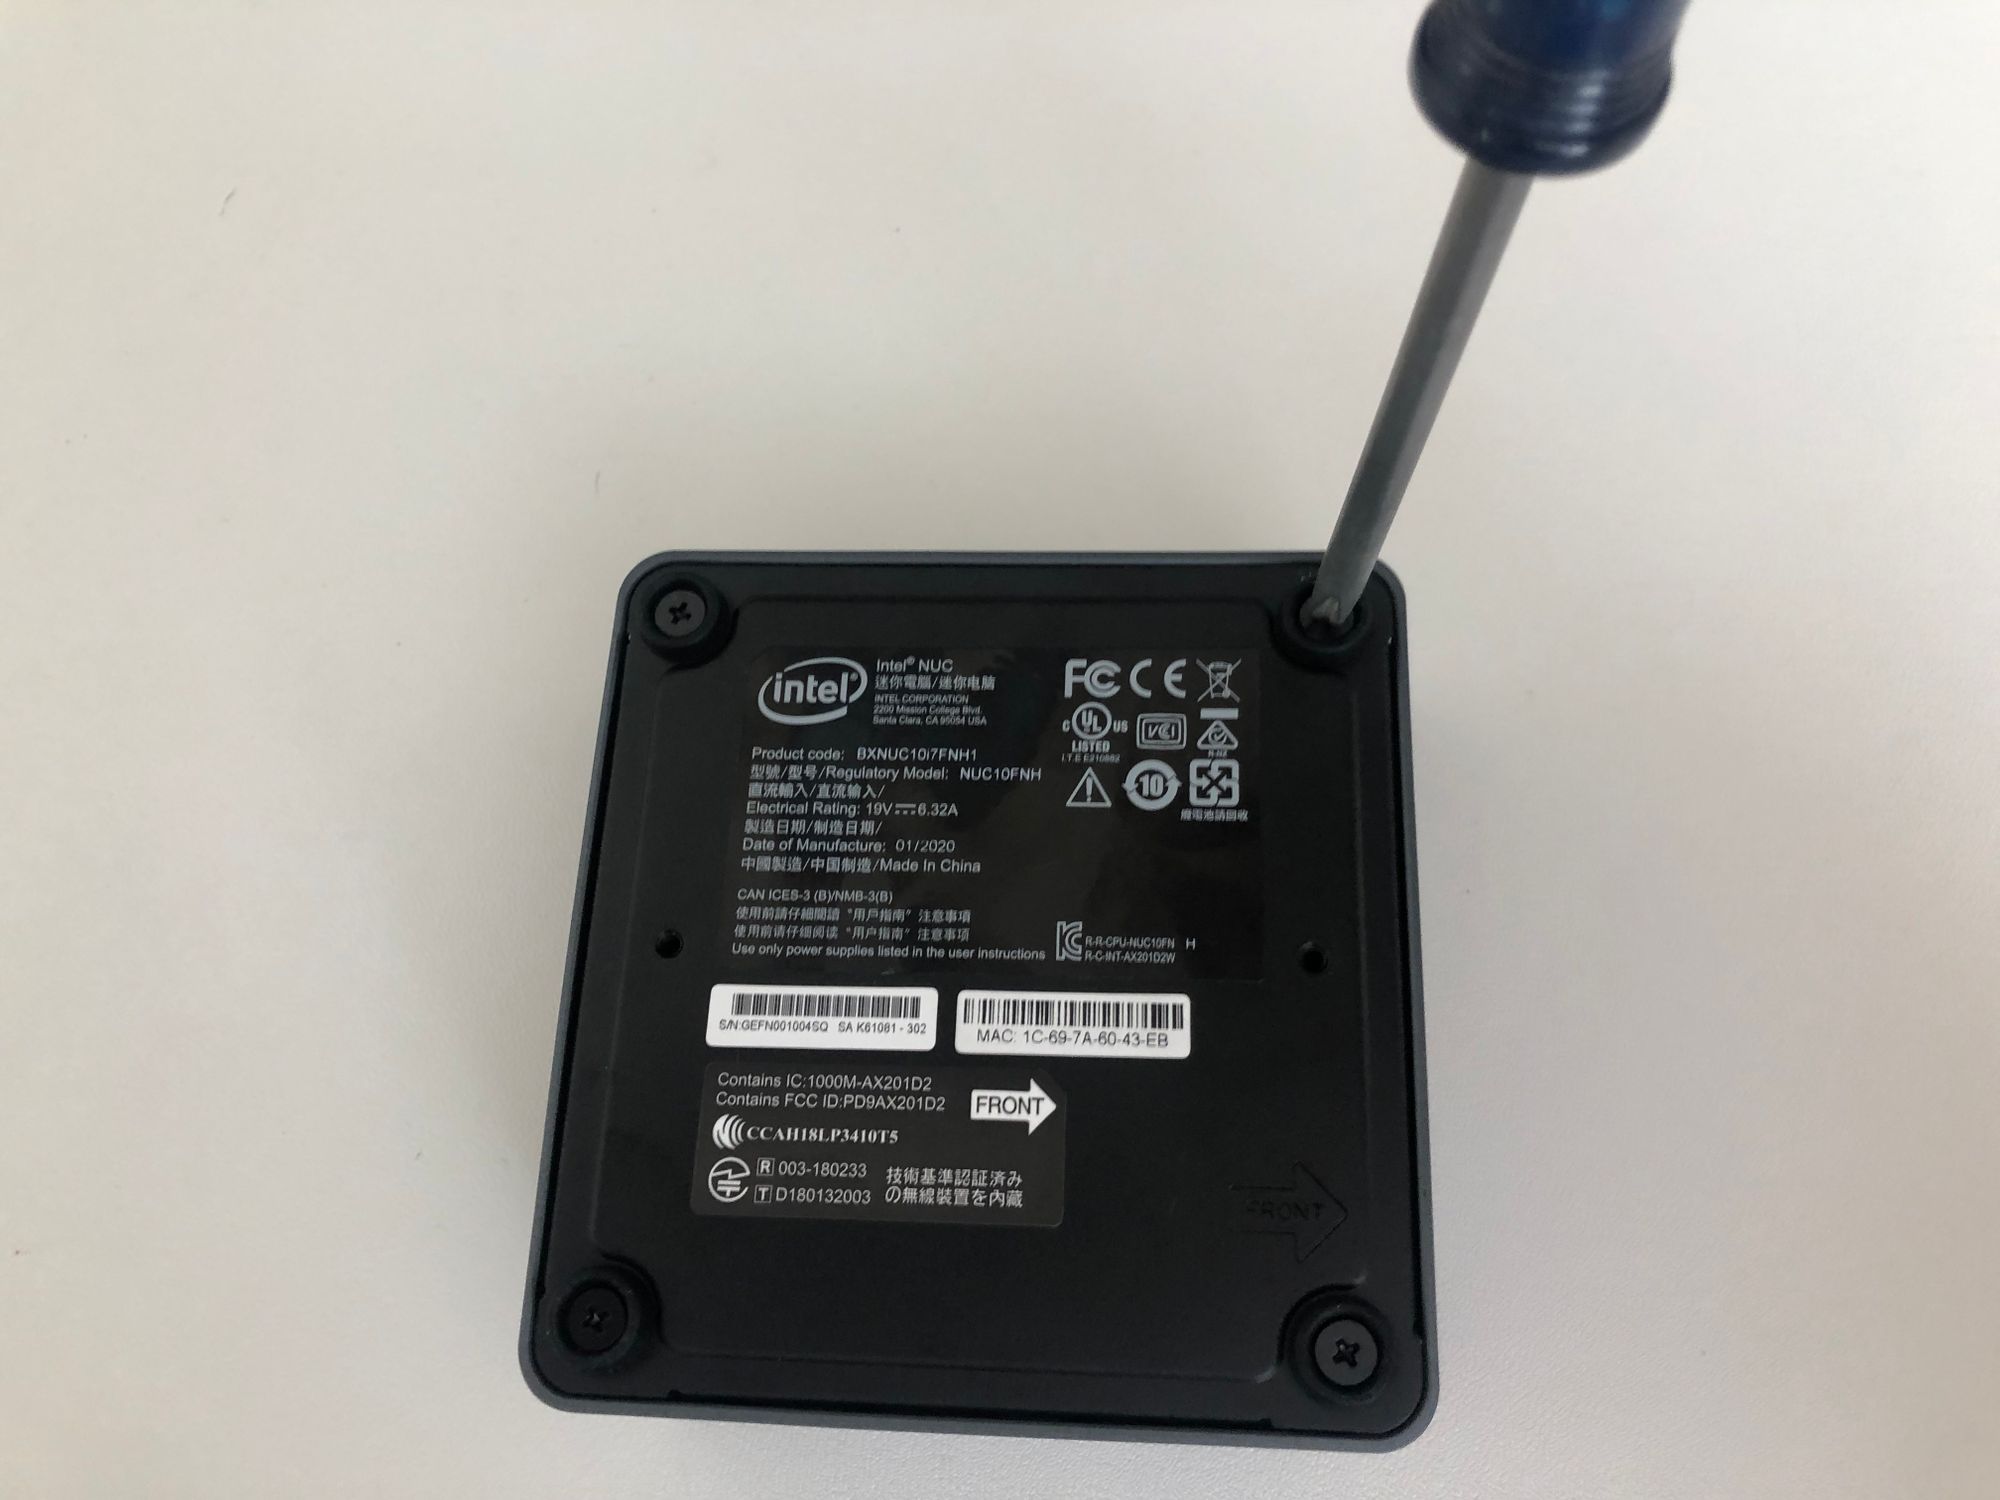
First we need to flip the NUC over and remove the 4 screws that hold the cover on, and gently pull the cover off.

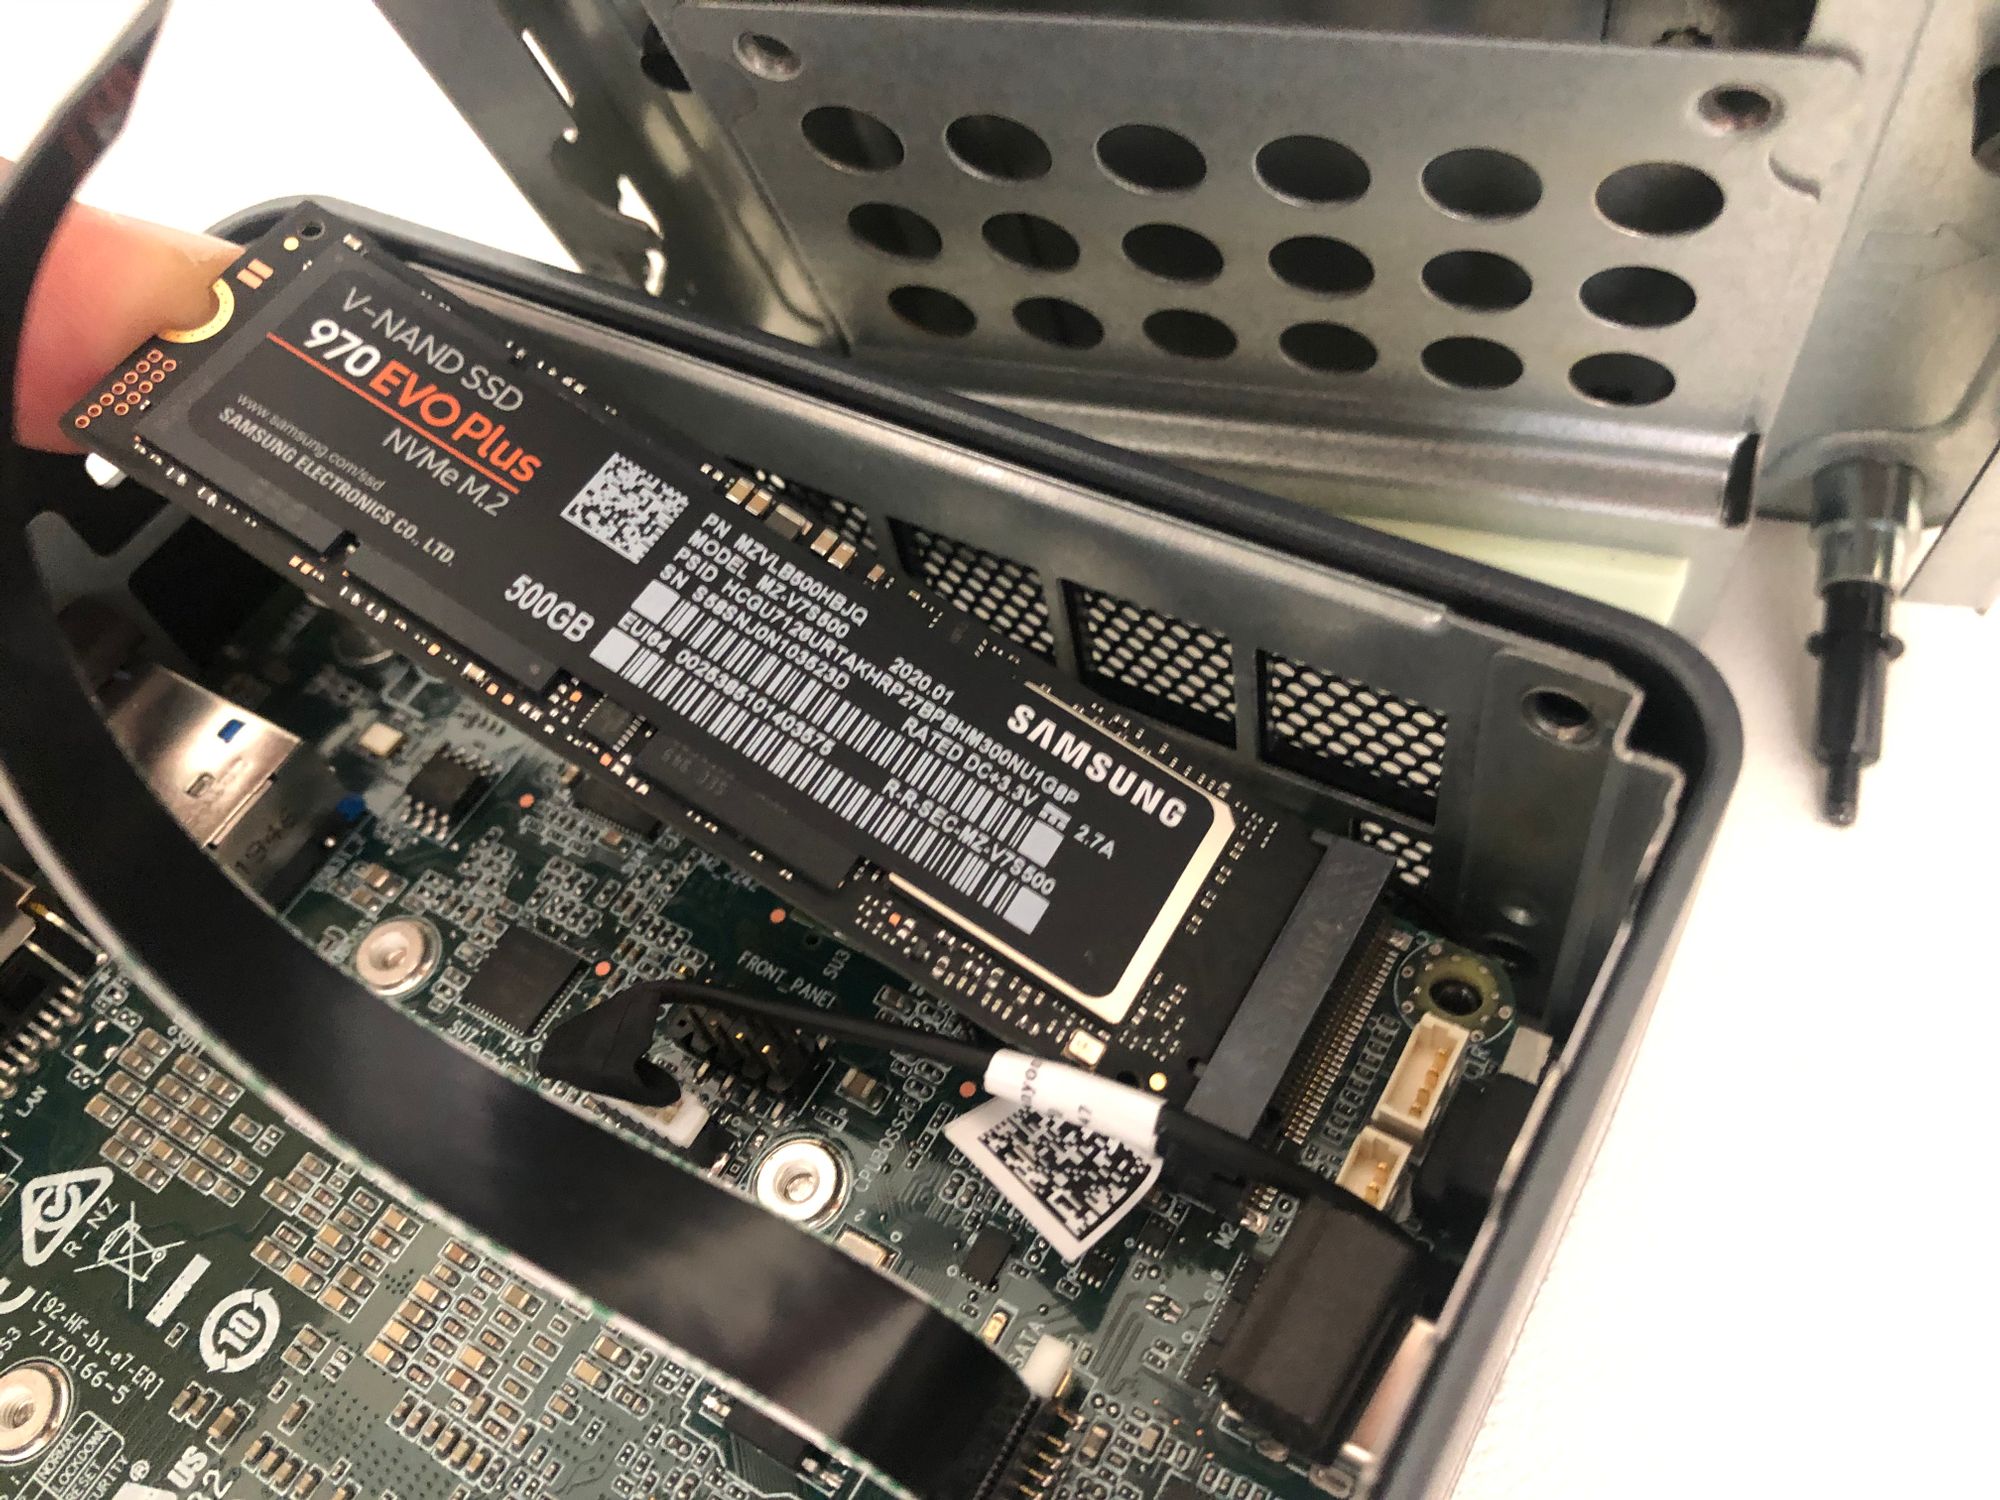
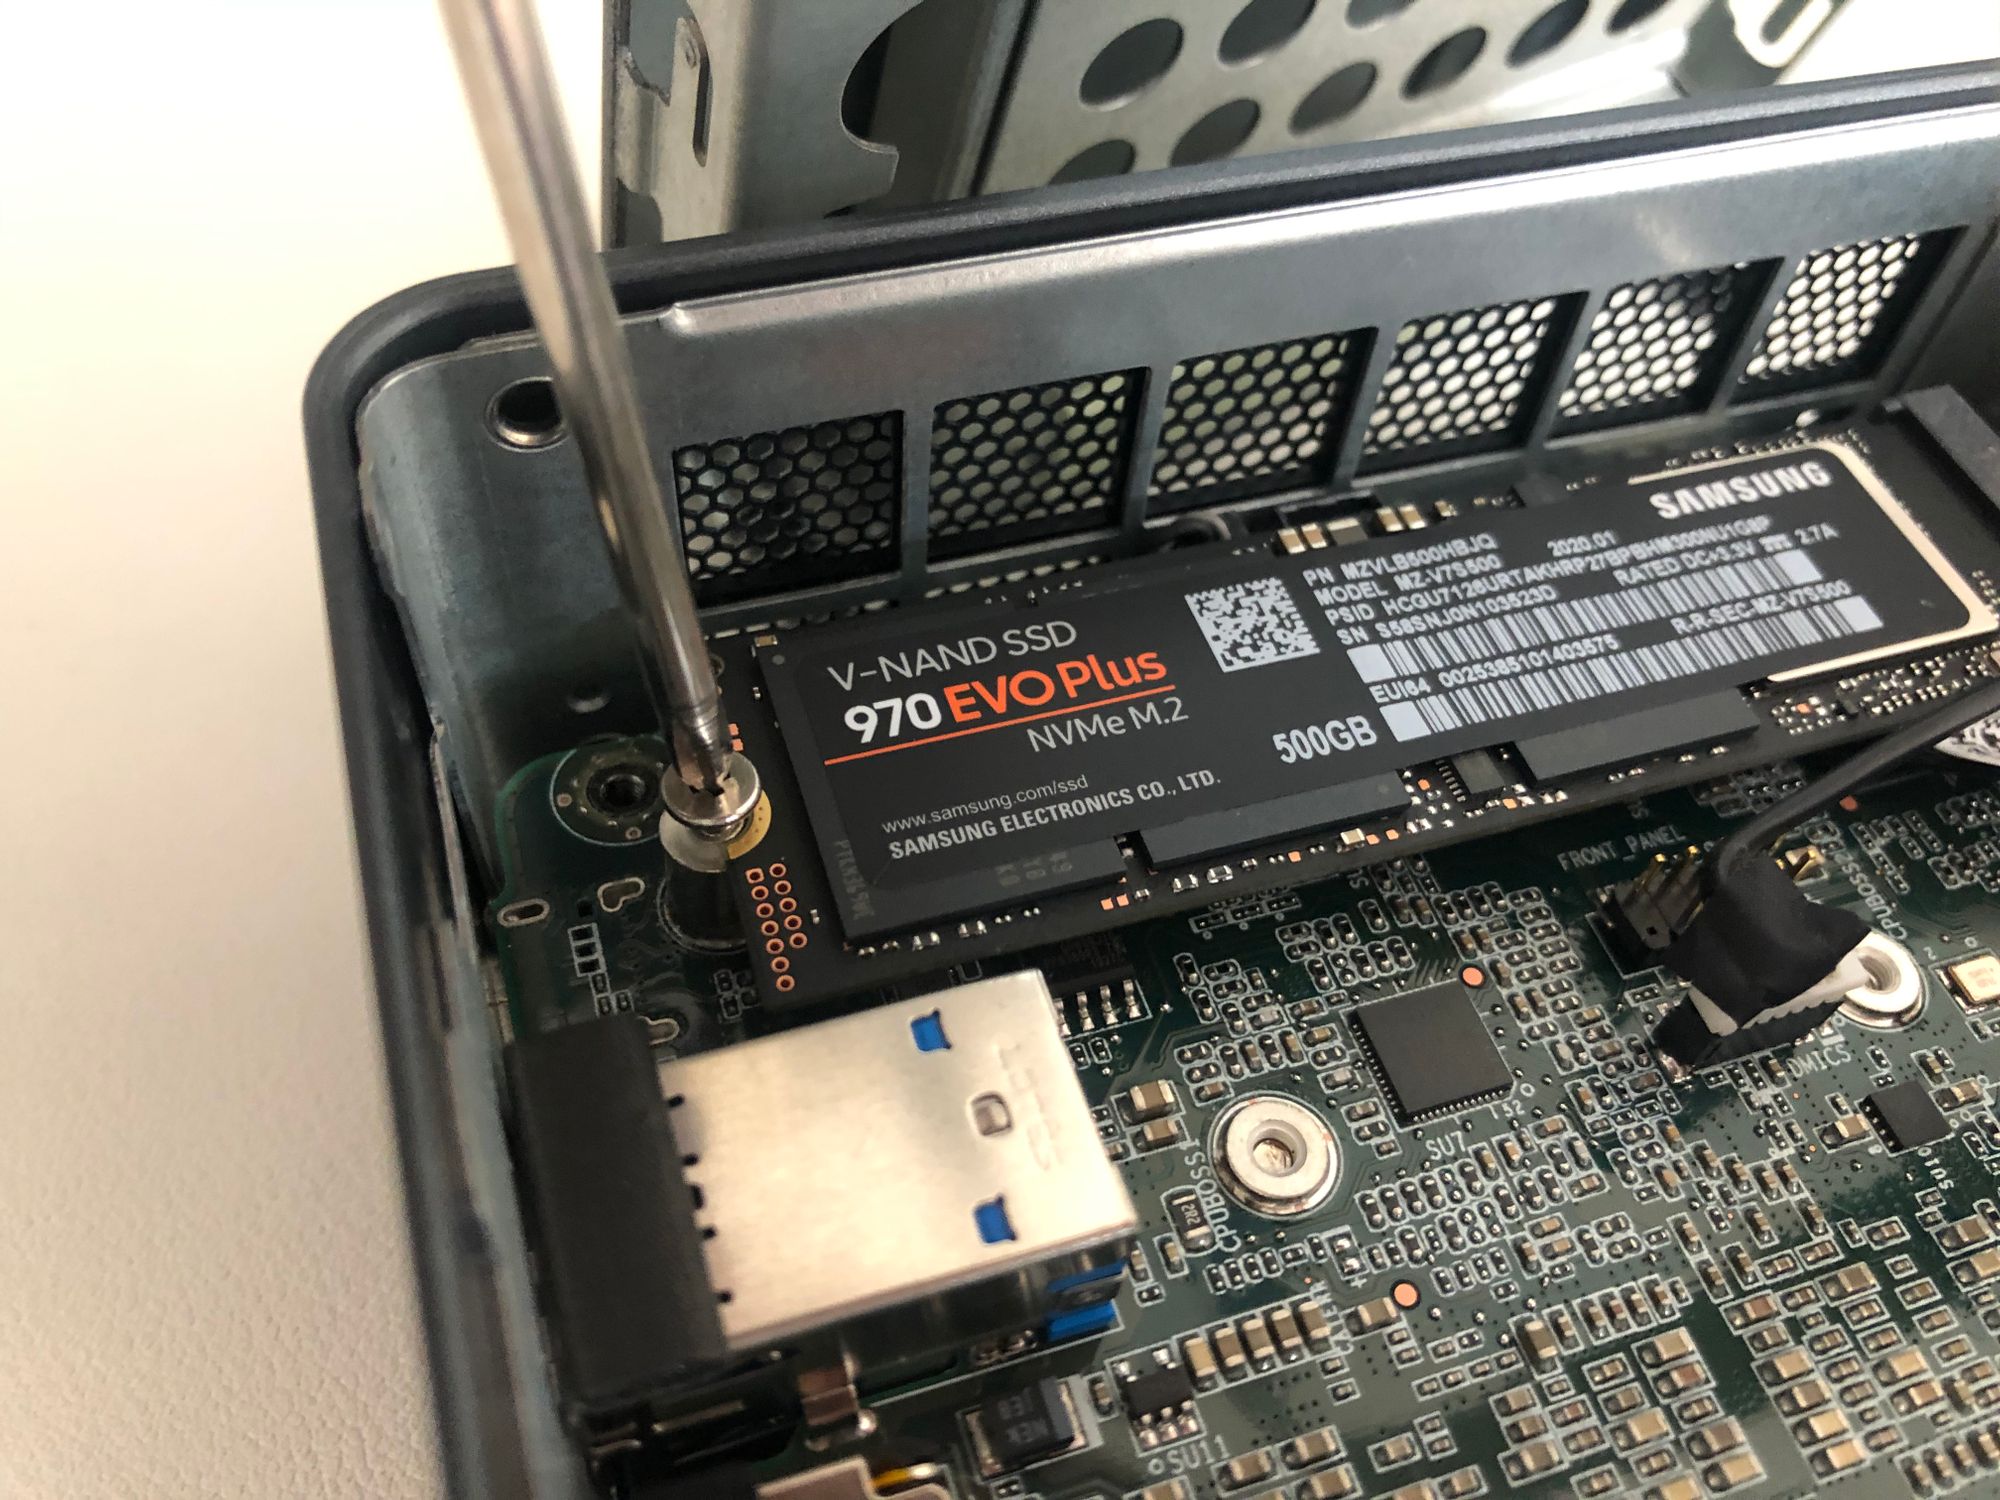
Next we can install the ssd drive. To do this we will remove the screw back by the usb ports on the rear. Once the screw is out you can slide the ssd drive in and tighten the screw back down.

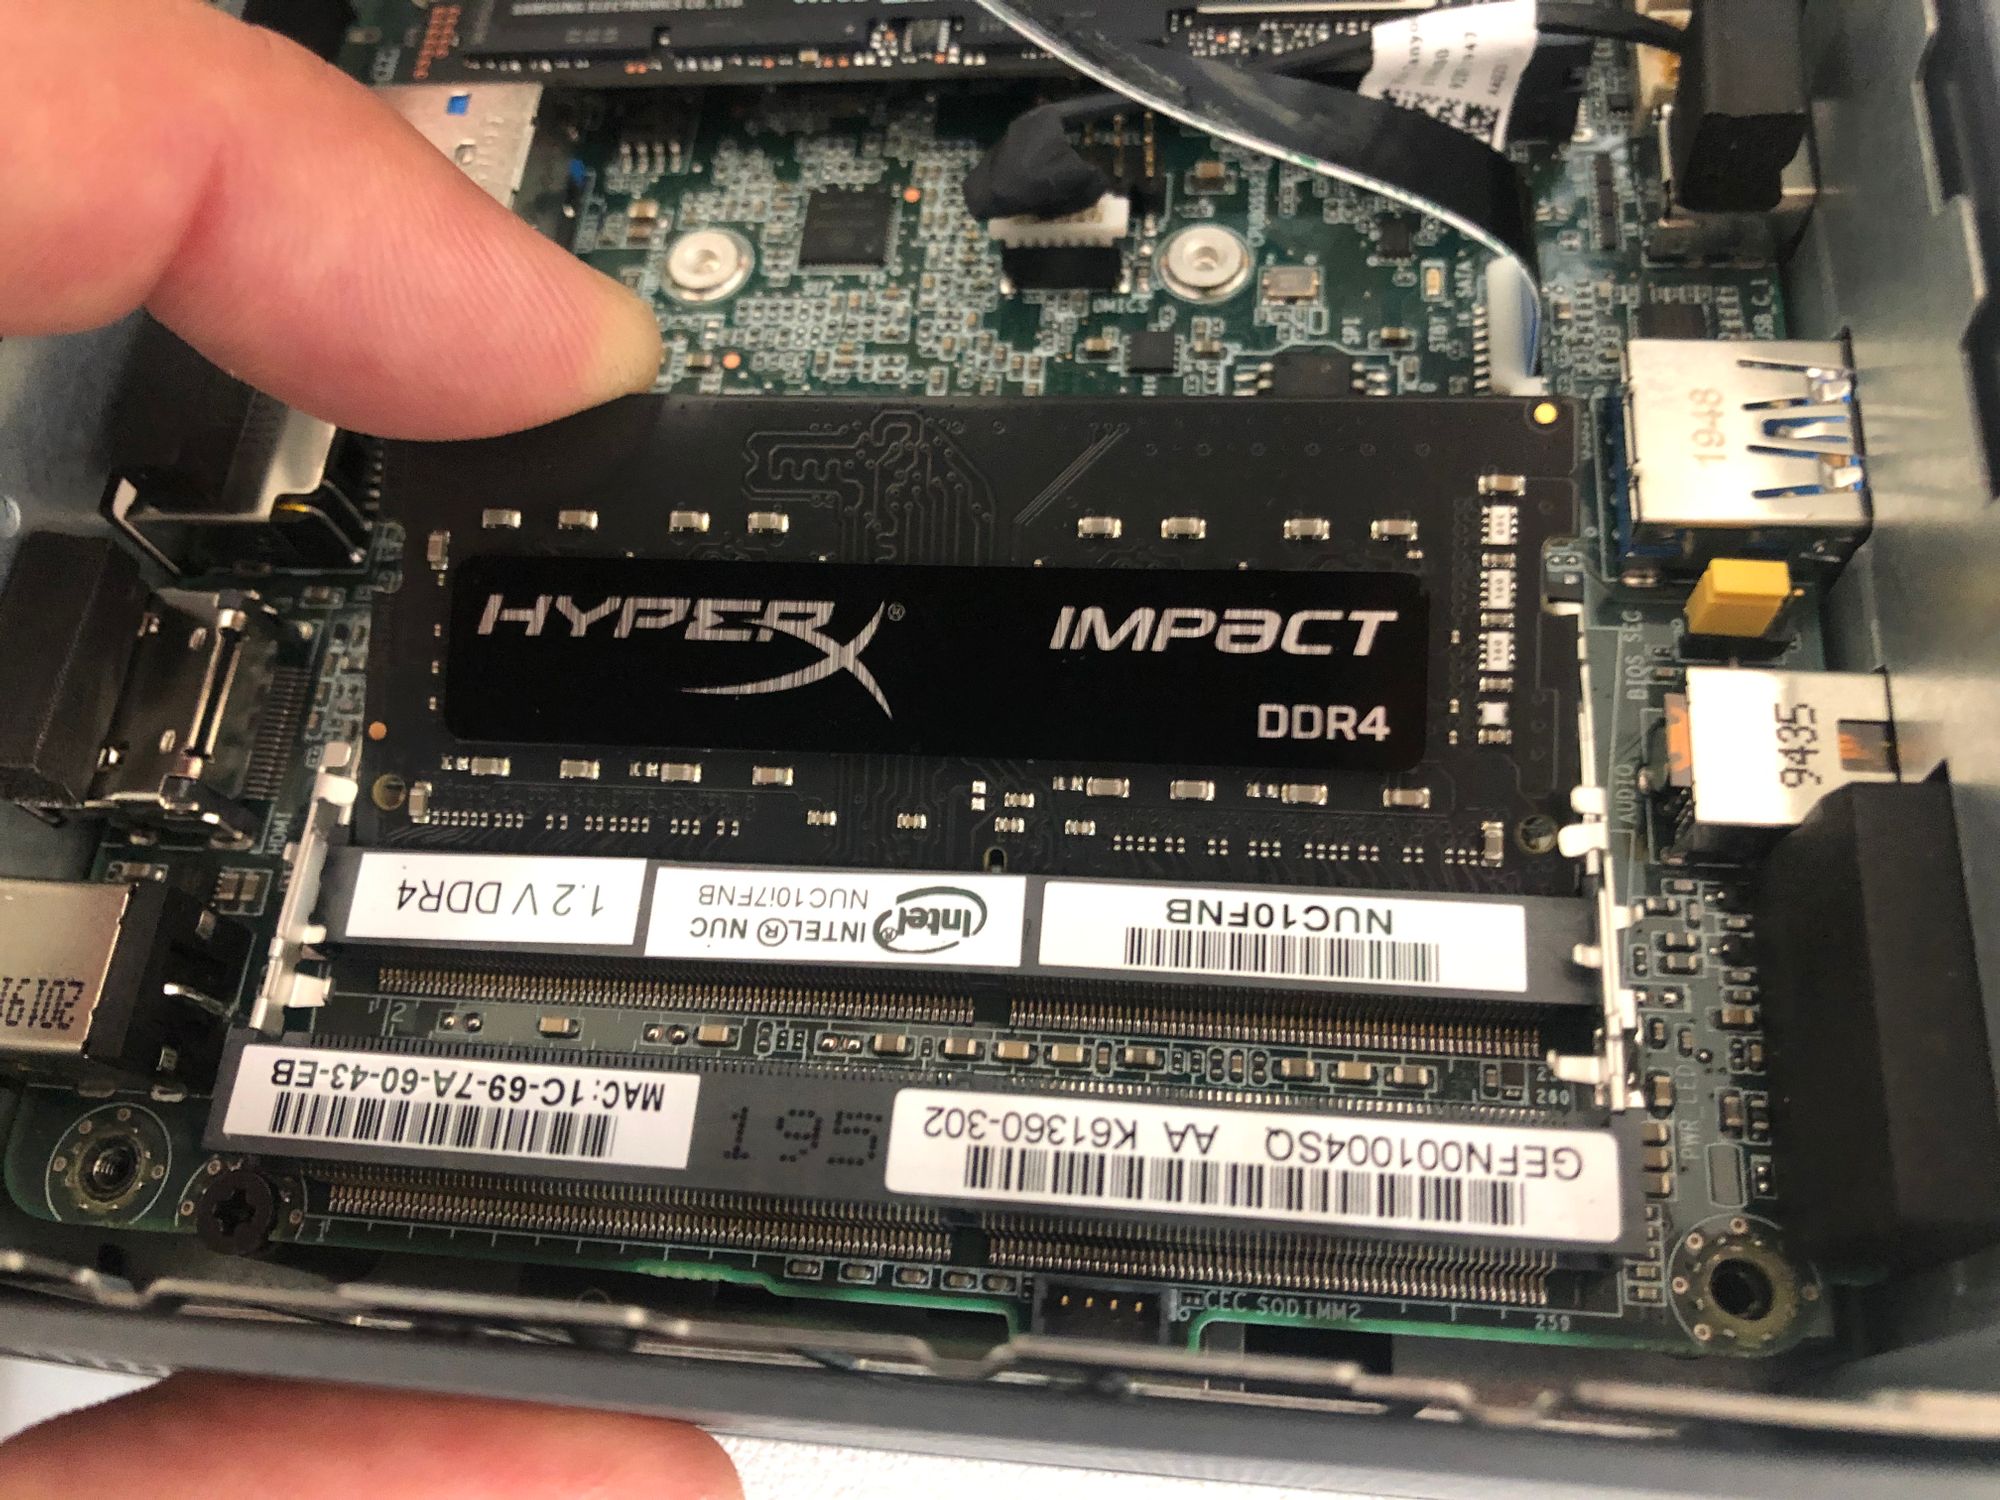
Finally we need to install the Memory. Just slide each module in with the top angled up and then gently push down until it snaps in.
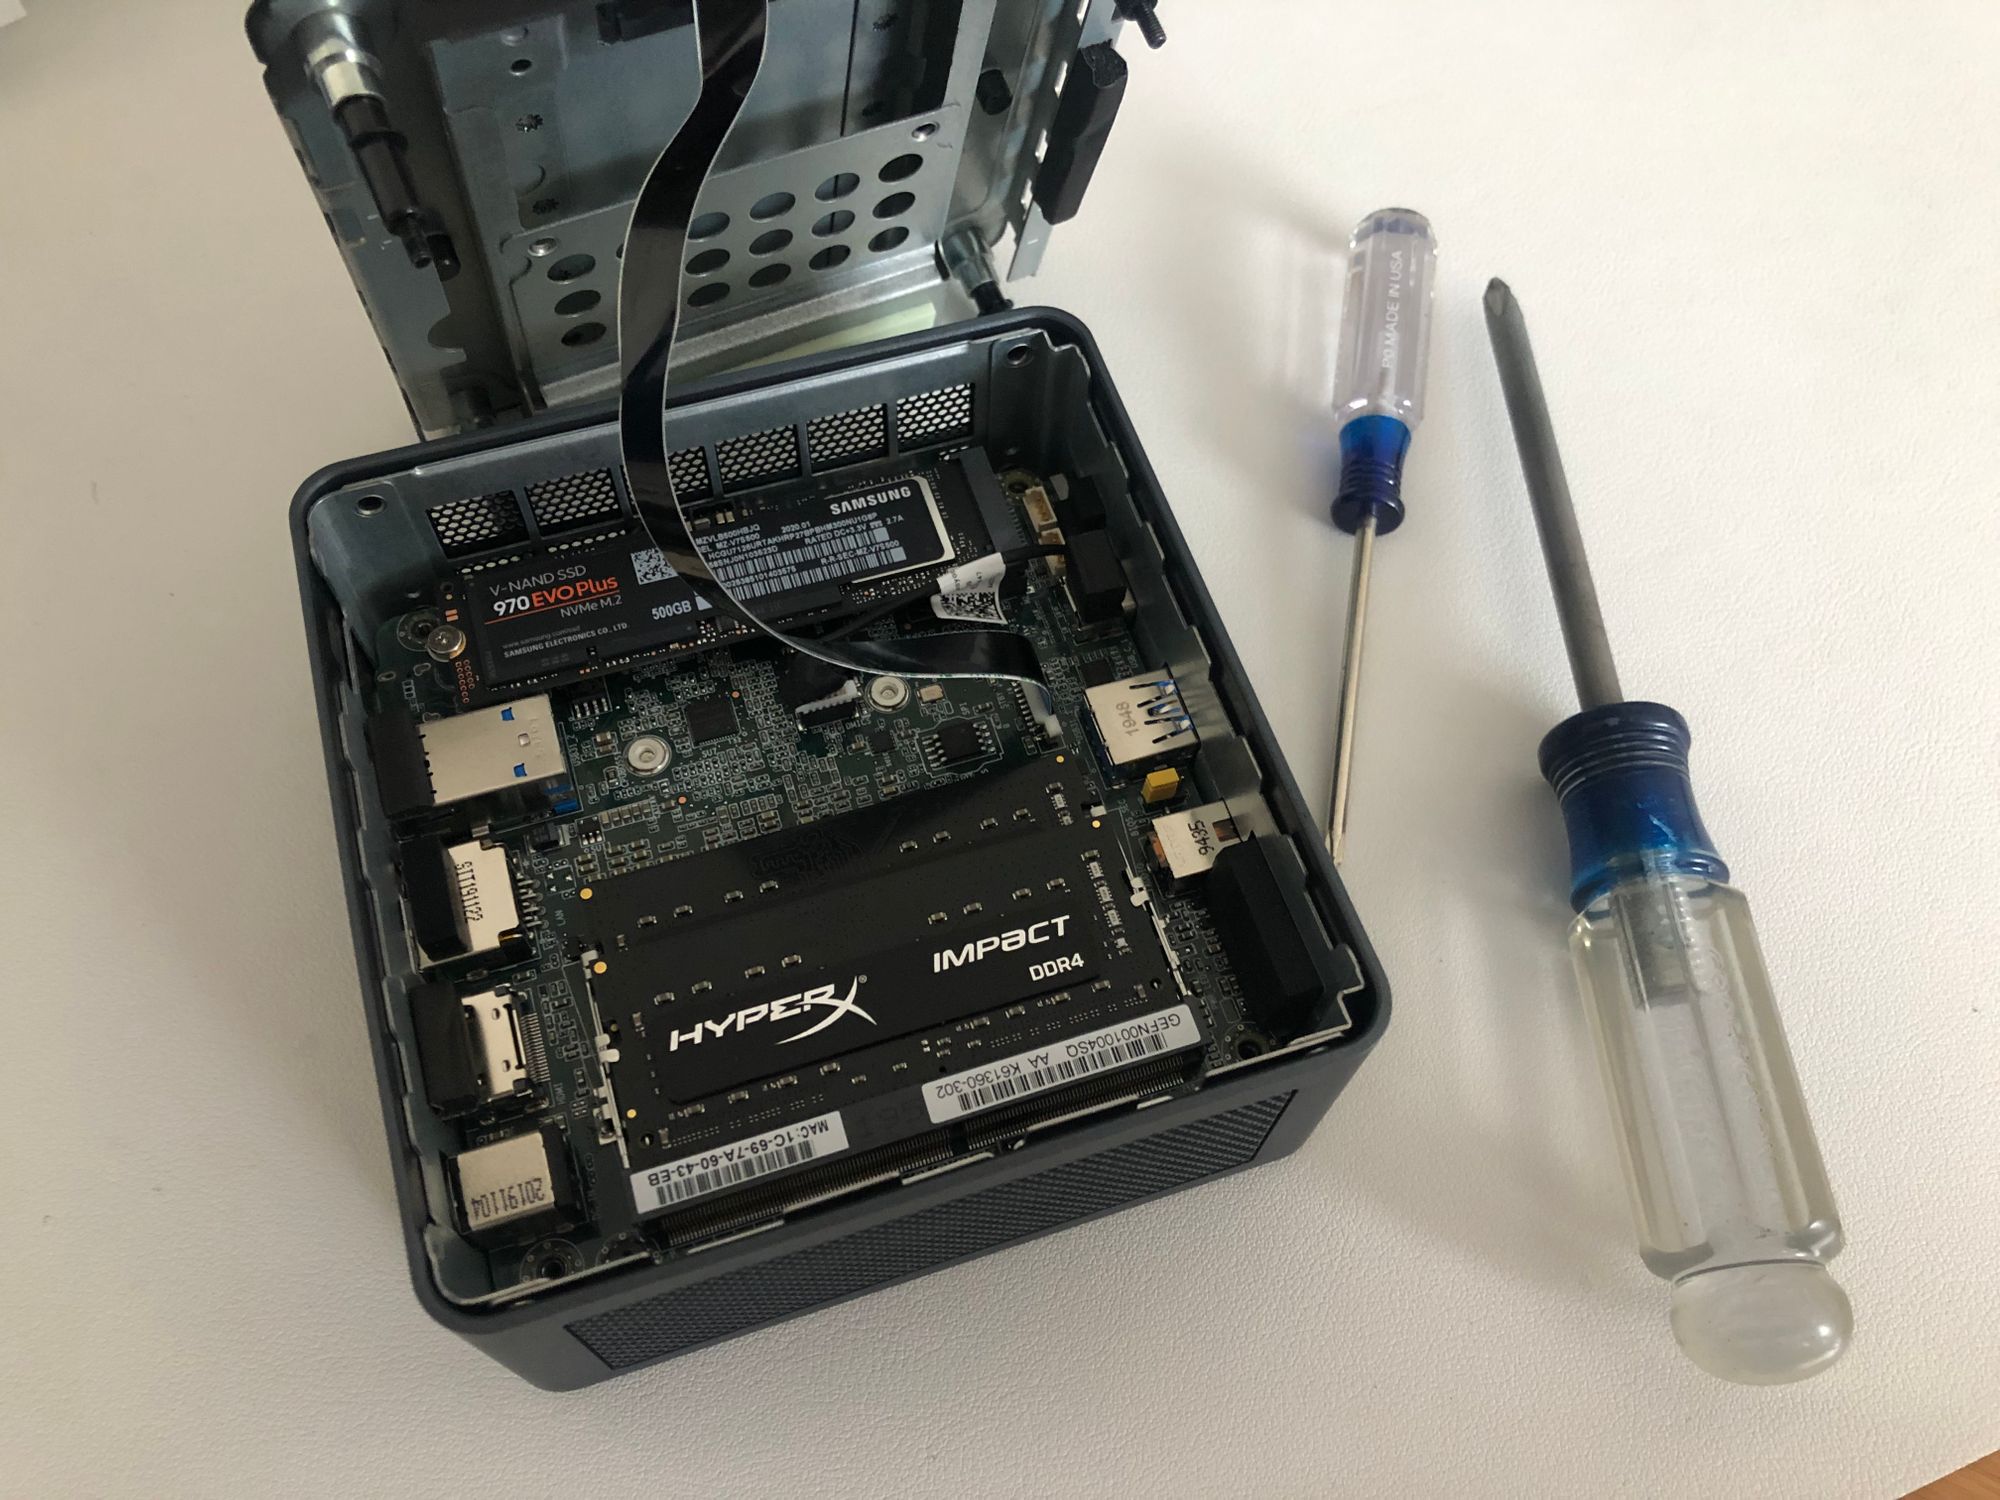
At this point all thats left to do is screw the cover back on, and plug in the power, monitor, and keyboard.
Updating the BIOS
Since we are starting fresh I figured it wouldn’t hurt to update the bios to the latest version. Obviously this can fail and the whole thing could be bricked, but I was feeling lucky enough. (this step could be skipped)
To start with go to the intel download center. Change the operating system to OS Independent and look for the bios for your model of NUC. In this case mine was BIOS Update [FNCML357].
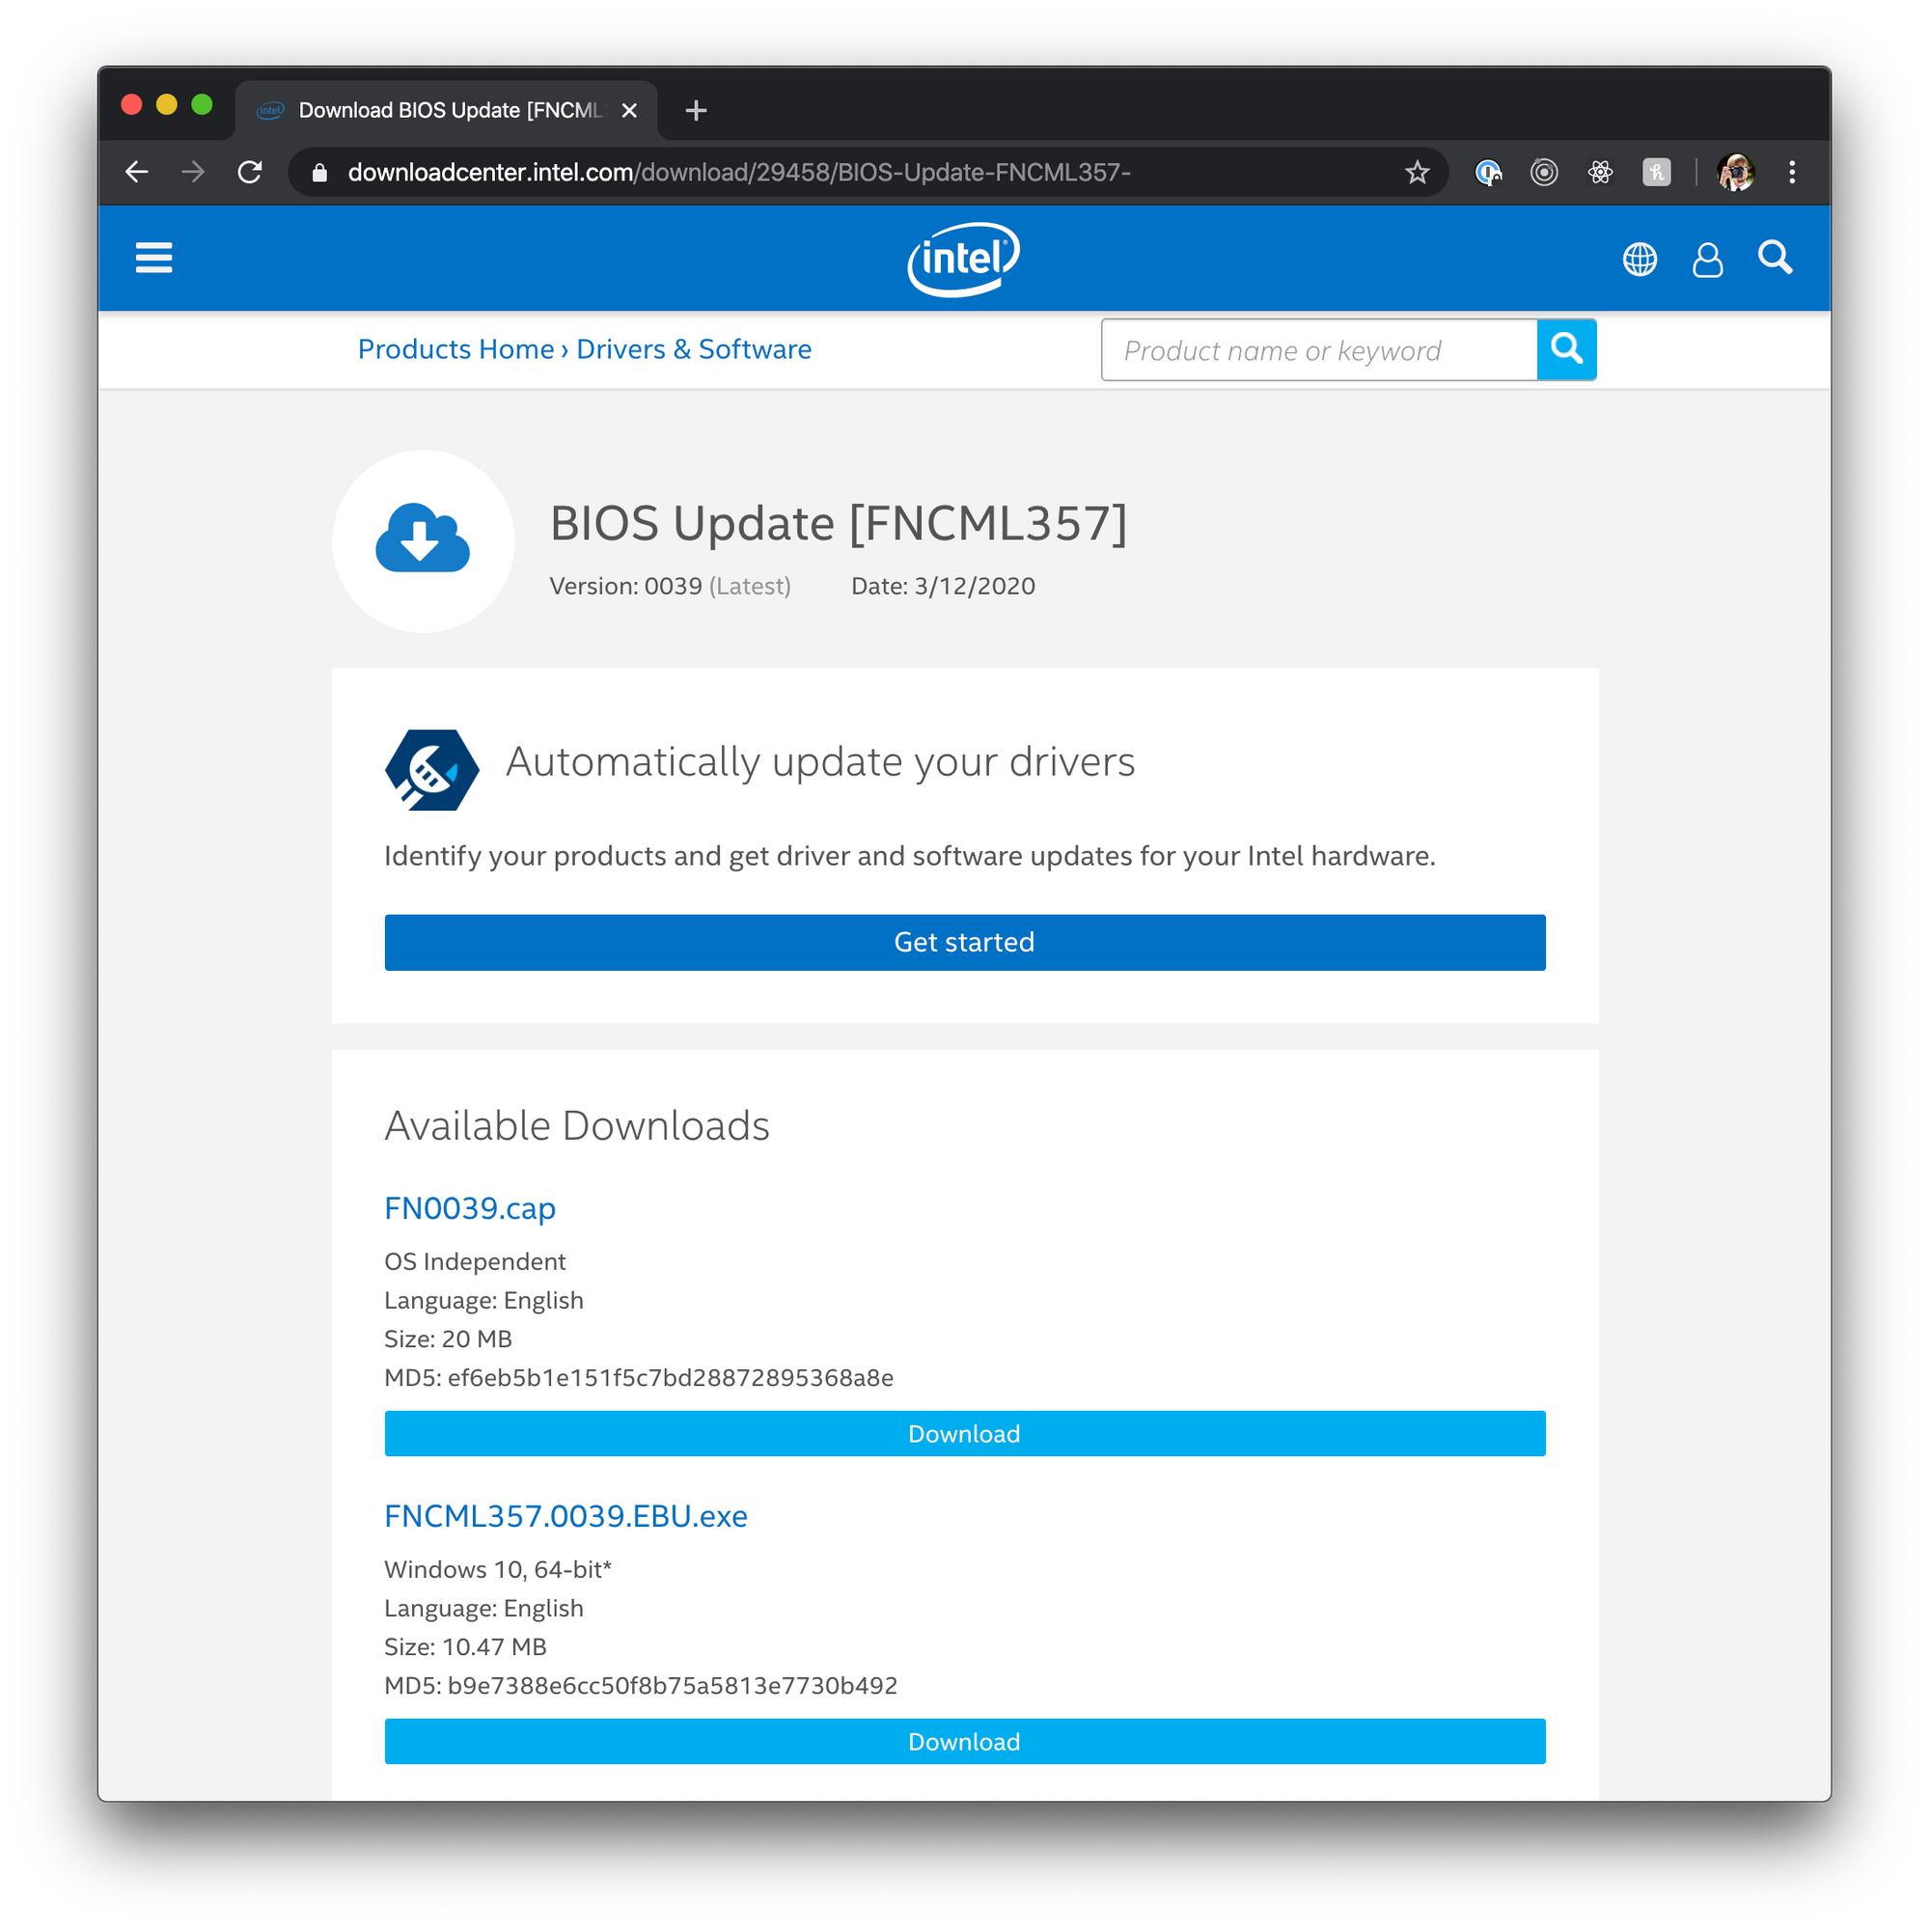
You’ll want to download the FN0039.cap file. The method we’ll be using to do the update is the power button method. The instructions can be found here, but it’s a pretty straight forward procedure.
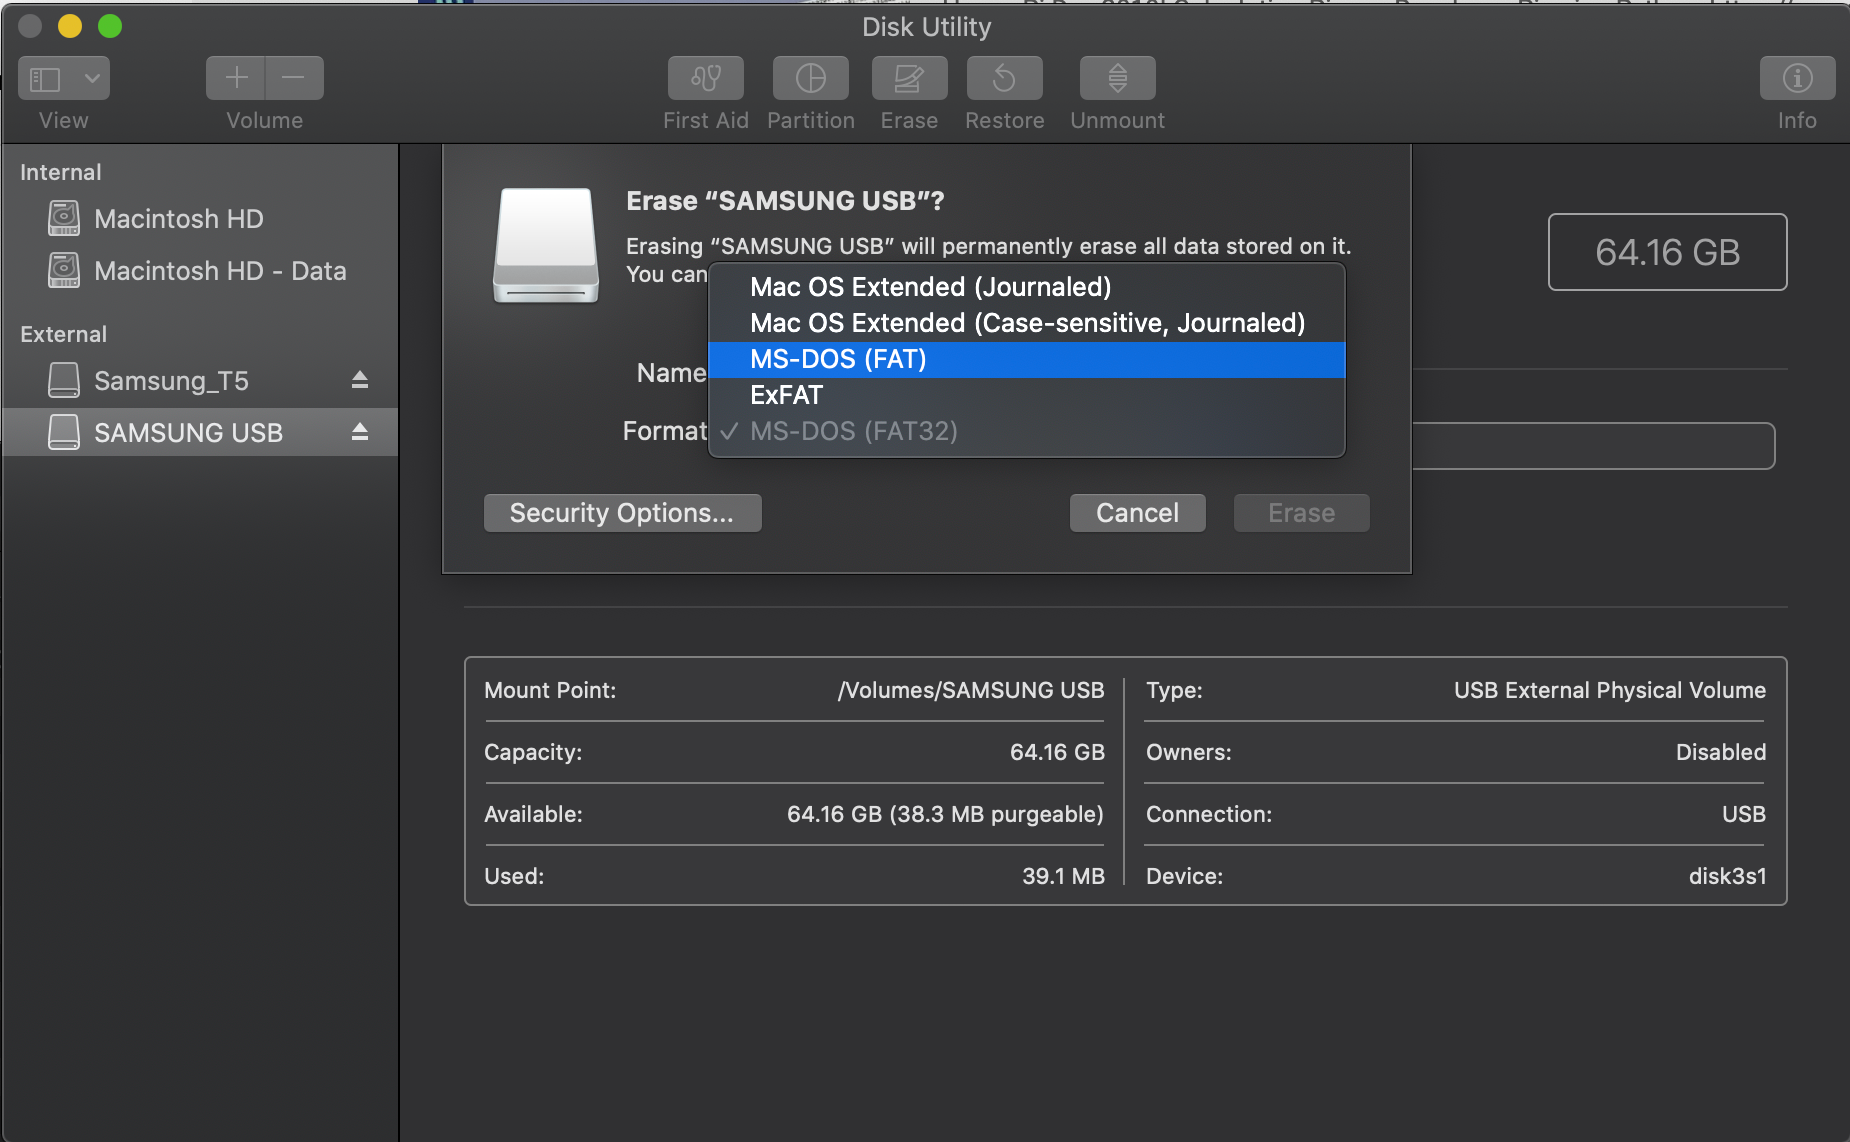
Start off by grabbing a USB drive and it’ll need to be formatted. I used Disk Utility on MacOS and formatted it to MS-DOS (FAT). Once thats done put the .cap file you downloaded on the USB drive.
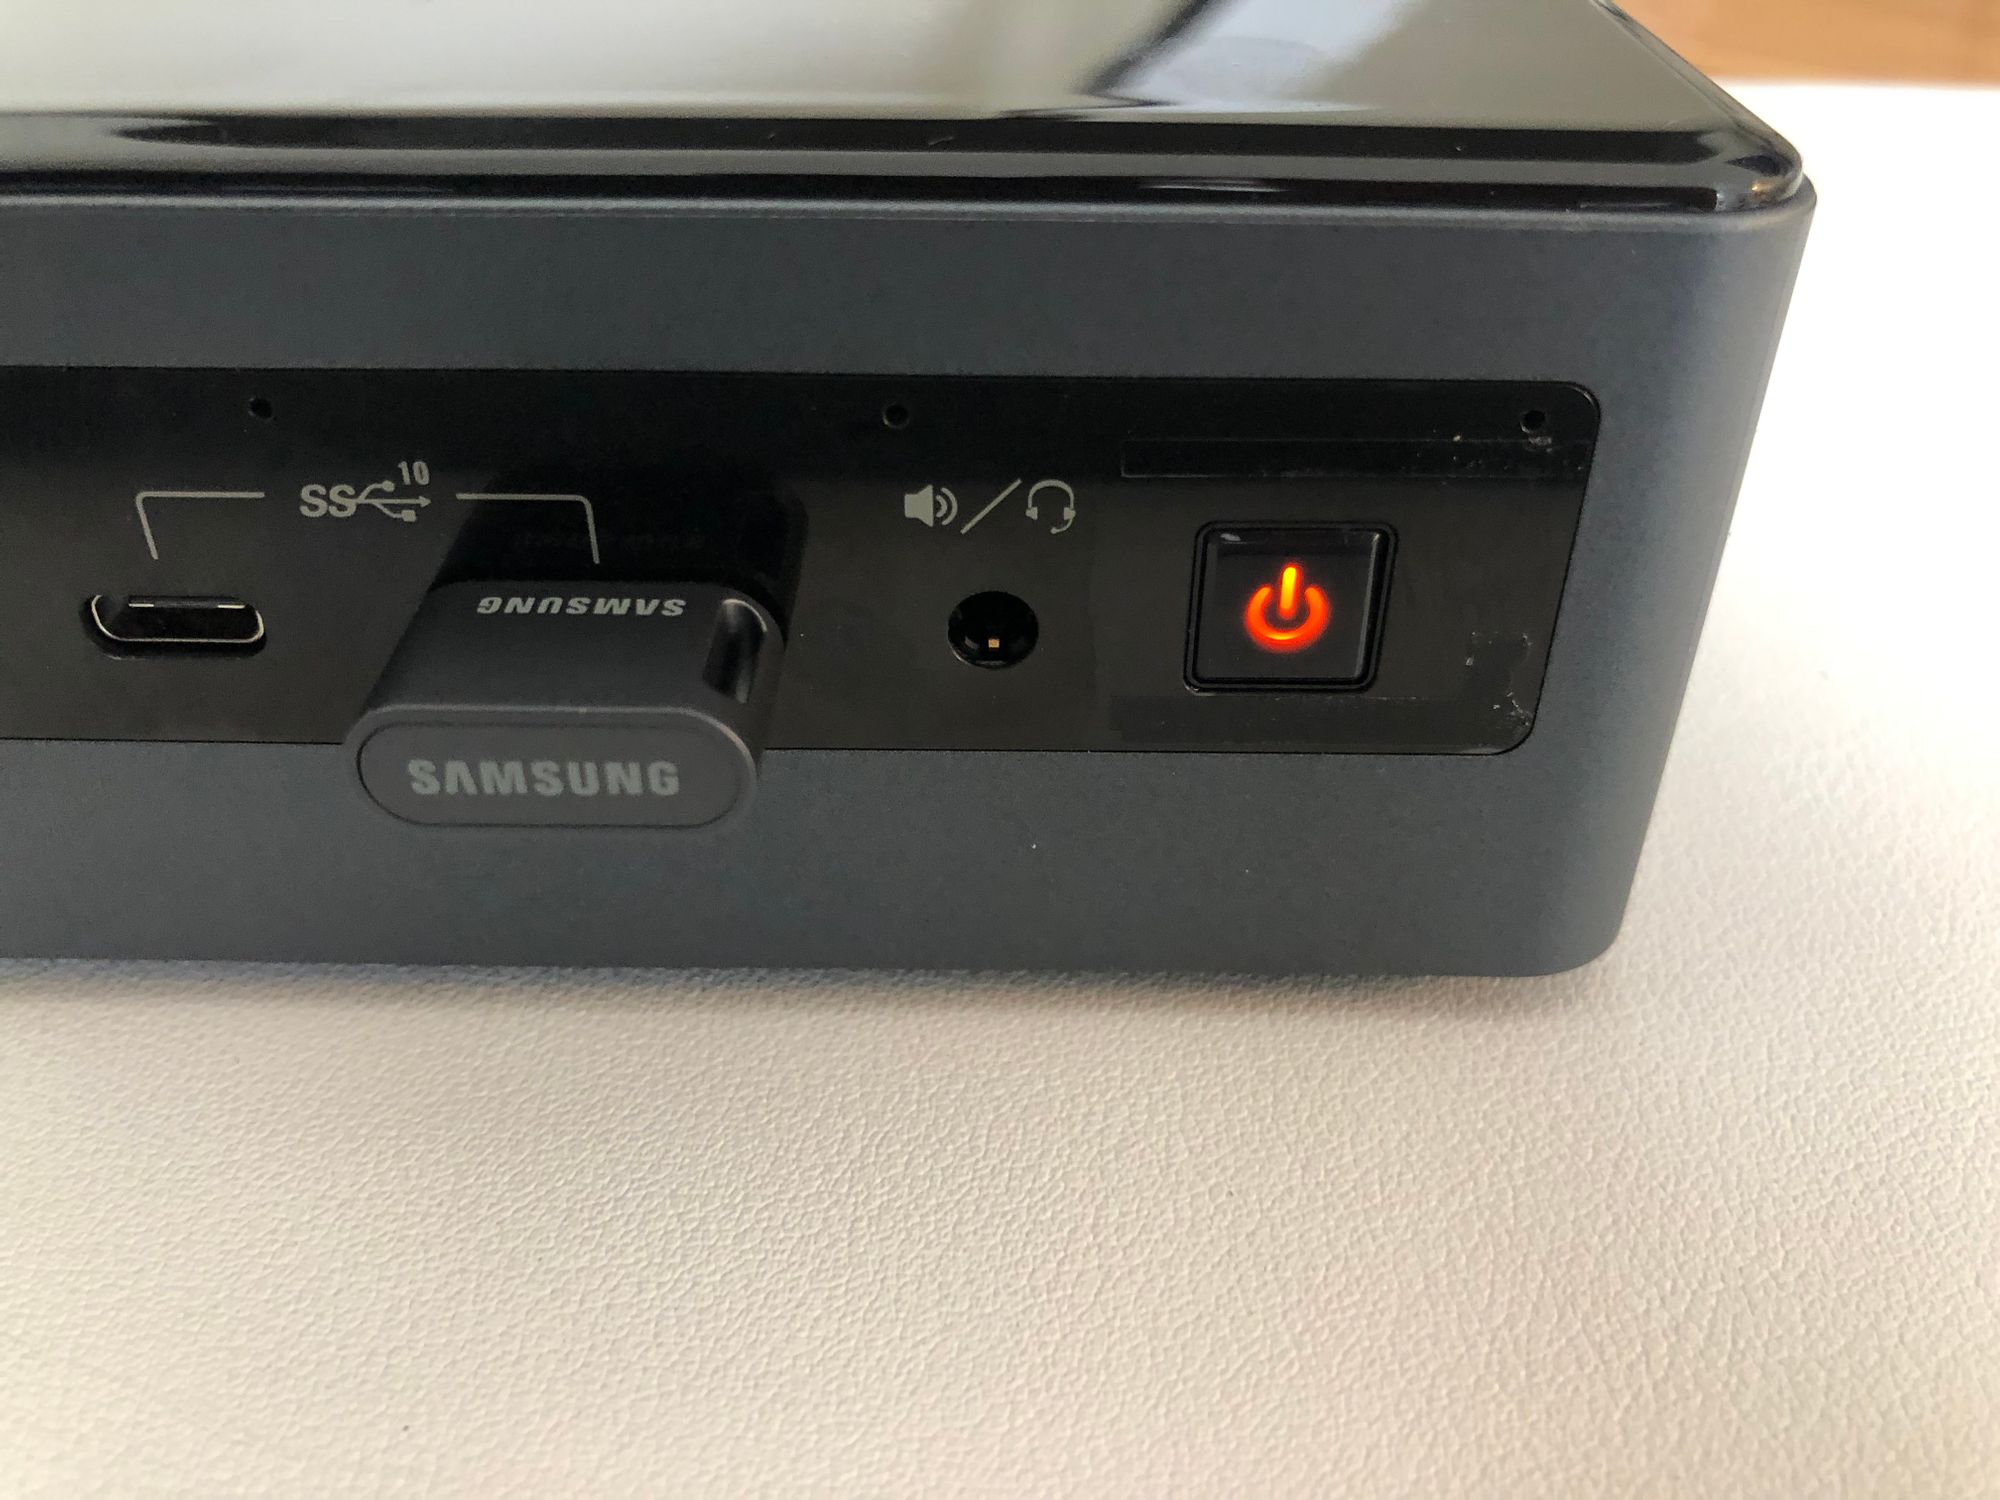
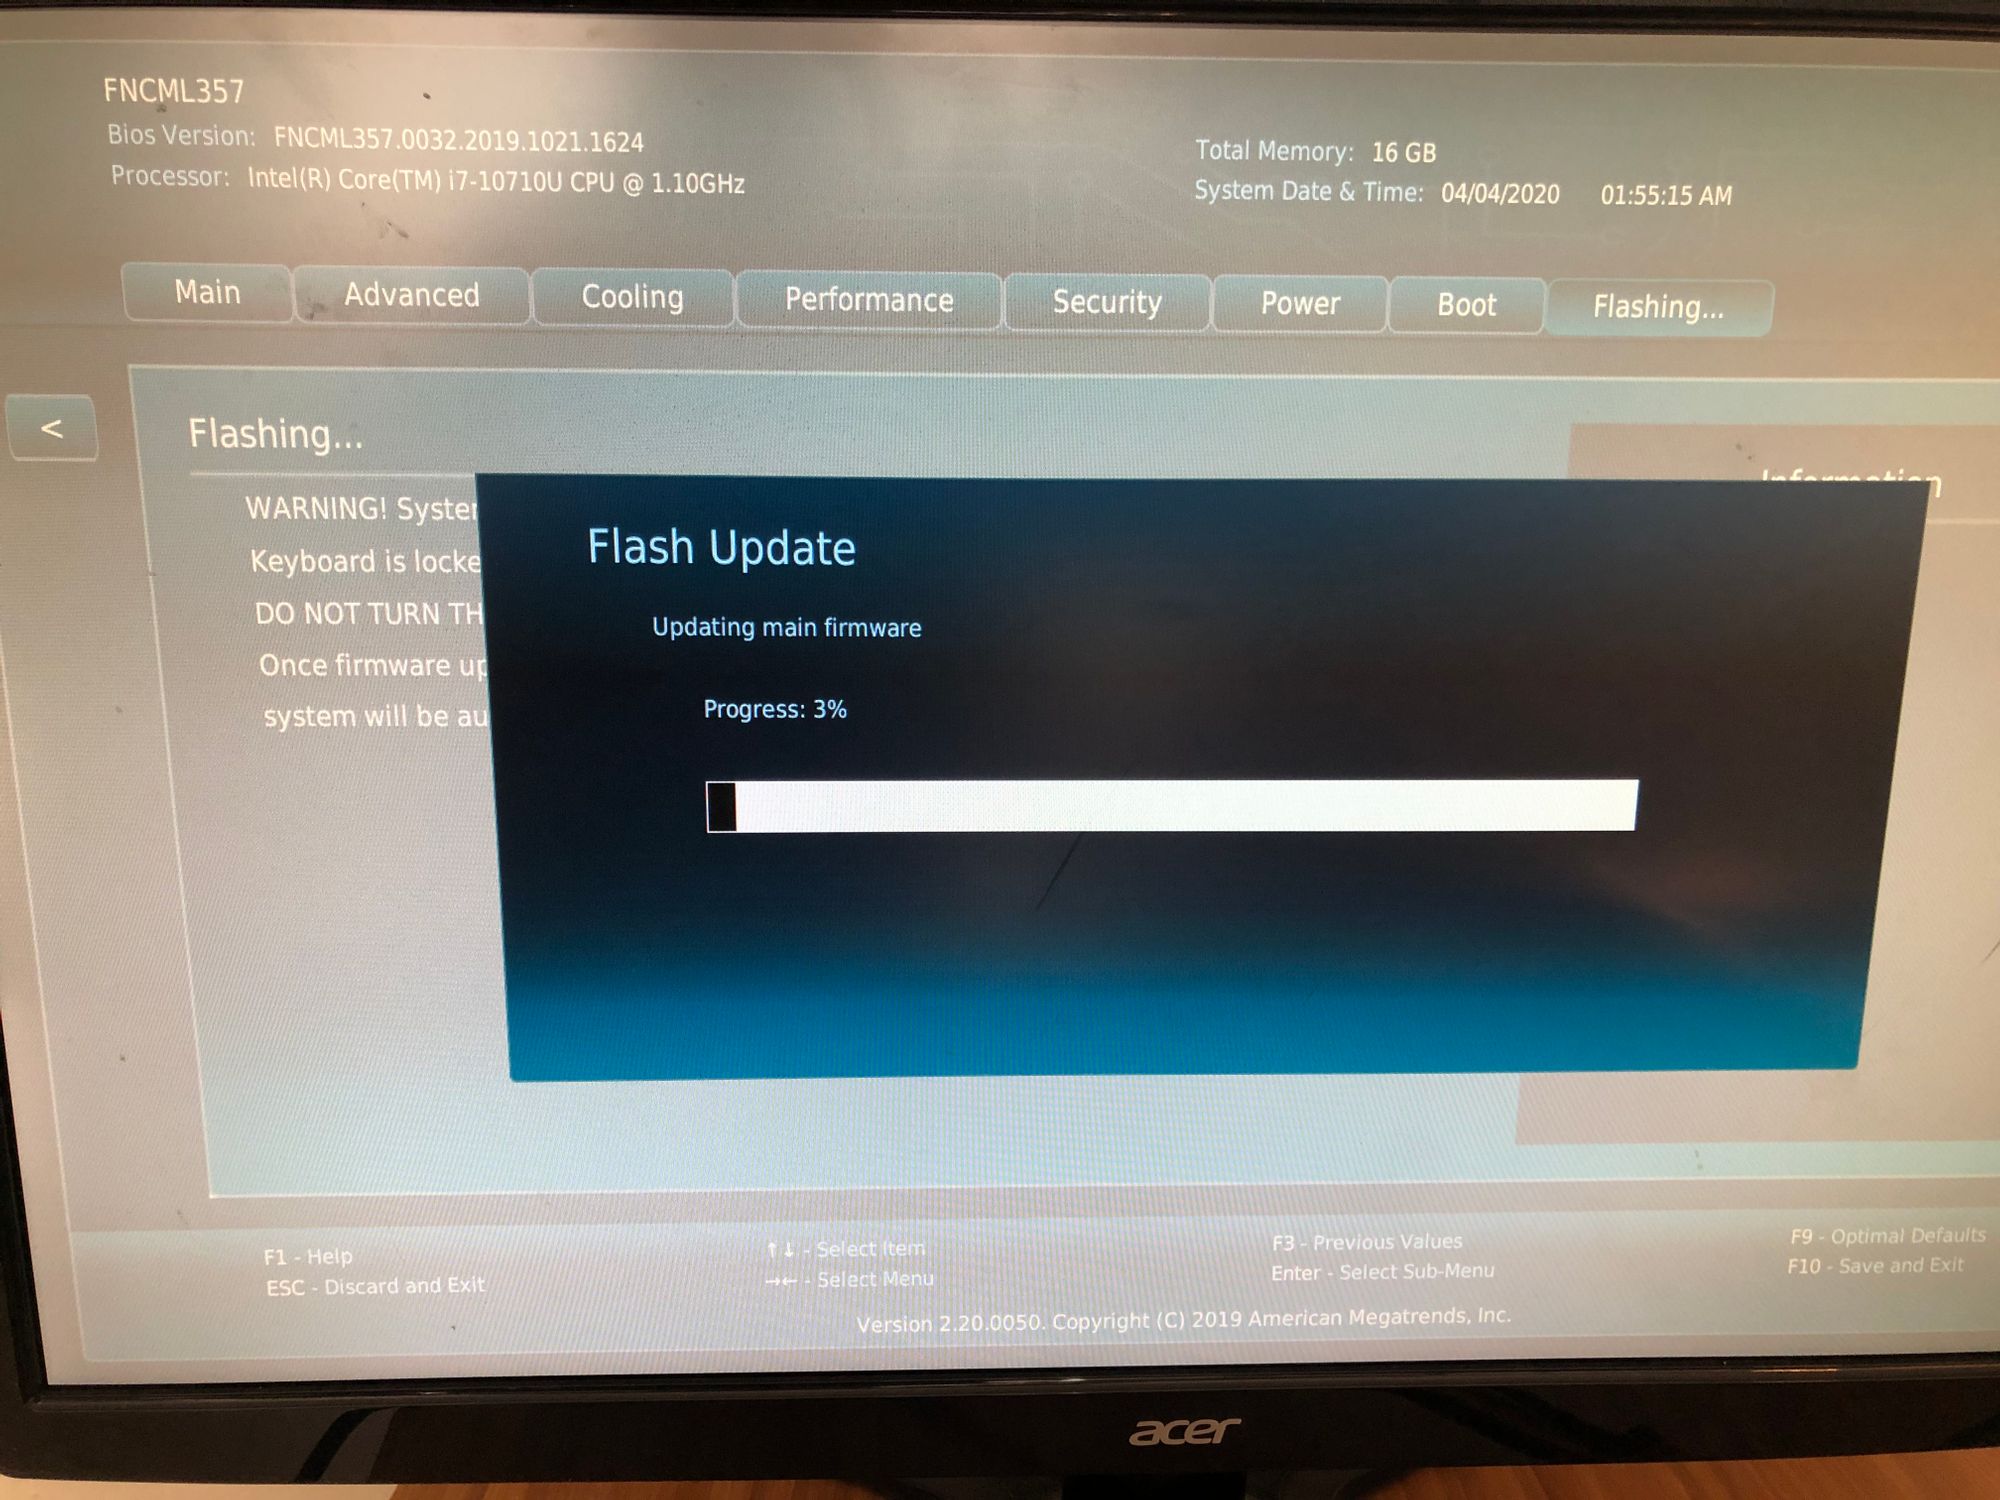
With the NUC powered off completely insert the USB Drive. Next, you will hold down the power button for 3 seconds after which it will turn red and you can release it.
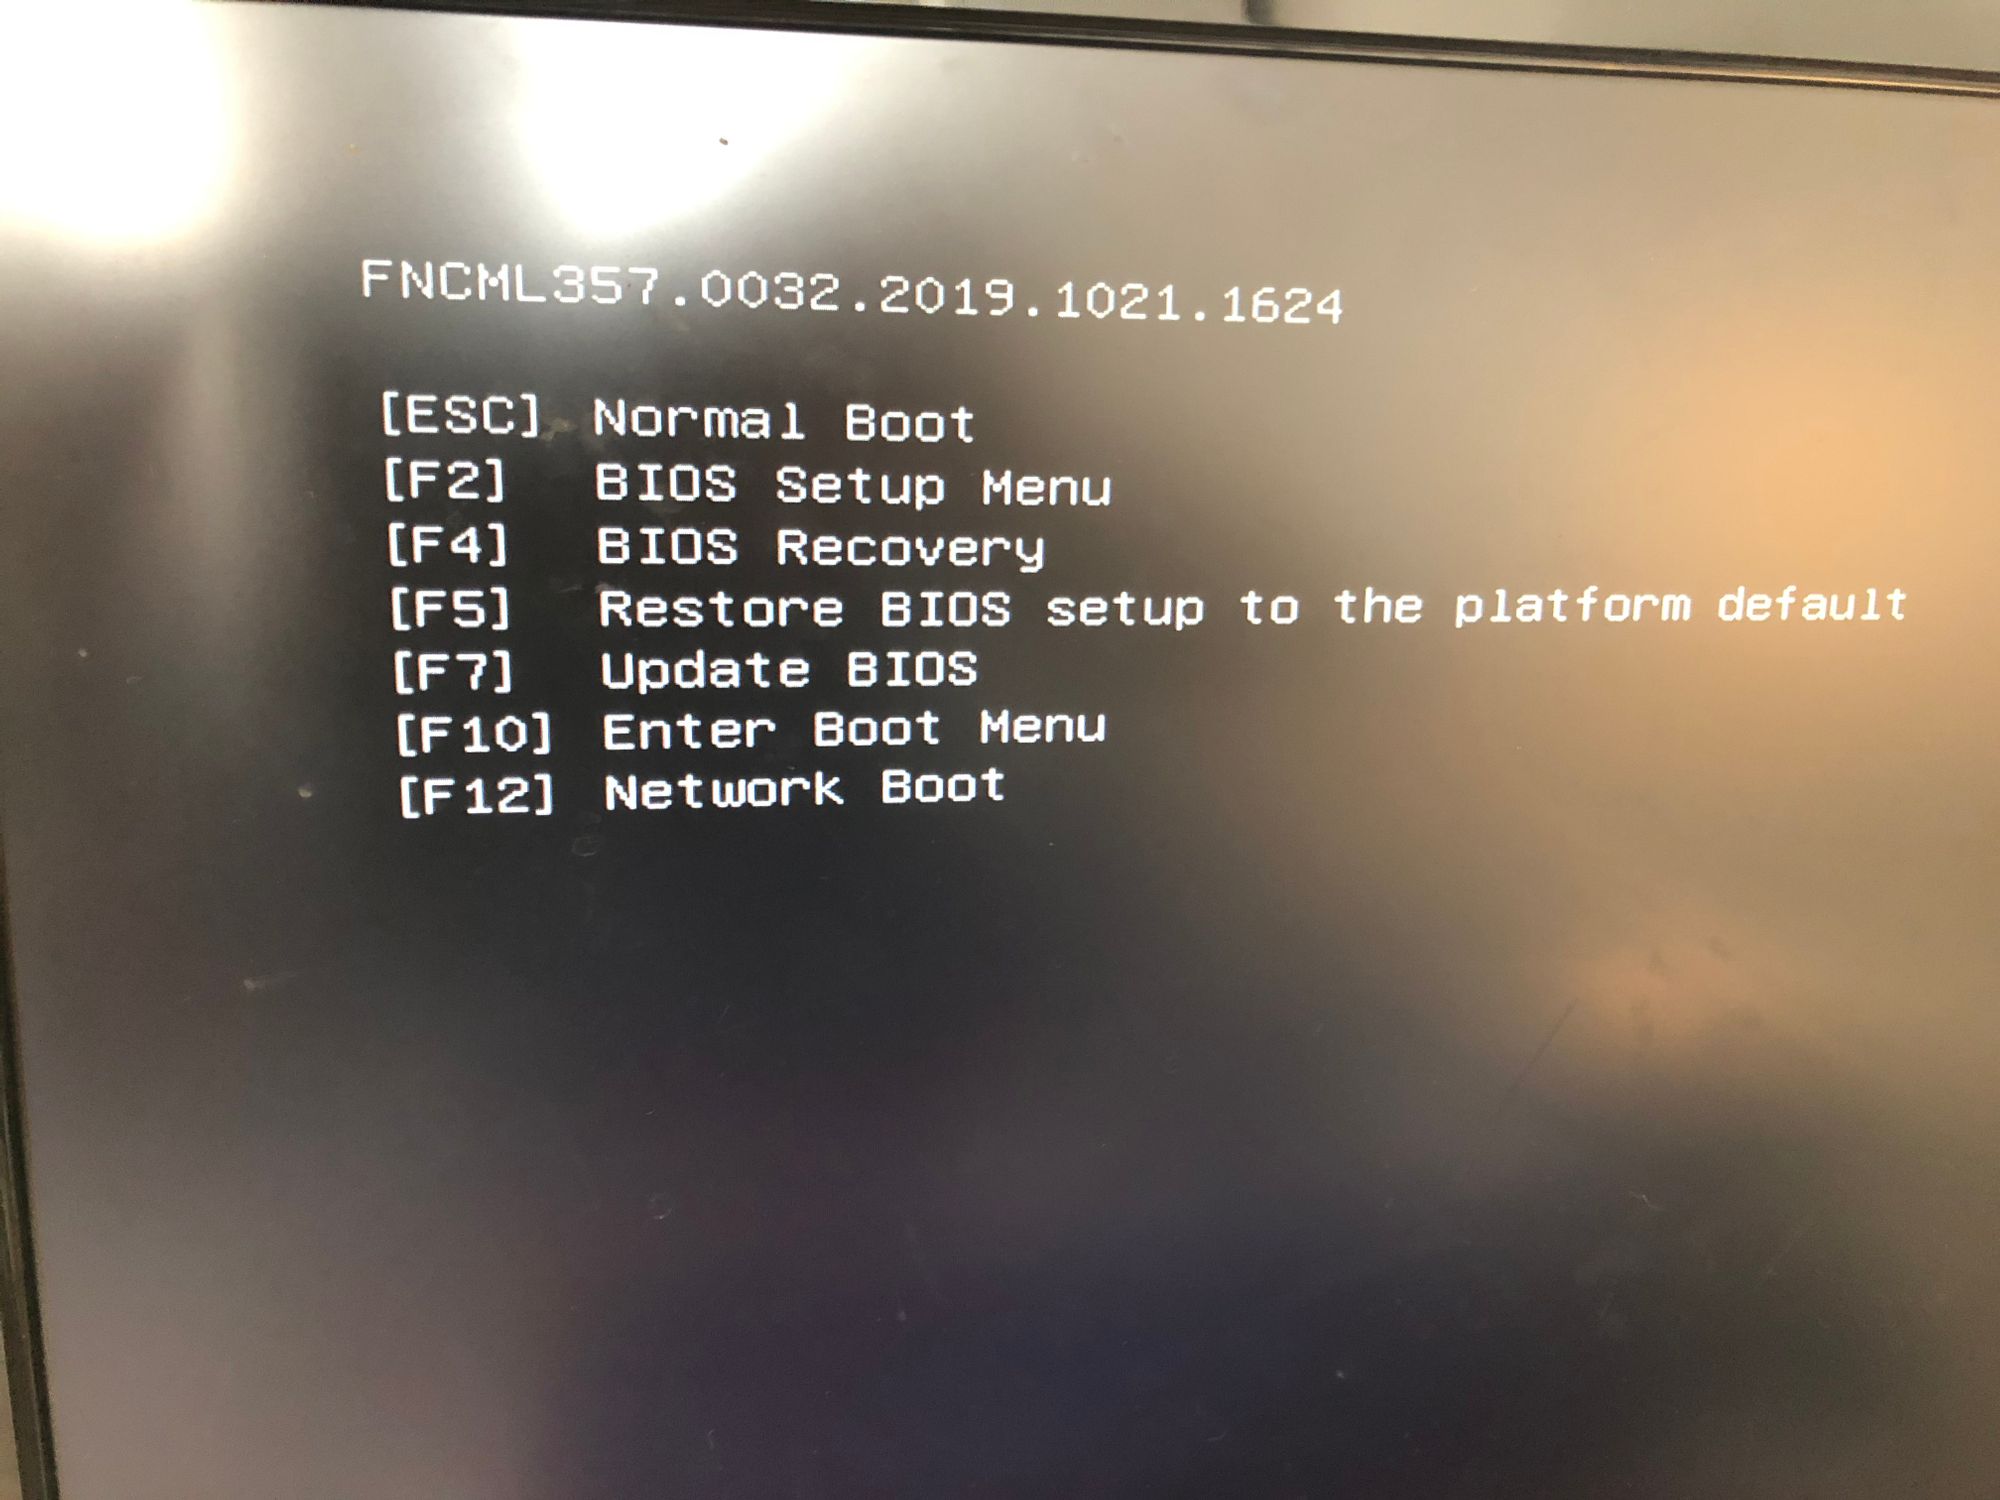
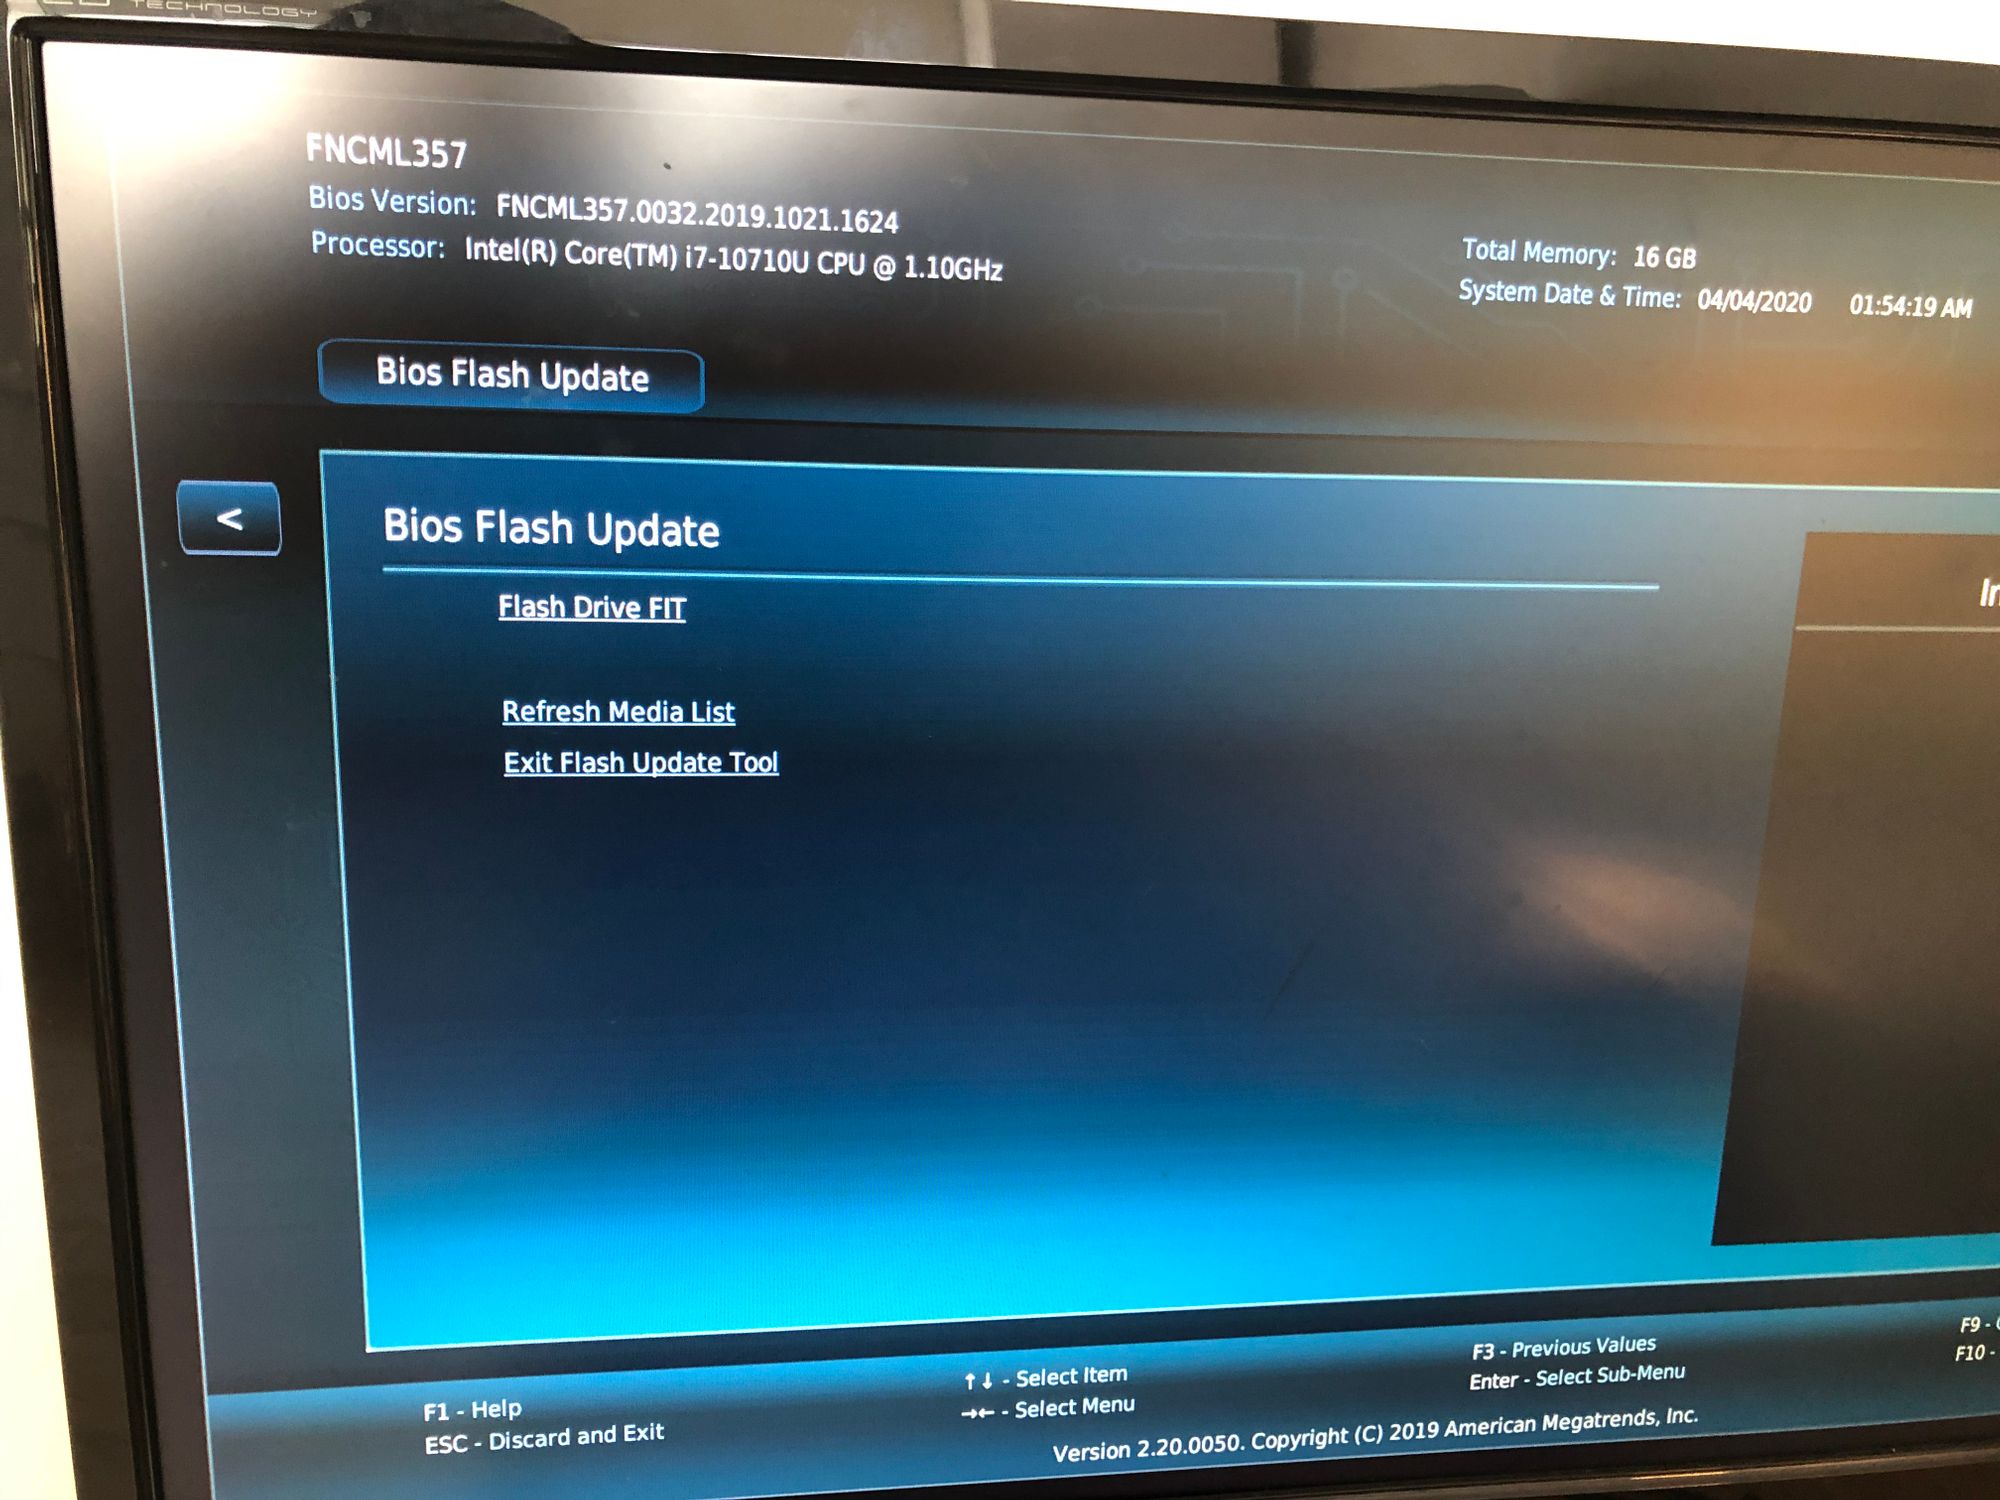
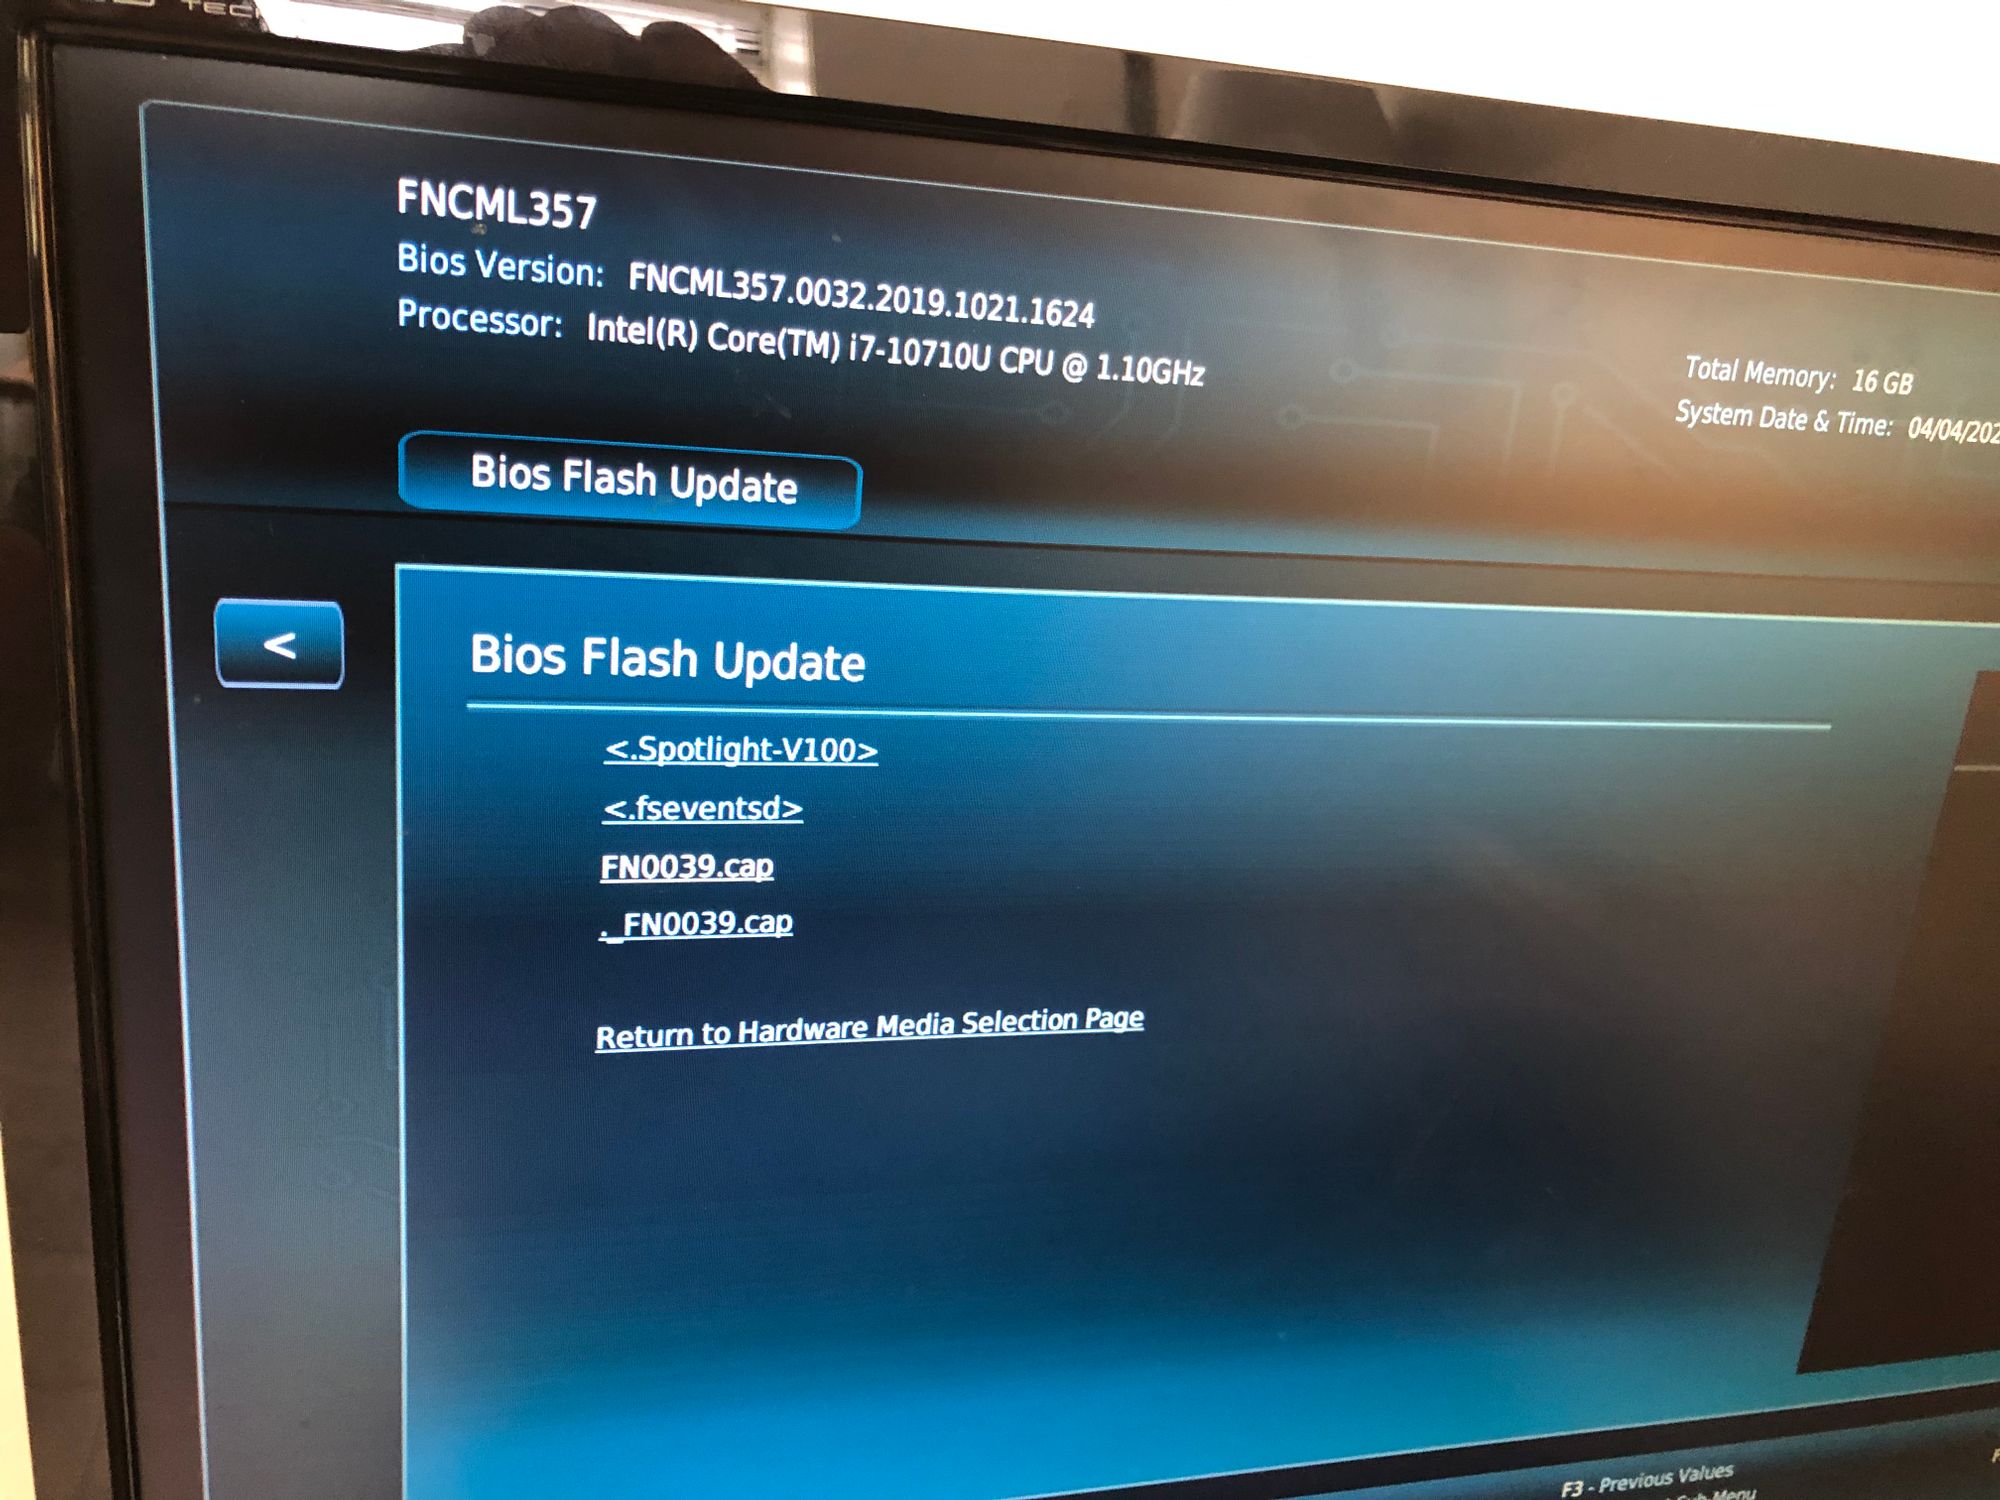
The NUC will then boot and you’ll be presented with a screen of different options. You’ll want to pick “Update Bios” and therefore can press F7 on the keyboard. Next you’ll be presented with a screen to choose the flash drive, then the .cap file. You’ll see instructions for navigating the screens at the bottom.
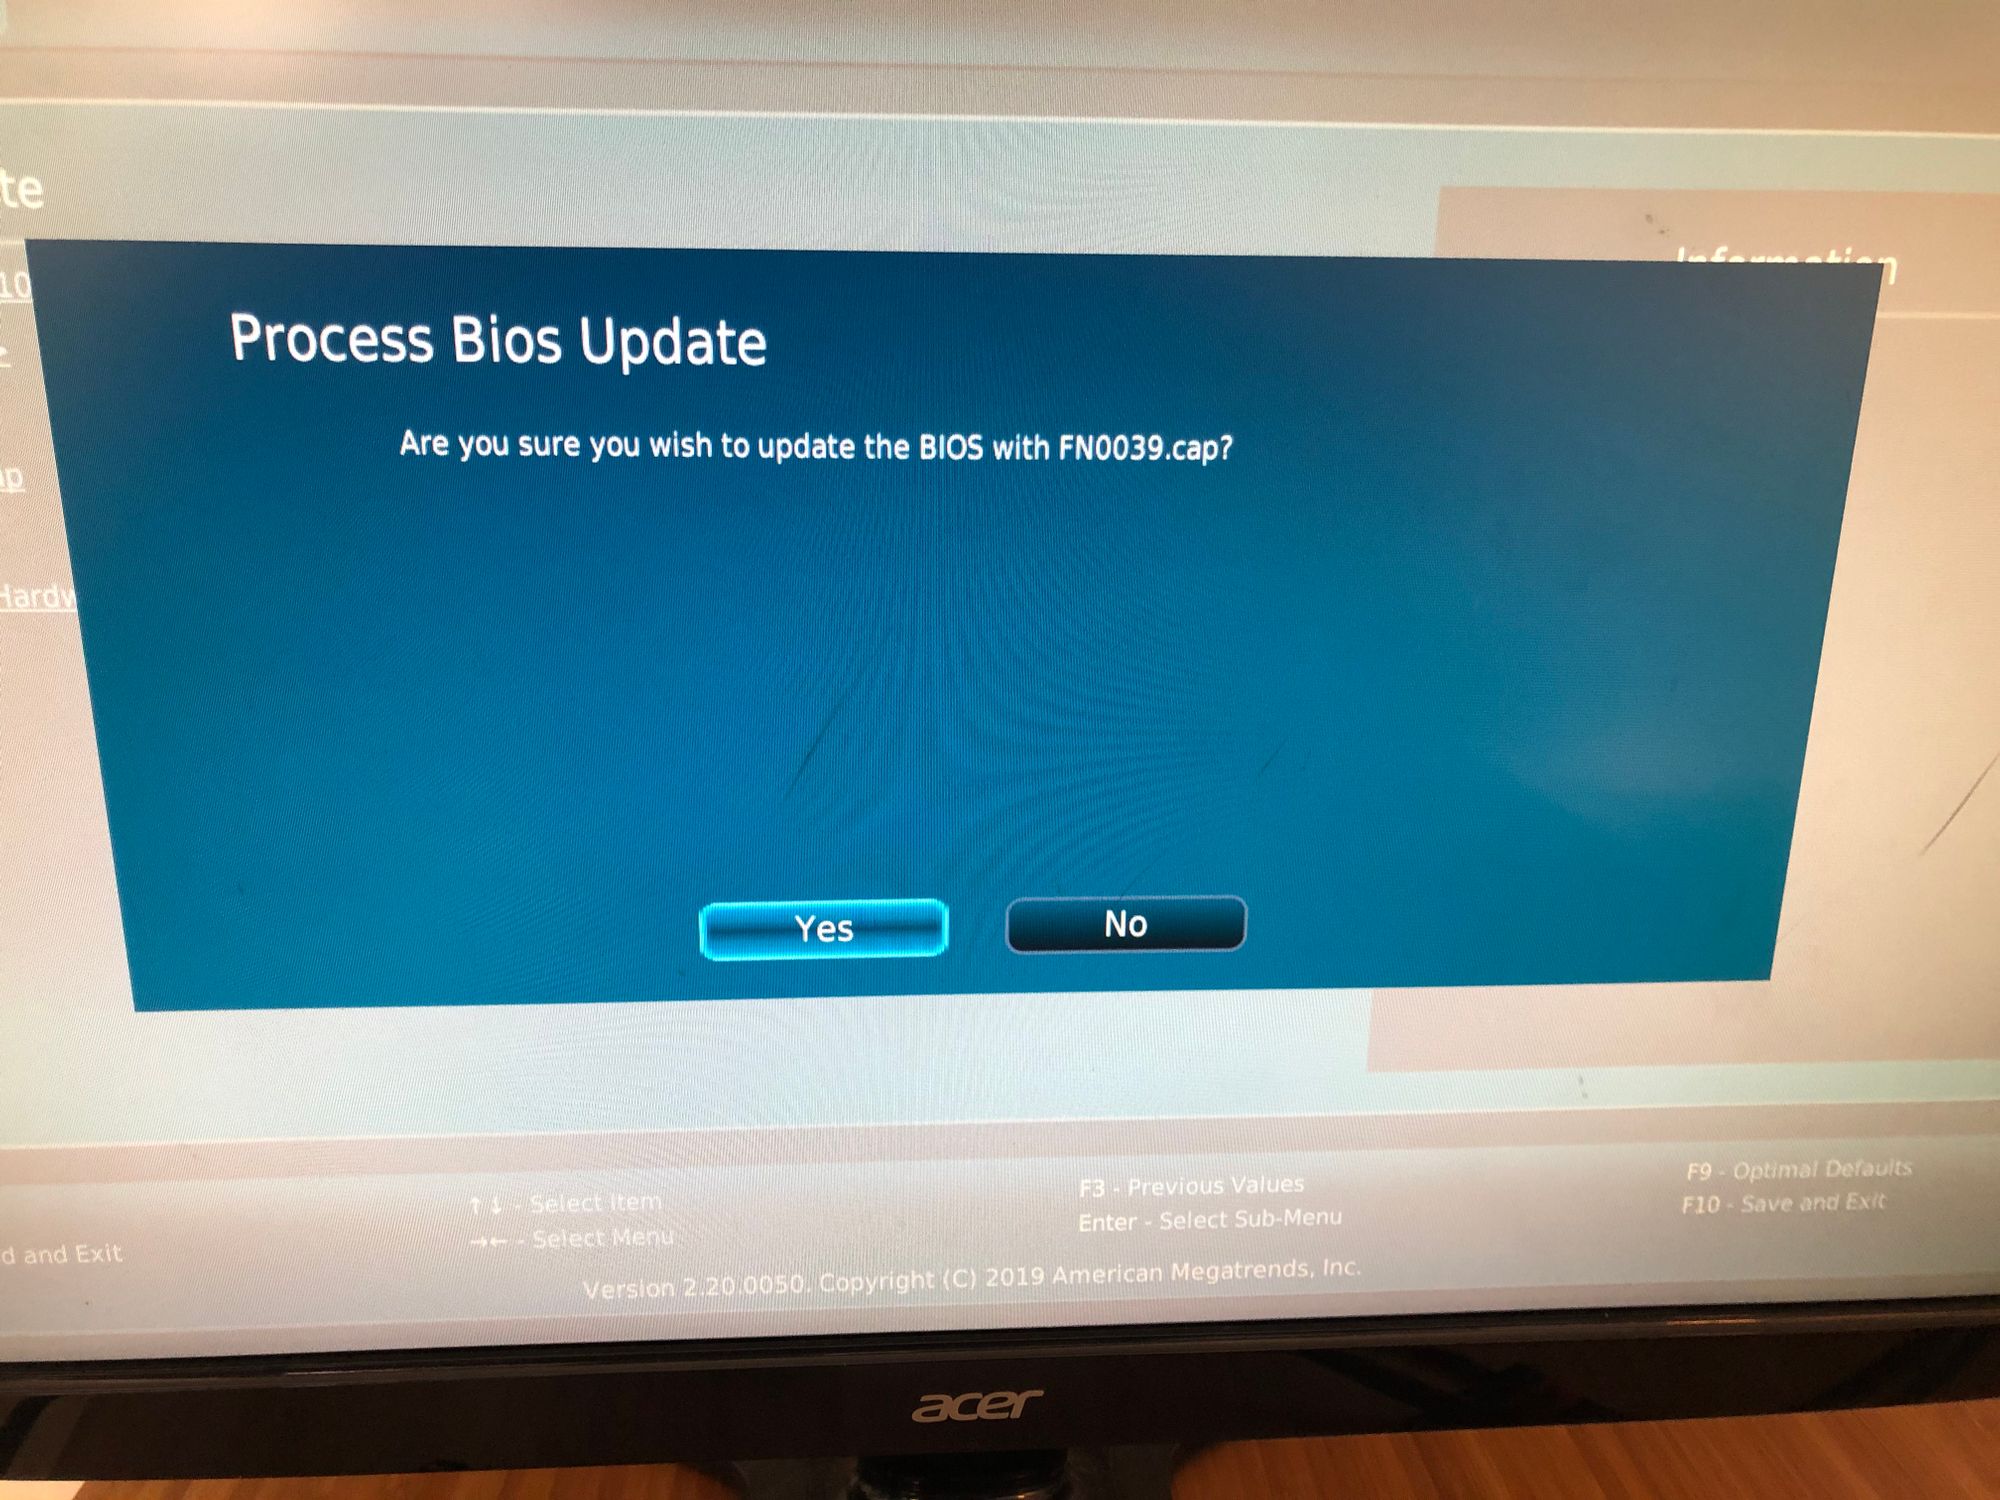
Eventually you’ll make it through the screens where it’ll ask you to confirm the BIOS update, the NUC will reboot, and you will then see the Flash Update screen showing you the progress of the update.

Installing Ubuntu 18.04.4
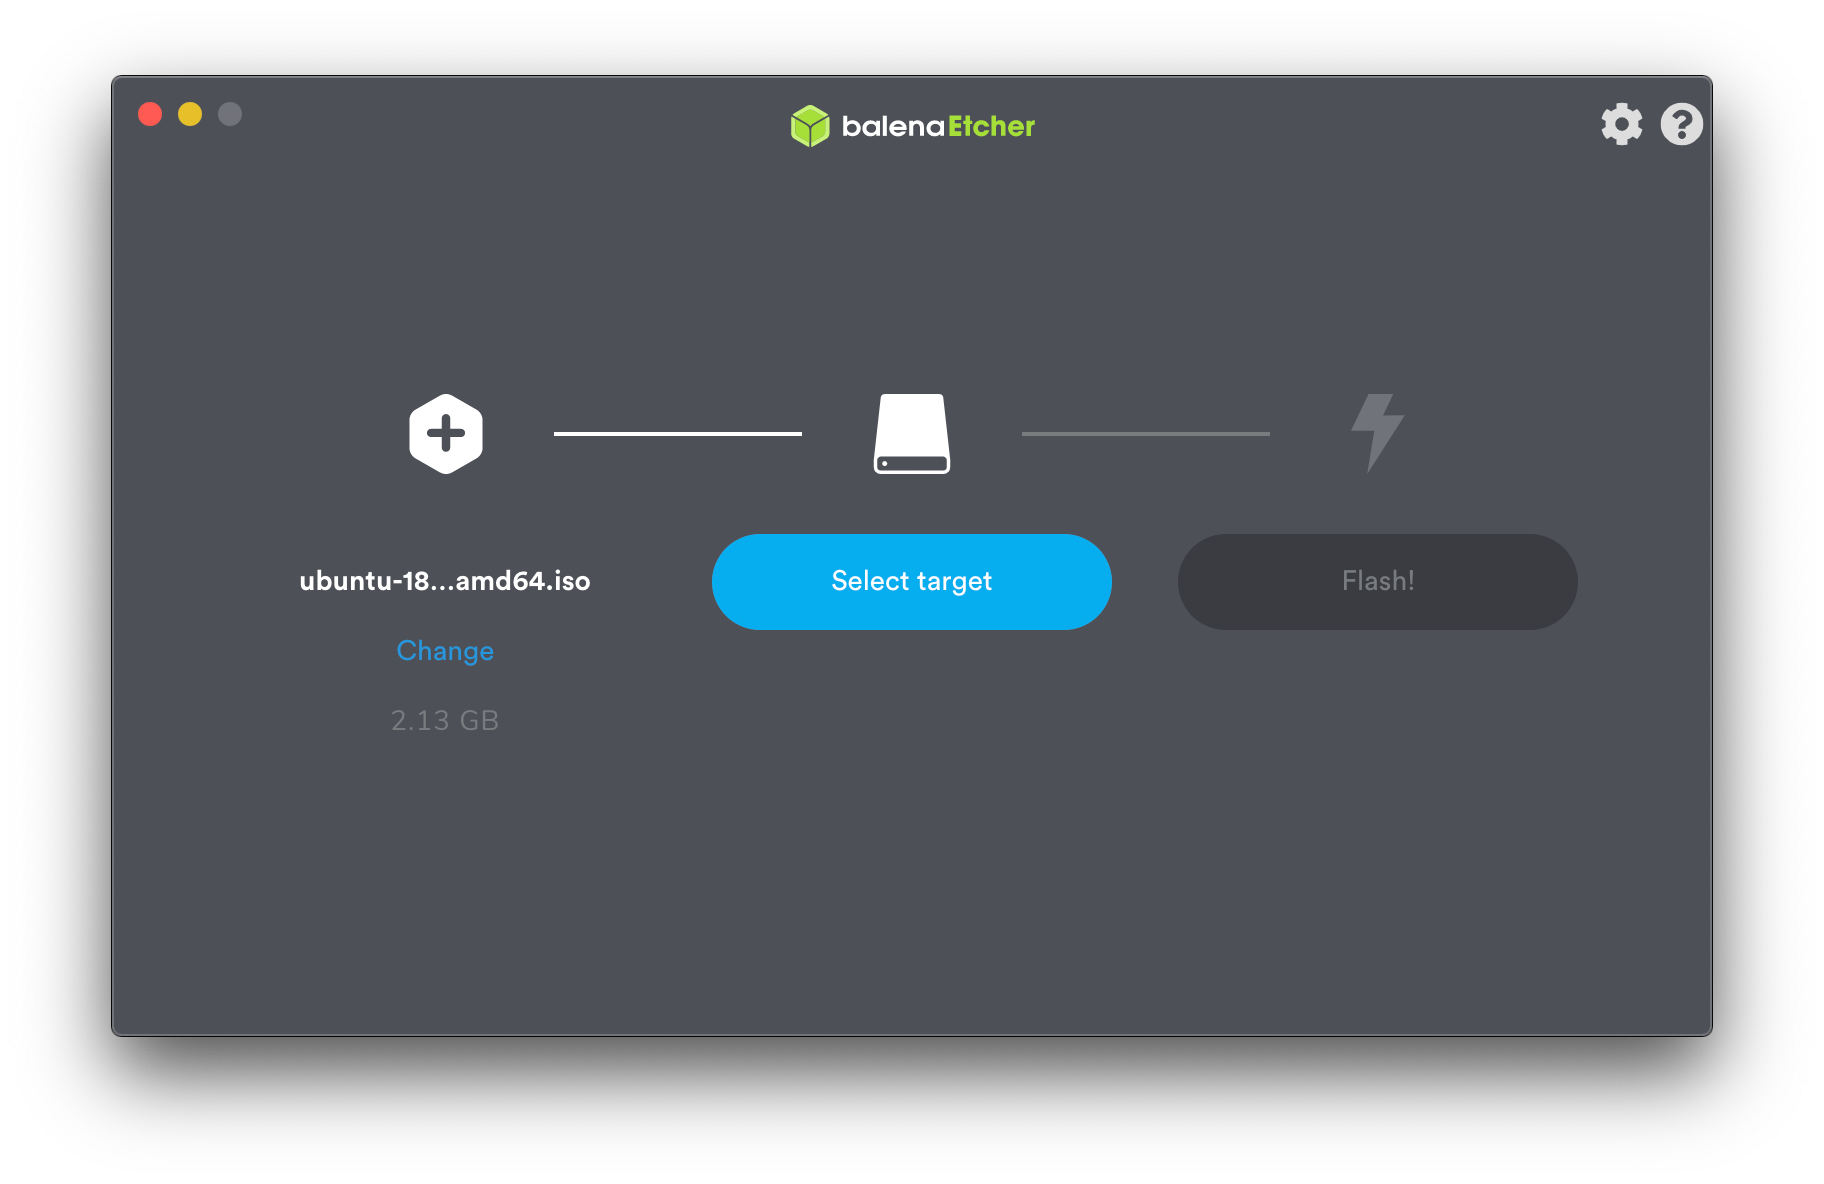
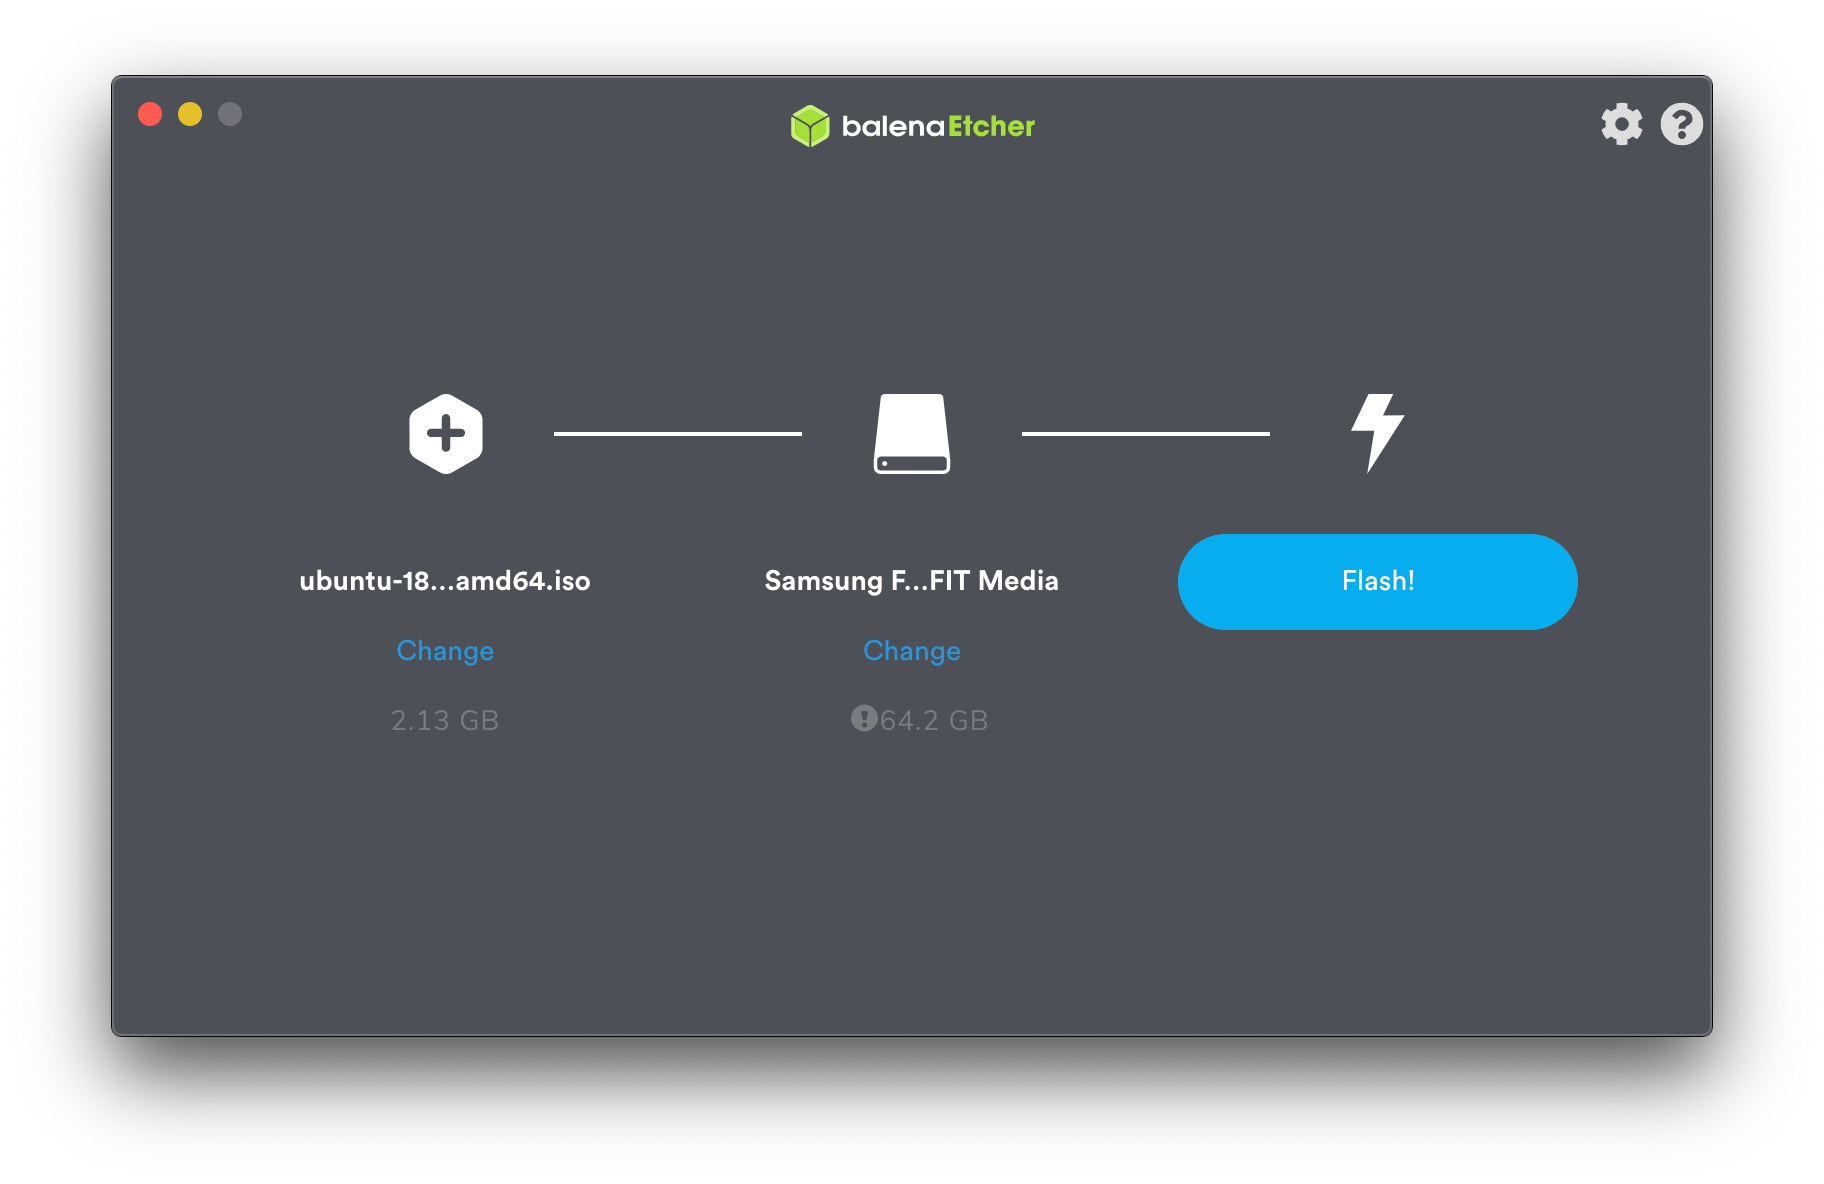
Next we will be downloading ubuntu, imaging a usb drive, and installing the operating system. I opted for the desktop minimal version just to give myself something to mess around with. We will be downloading two things: Ubuntu and Balena Etcher. Once they are both downloaded get Etcher installed and opened up. First you’ll select the image for Ubuntu, next you’ll select the USB drive, and then click flash.

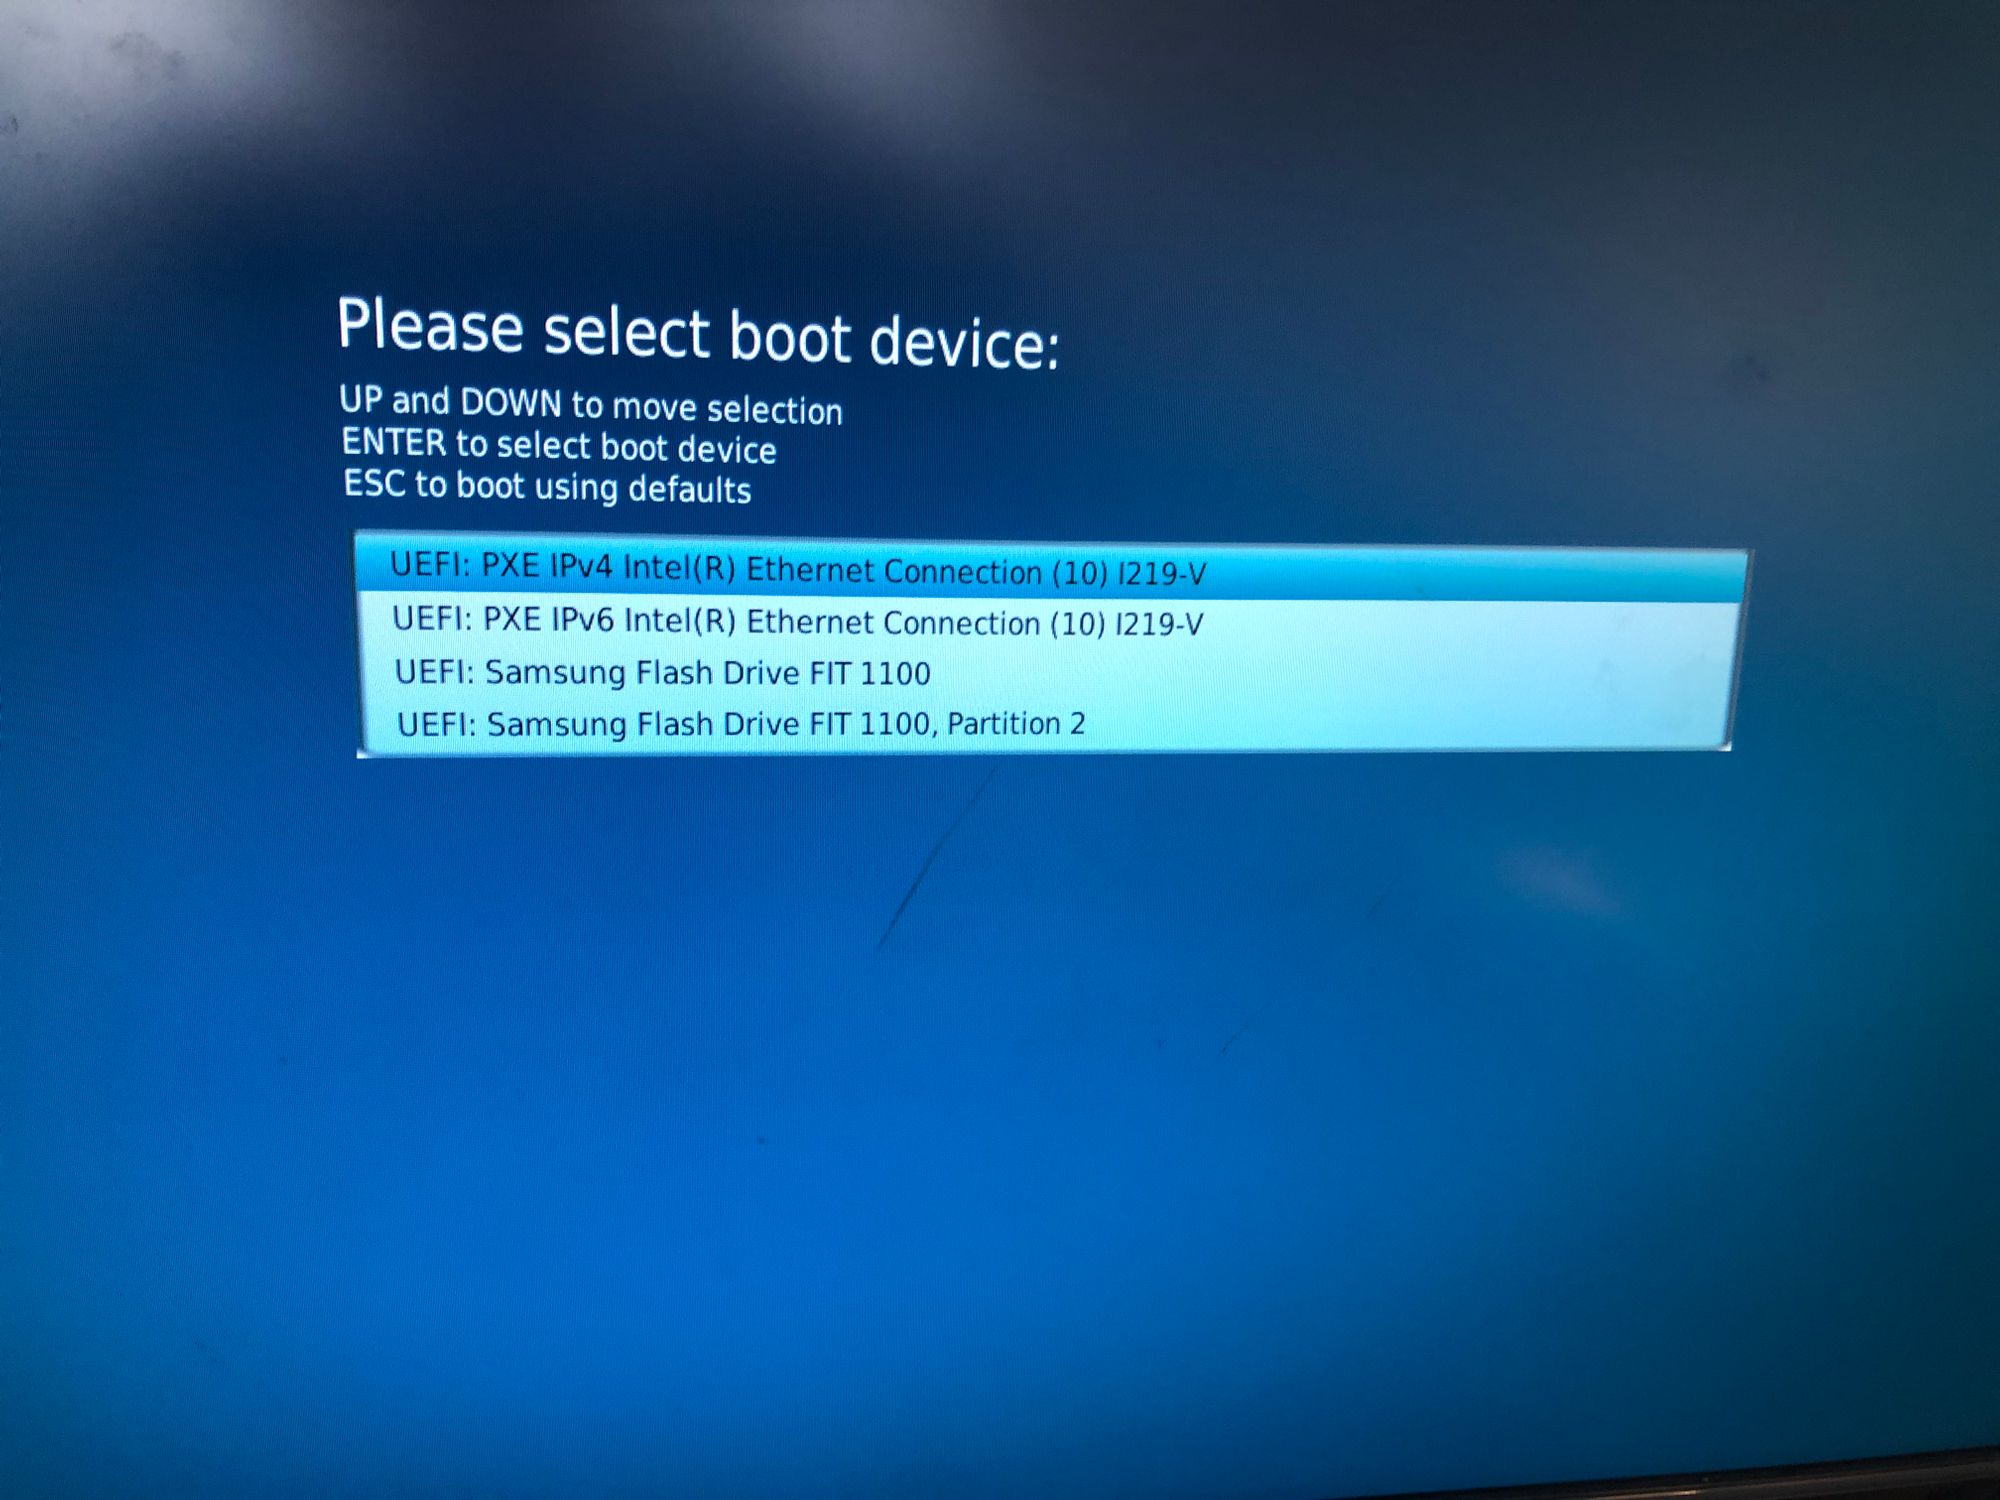
After Ether is finished you can remove the USB drive from the computer and insert it into the NUC with the power off. Now we will do the same thing we did when updating the BIOS and hold down the power button for 3 seconds and then release it. Next you’ll see the same screen from updating the BIOS but this time you will be pressing F10 which will take you to the boot menu. Choose your USB drive, then at the next screen select “Install Ubuntu.”
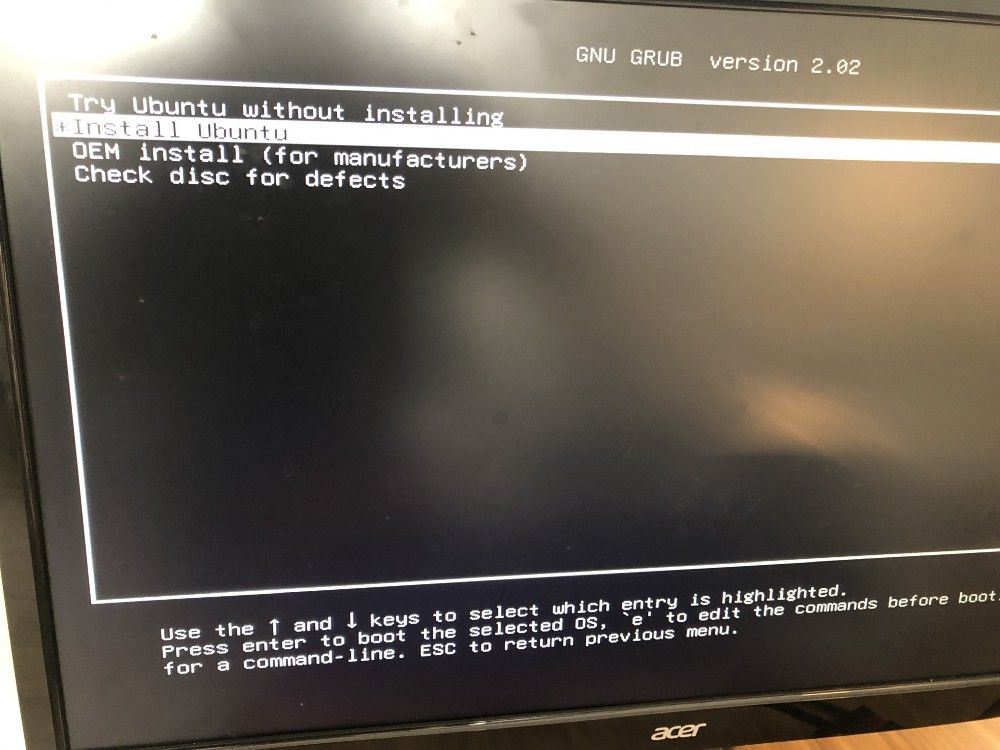
Now all you’ll have to do is walk through Ubuntu’s installer screens and then we are good to go!


Enable SSH
I suppose getting SSH working isn’t completely essential but it sure is handy to be able to sit at a laptop and just ssh into the NUC. Also, it’s also pretty straight forward, so why not?
sudo apt update
sudo apt install openssh-server
(press y)
sudo systemctl enable ssh
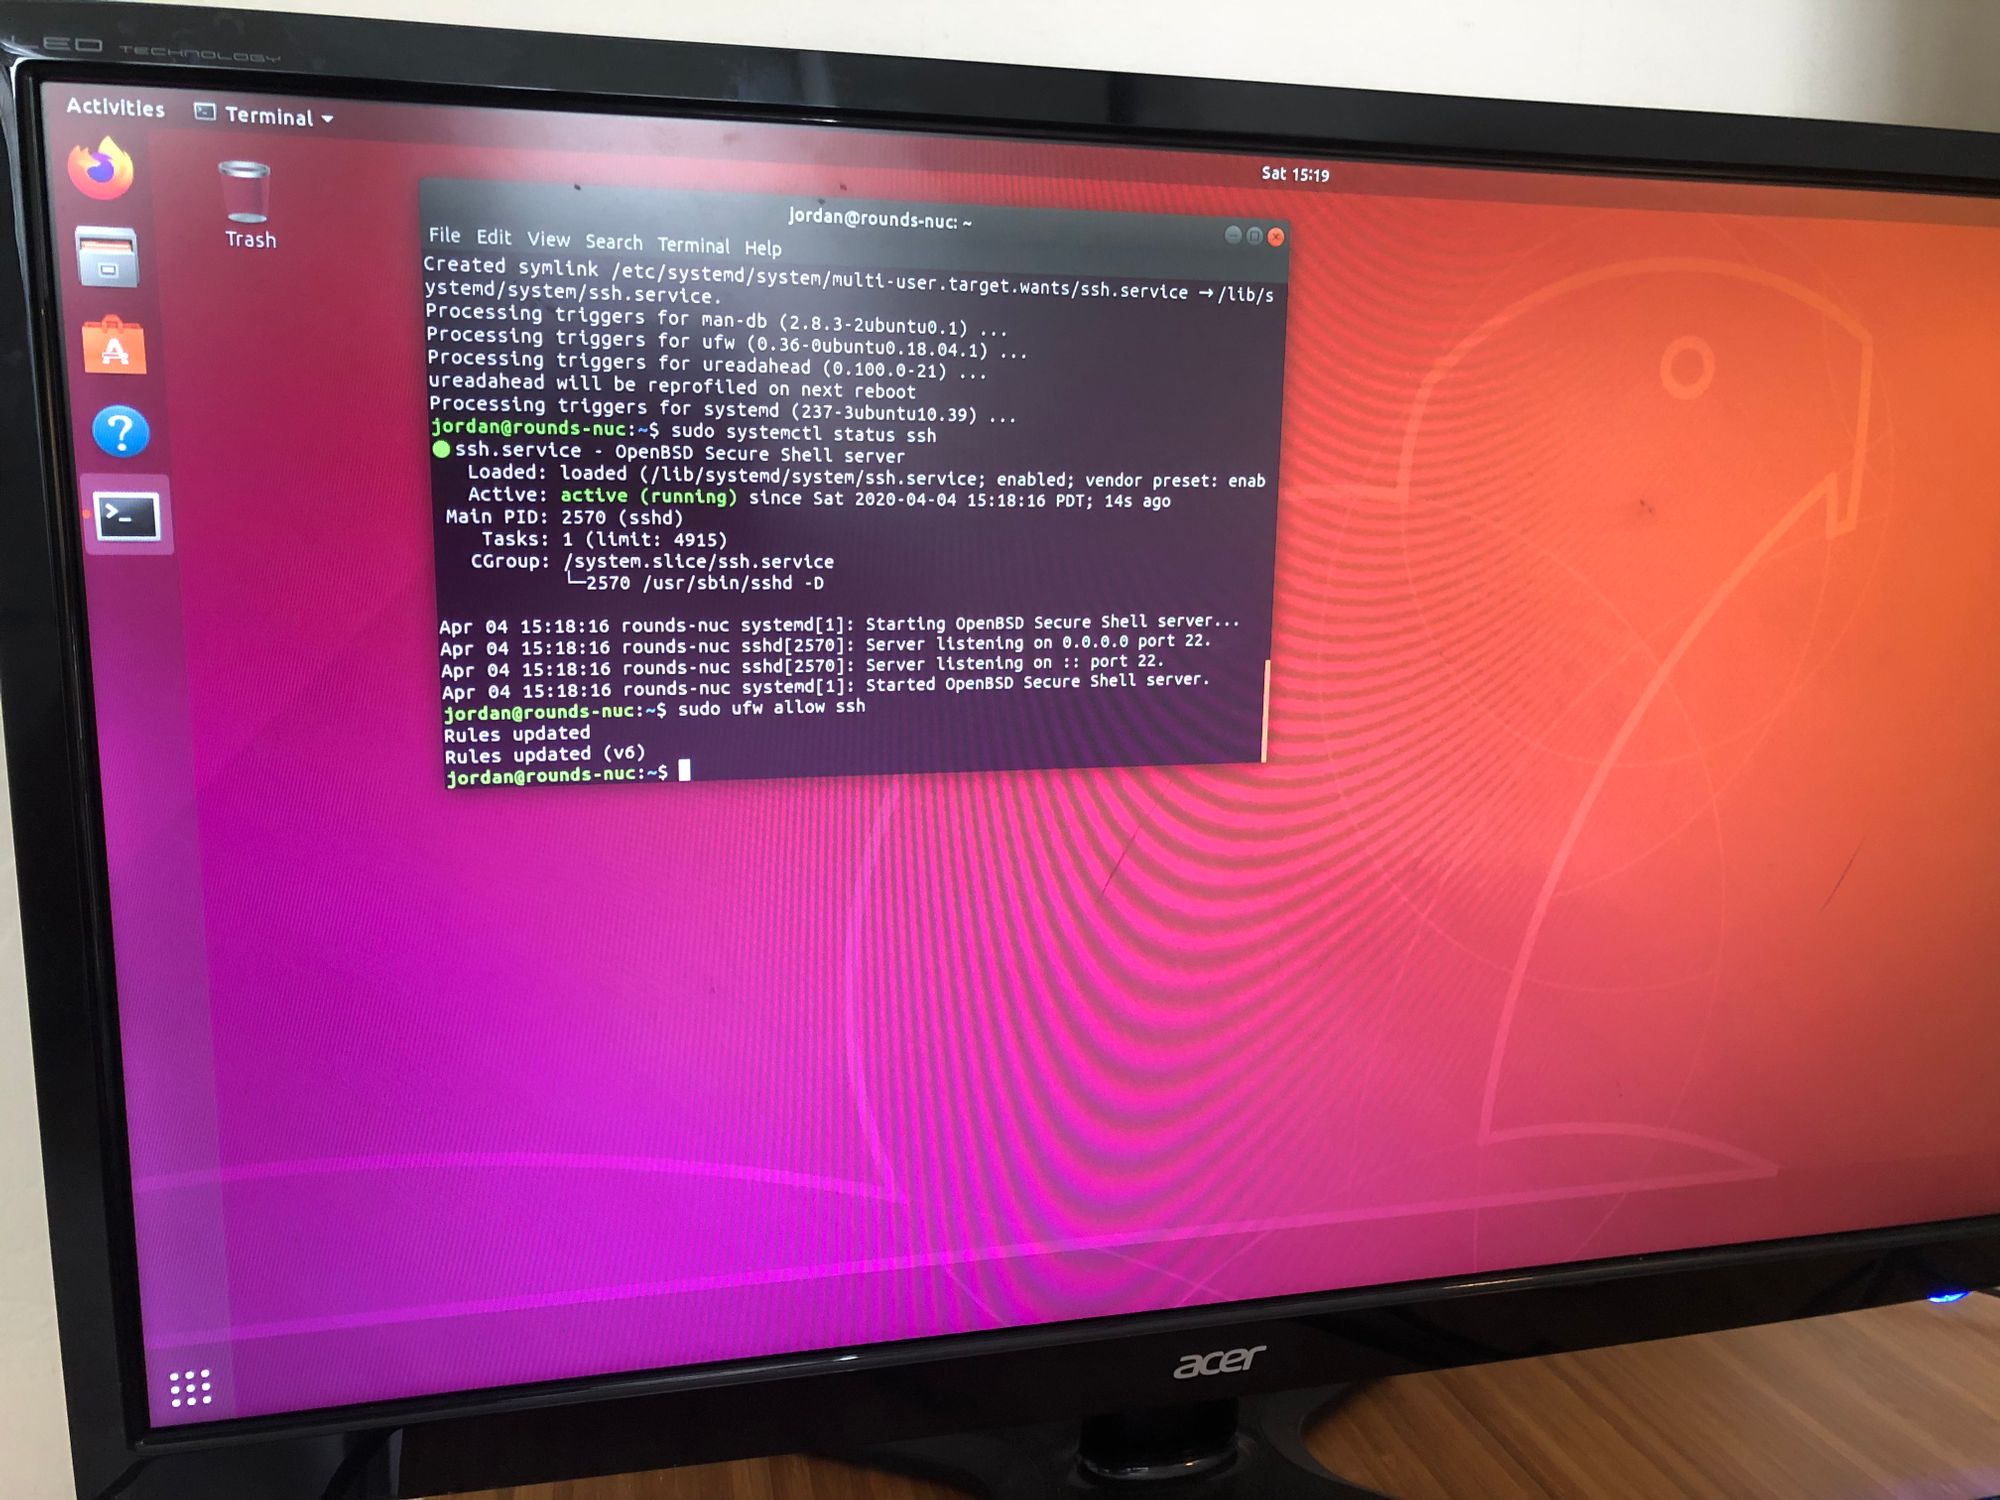
sudo ufw allow ssh
sudo ufw enableThis should have enabled ssh, and allowed traffic over port 22 through the firewall.
Install Docker
I chose to install Docker using the repository as it’s the recommended method.
sudo apt-get update

sudo apt-get install \
    apt-transport-https \
    ca-certificates \
    curl \
    gnupg-agent \
    software-properties-common
Install Docker’s official GPG key and verify the fingerprint (0EBFCD88)
curl -fsSL https://download.docker.com/linux/ubuntu/gpg | sudo apt-key add -

sudo apt-key fingerprint 0EBFCD88
Setup the stable repository.
sudo add-apt-repository \
   "deb [arch=amd64] https://download.docker.com/linux/ubuntu \
   $(lsb_release -cs) \
   stable"
Install Docker Engine
sudo apt-get update

sudo apt-get install docker-ce docker-ce-cli containerd.io
Install Portainer
Installing Portainer is not necessary but is extremely useful as it gives you an actual GUI to interact with Docker. If you are new to Docker like me this will be extremely helpful. First you will create a volume for the portainer data and then create the container.
docker volume create portainer_data
docker run -d -p 9000:9000 -v /var/run/docker.sock:/var/run/docker.sock -v portainer_data:/data portainer/portainer
Once this is complete you can navigate in your browser to the NUC’s IP address port 9000. (ie: 192.168.7.4:9000) From there you will be prompted to create the admin account, then choose the Docker environment you want to manage, which is “Local.” After connecting to local you will be logged in and presented with a screen similar to this:
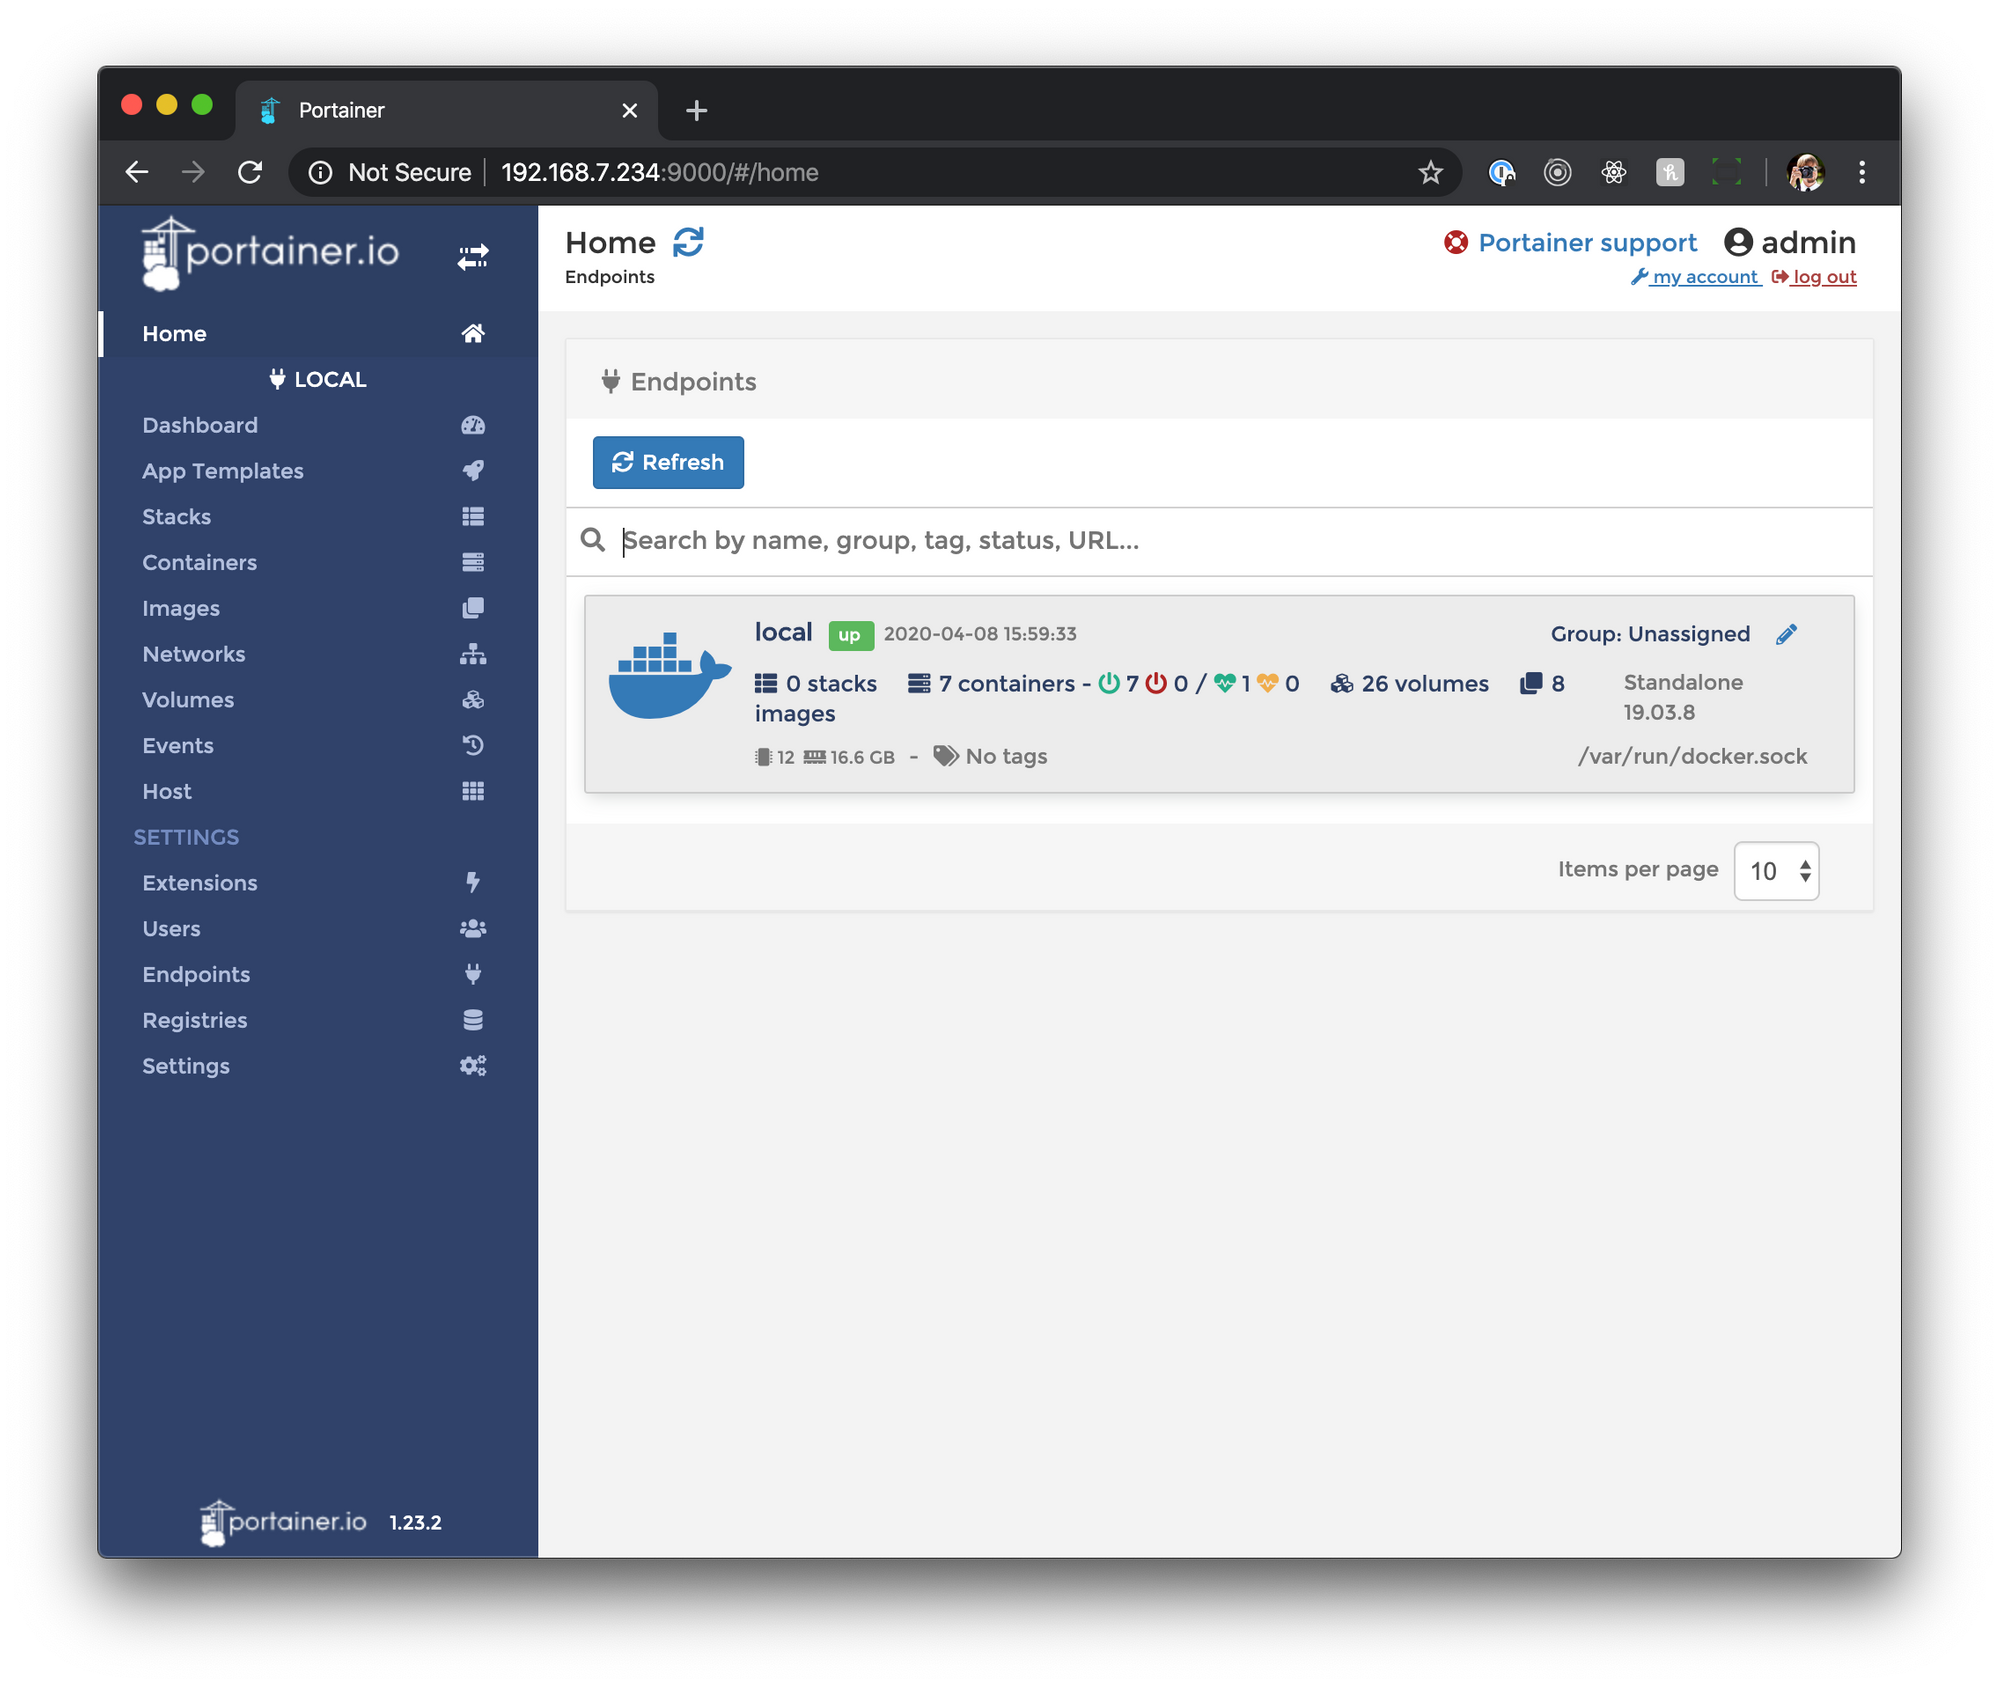
From here you will be able to navigate around to view your containers, volumes, etc.
Installing Home Assistant — Finally!
So looking around the internet there didn’t seem to be a ton of tutorials installing what was called Hassio in Docker. I found one here and here. They are both pretty similar but out of date, since the URL to the repo has changed. The new repo for Home Assistant Supervised lives here. It took me a while to figure out what changed, what the correct URL was, etc. Because of the name changes I even glazed over the official documentation not realizing it was exactly what I needed. Run the commands listed below and Home Assistant will be installed and running in its various Docker containers.
sudo su

add-apt-repository universe

apt-get install bash jq curl avahi-daemon dbus software-properties-common apparmor-utils apt-transport-https ca-certificates network-manager socat

systemctl disable ModemManager

systemctl stop ModemManager

curl -sL https://raw.githubusercontent.com/home-assistant/supervised-installer/master/installer.sh | bash -s -- -m intel-nuc -d /home/docker/hassio
There are two things to call out:
- -m is the machine type (in our case intel-nuc)
- -d is me saying I want the default data storage location
There are a few other options for the installer that are explained on the Github page.
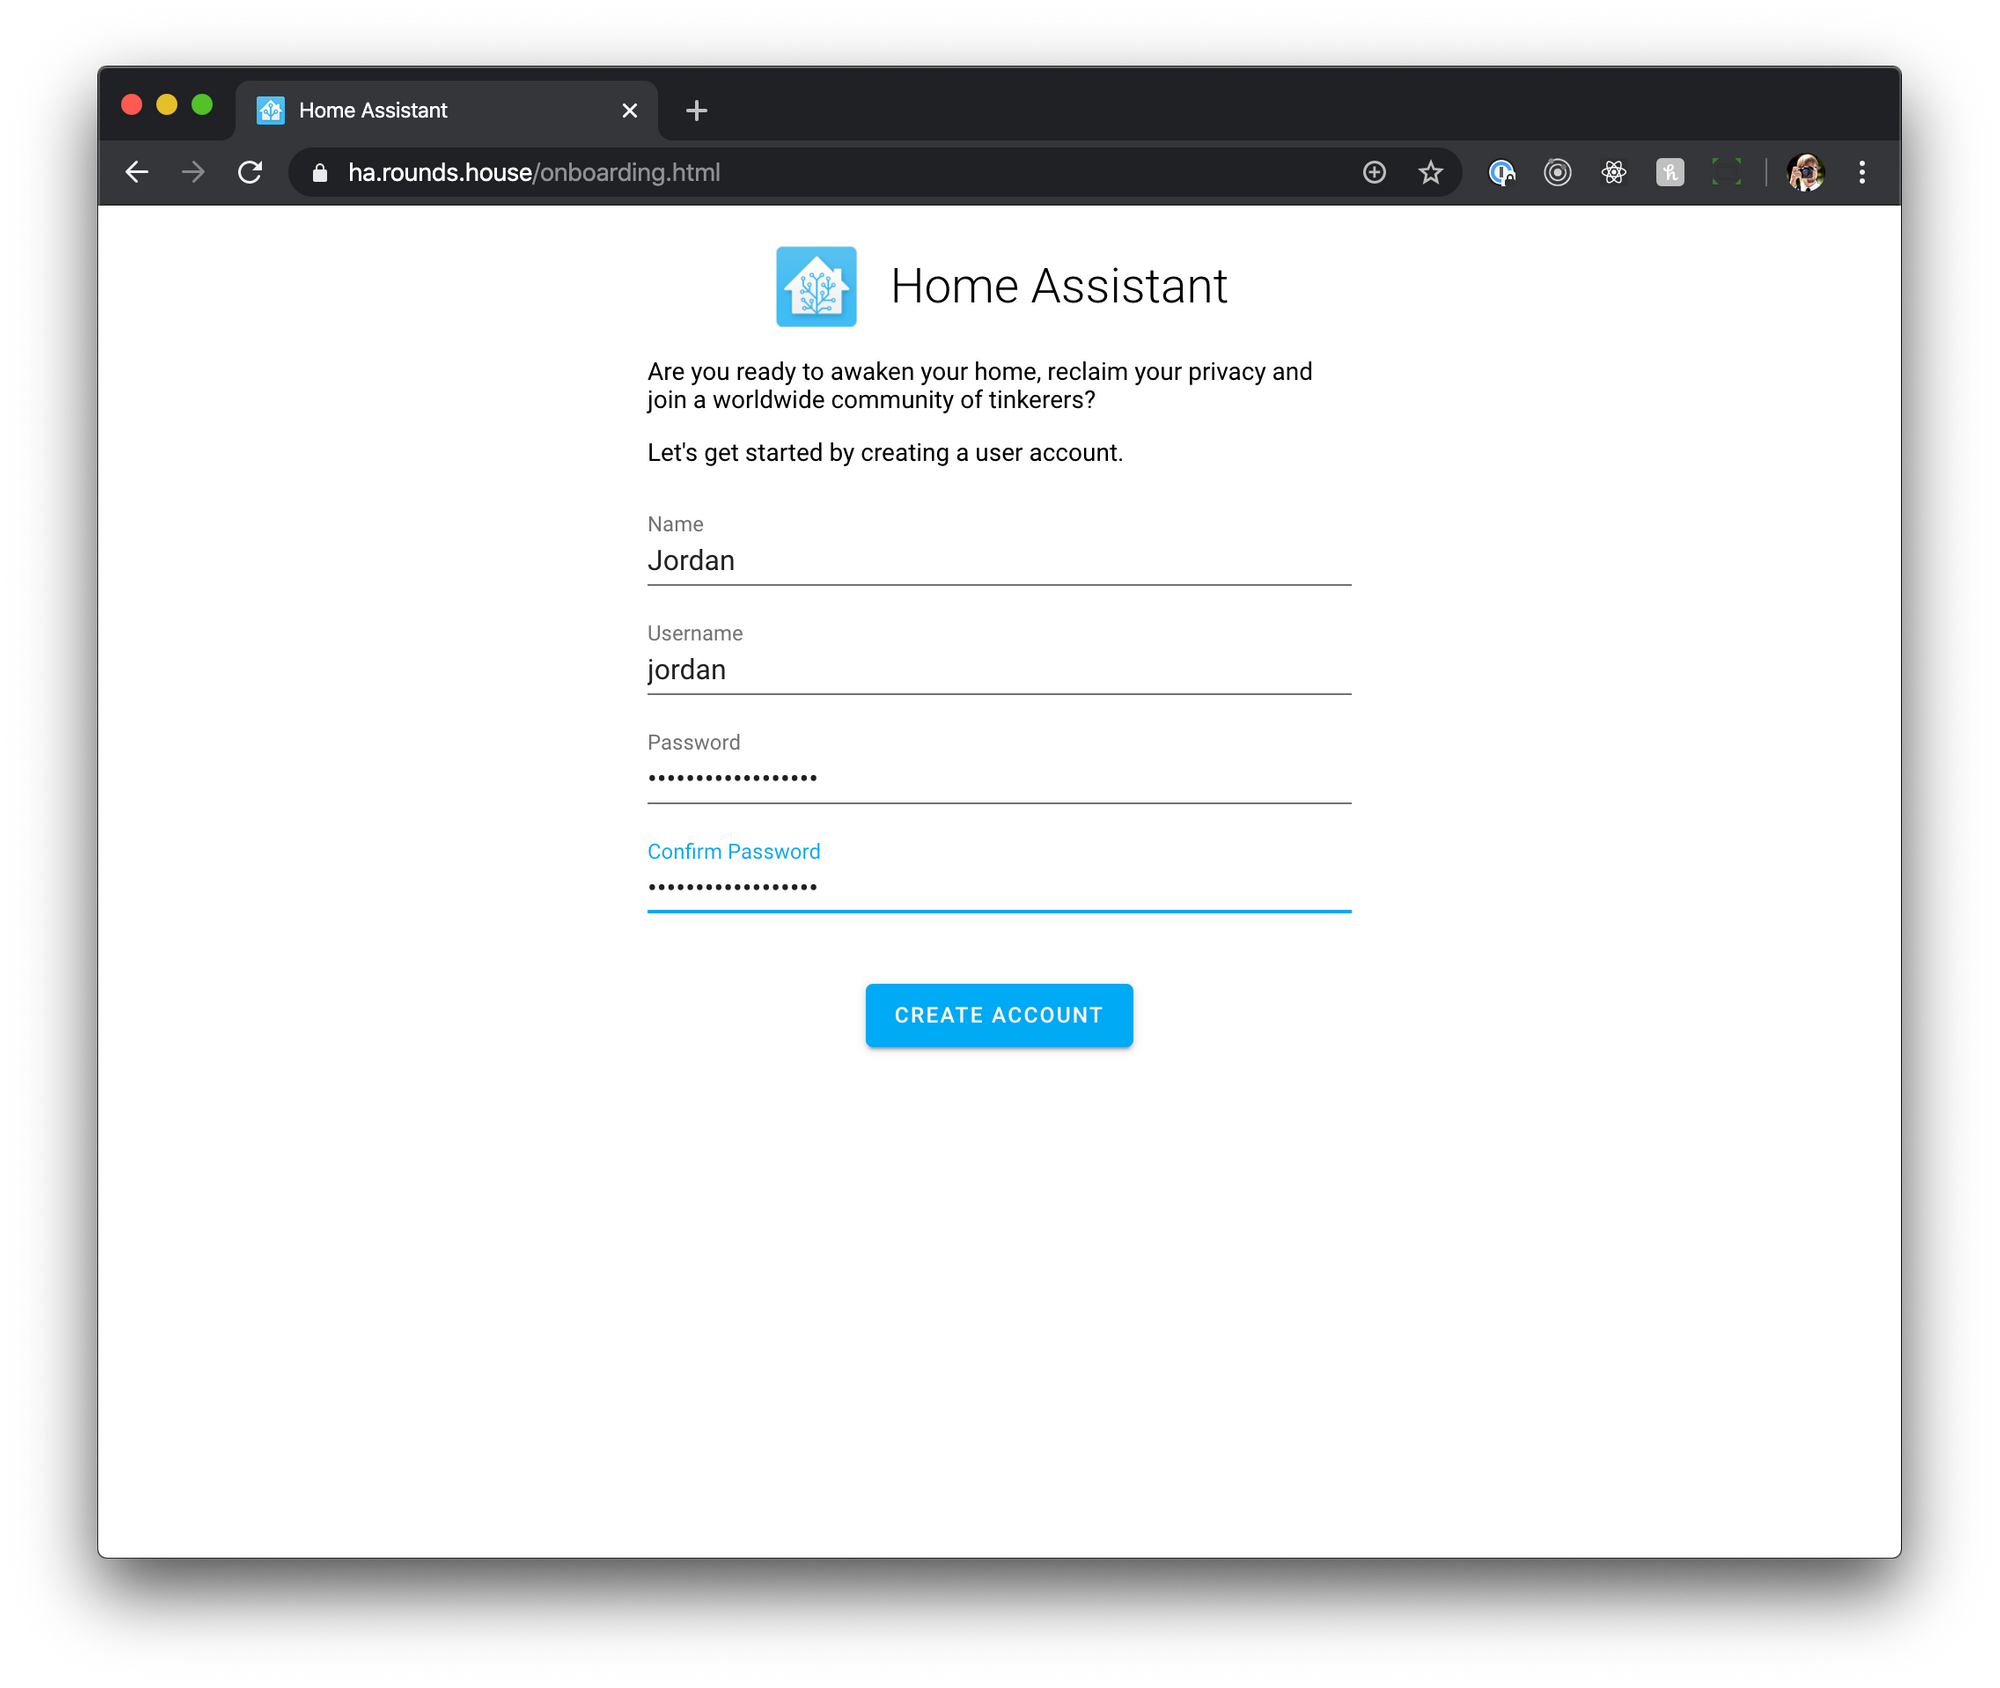
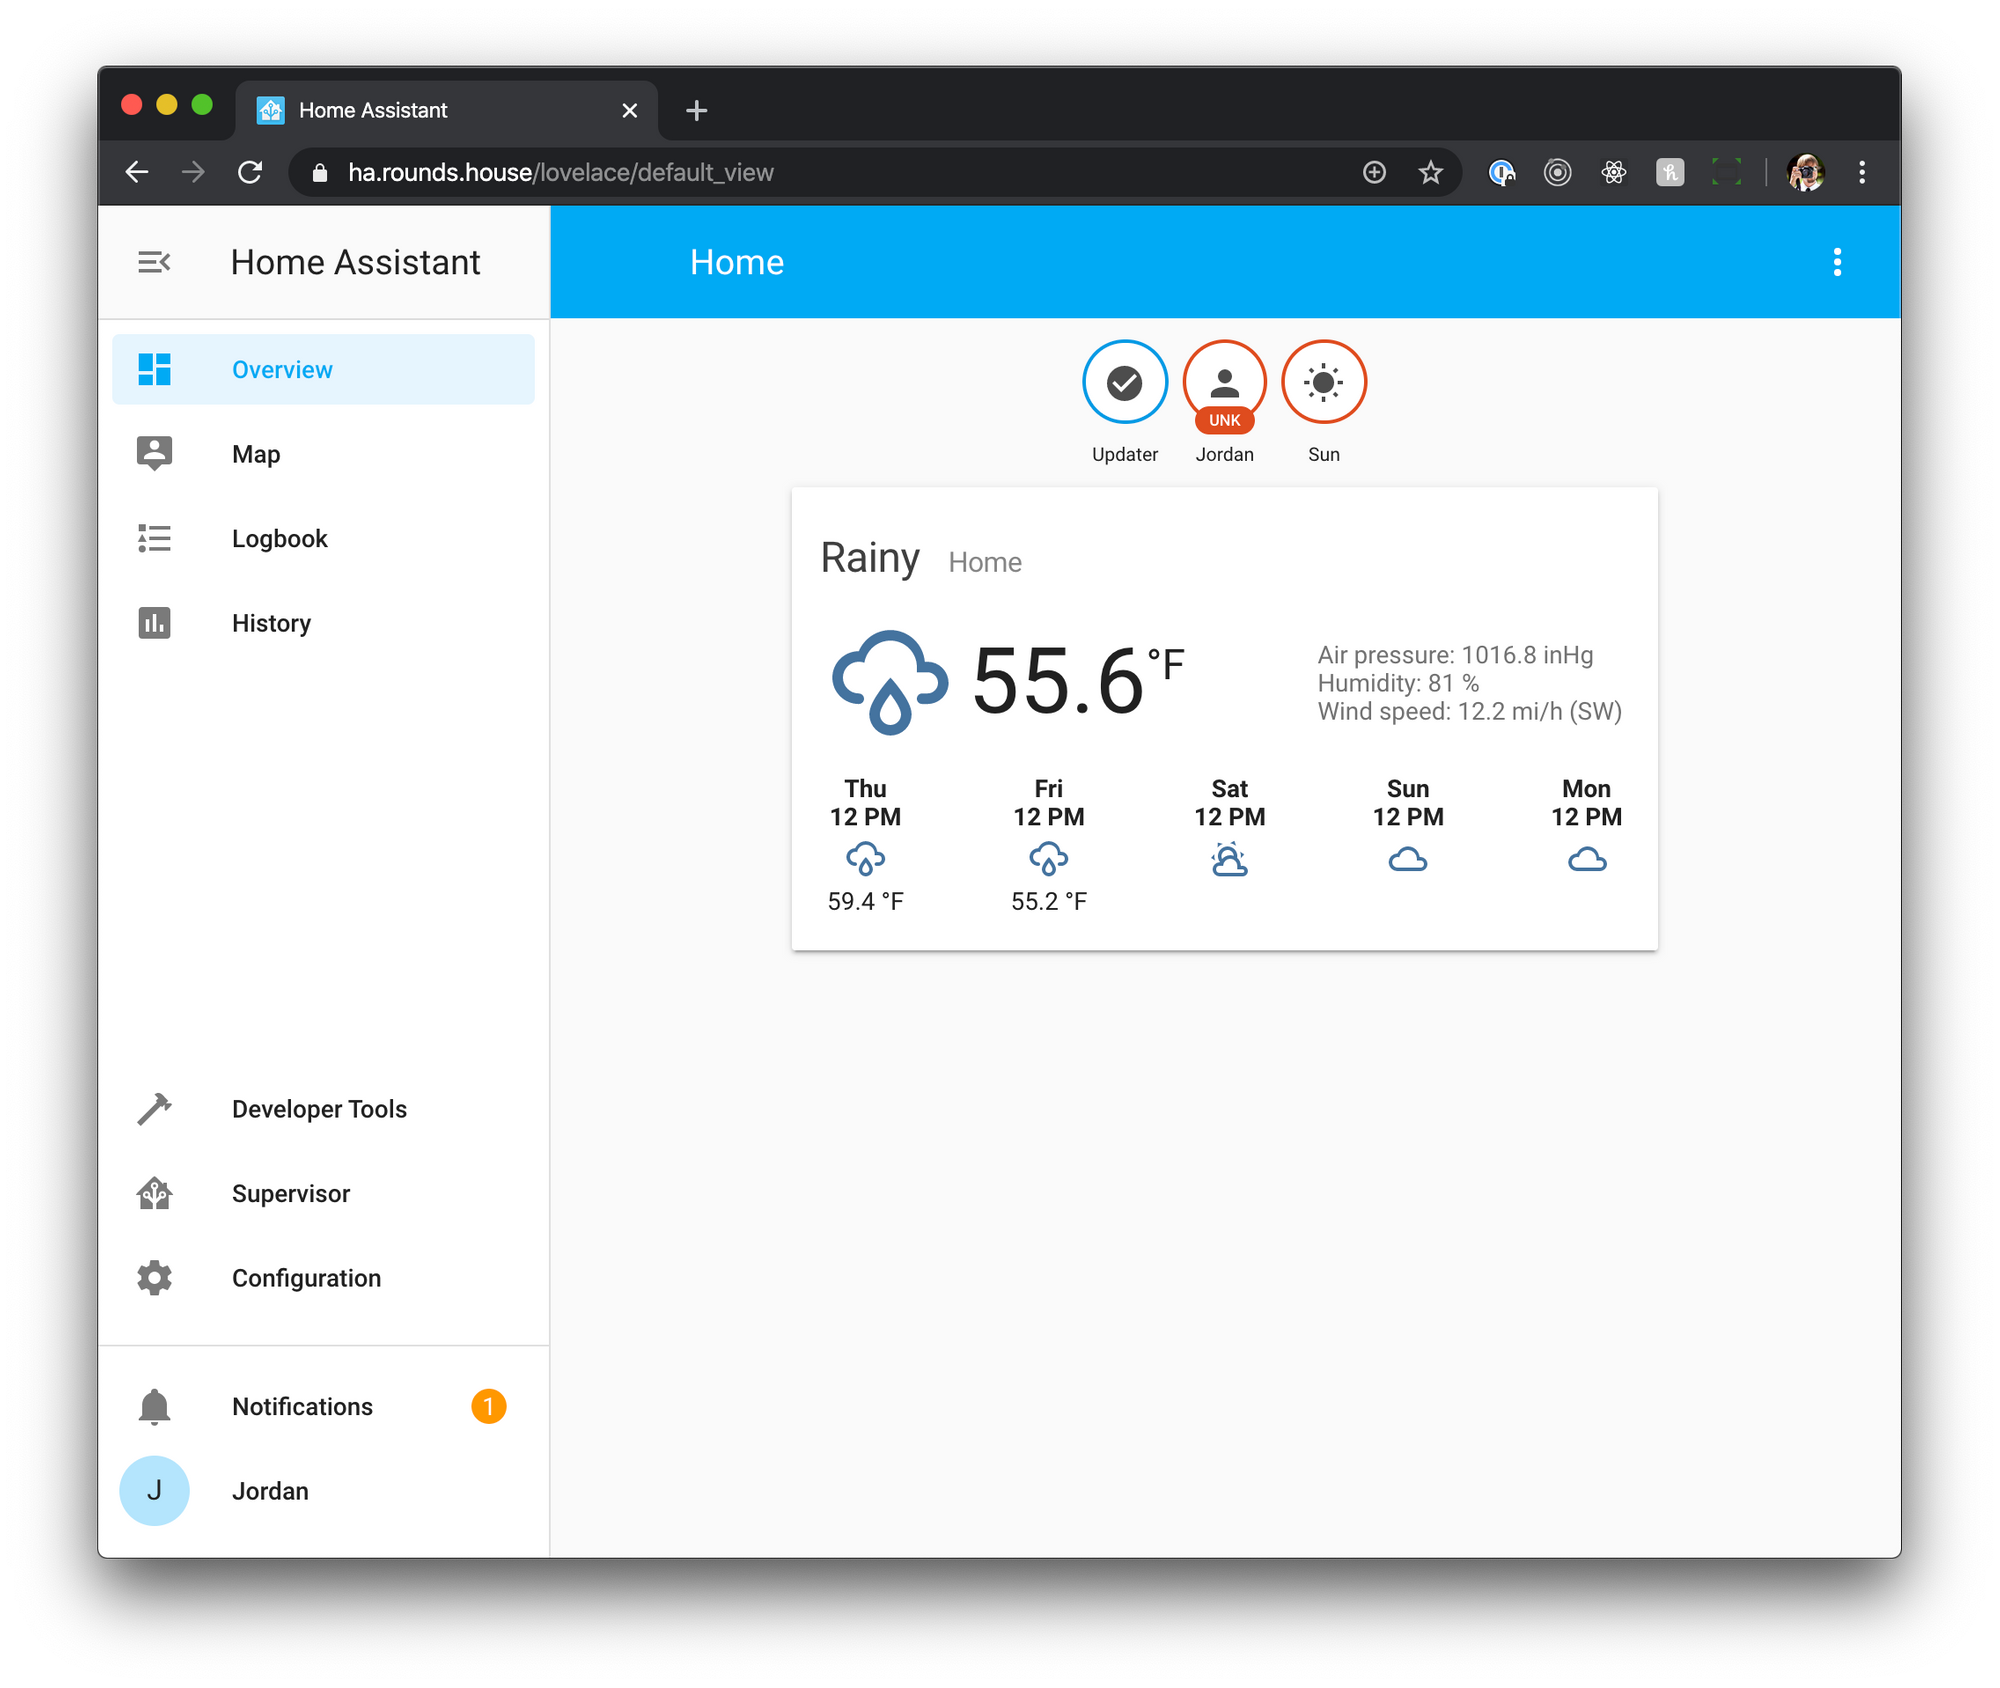
You will then need to navigate to (your-nuc-ip:8123) and you’ll be prompted to setup your user for Home Assitant.
In Conclusion
The whole setup process is definitely a bit more complex than installing Home Assistant on a Raspberry Pi, but now that I’m setup on the NUC everything is so much more snappy and I feel like I’m more in control and have options I didn’t know existed. That control definitely comes with quite the learning curve, but if you’re patient and willing to do some reading its totally worth it!