

I've been trying to figure out a good reliable way to have semi complex automations setup for Home Assistant that I can easily edit and debug. Node Red ended up being the solution I settled on.
My goal was to be able to control Hue lights with Insteon dimmers where the dimmers aren't actually connected to the load and communicating via MQTT. This is the second post in a series about that journey. You can find the first post here:

We will walkthrough installing Node Red in Docker and then setting it up to connect to Home Assistant. Finally we will verify that messages are coming through properly.
Installing Node Red
Being new to Node Red, I had zero idea what I was doing, but knew that I wanted to run it in Docker. I started by looking around at the various Dockerfiles out there and tried to pick the various flows that it seemed like I might need installed. The most important one here being node-red-contrib-home-assistant-websocket. I think the only other one I needed was node-red-contrib-stoptimer. Here's the Dockerfile I ended up going with:
FROM nodered/node-red

RUN npm install node-red-contrib-actionflows \
        # https://flows.nodered.org/node/node-red-contrib-actionflows
				node-red-contrib-home-assistant-websocket \
        # https://flows.nodered.org/node/node-red-contrib-home-assistant-websocket
				node-red-contrib-stoptimer \
        # https://flows.nodered.org/node/node-red-contrib-stoptimer
				node-red-contrib-time-range-switch \
        # A simple Node-RED node that routes messages depending on the time. If the current time falls within the range specified in the node configuration, the message is routed to output 1. Otherwise the message is routed to output 2.
				node-red-contrib-timecheck \
        # Is it that time yet? This node compares a given time to the current time.
				node-red-node-timeswitch
# node to provide a simple timeswitch node to schedule daily on/off eventsFrom there it was just a simple docker-compose file to get up and running.
version: '3.7'
services:
  node-red:
    build: .
    container_name: "node-red"
    environment:
      TZ: ${TZ}
    image: "nodered/node-red"
    restart: unless-stopped
    ports:
      - "1880:1880"
    volumes:
      - "data:/data"
volumes:
  data:
    name: node-red_data
    driver: local-persist
    driver_opts:
      mountpoint: ${LOCAL_PERSIST}/node-red/data
Run docker-compose up -d and then navigate to the host's ip on port 1880.
Connecting Node Red to Home Assistant
The first thing we need to do to connect Node Red to Home Assistant is generate an access token. I decided to at the same time create a new user in Home Assistant specifically for Node Red. I don't have any real justification for this step other than I liked the separation. So you could totally skip this bit.
Click Configuration on the left navigation, and scroll down and click Users.
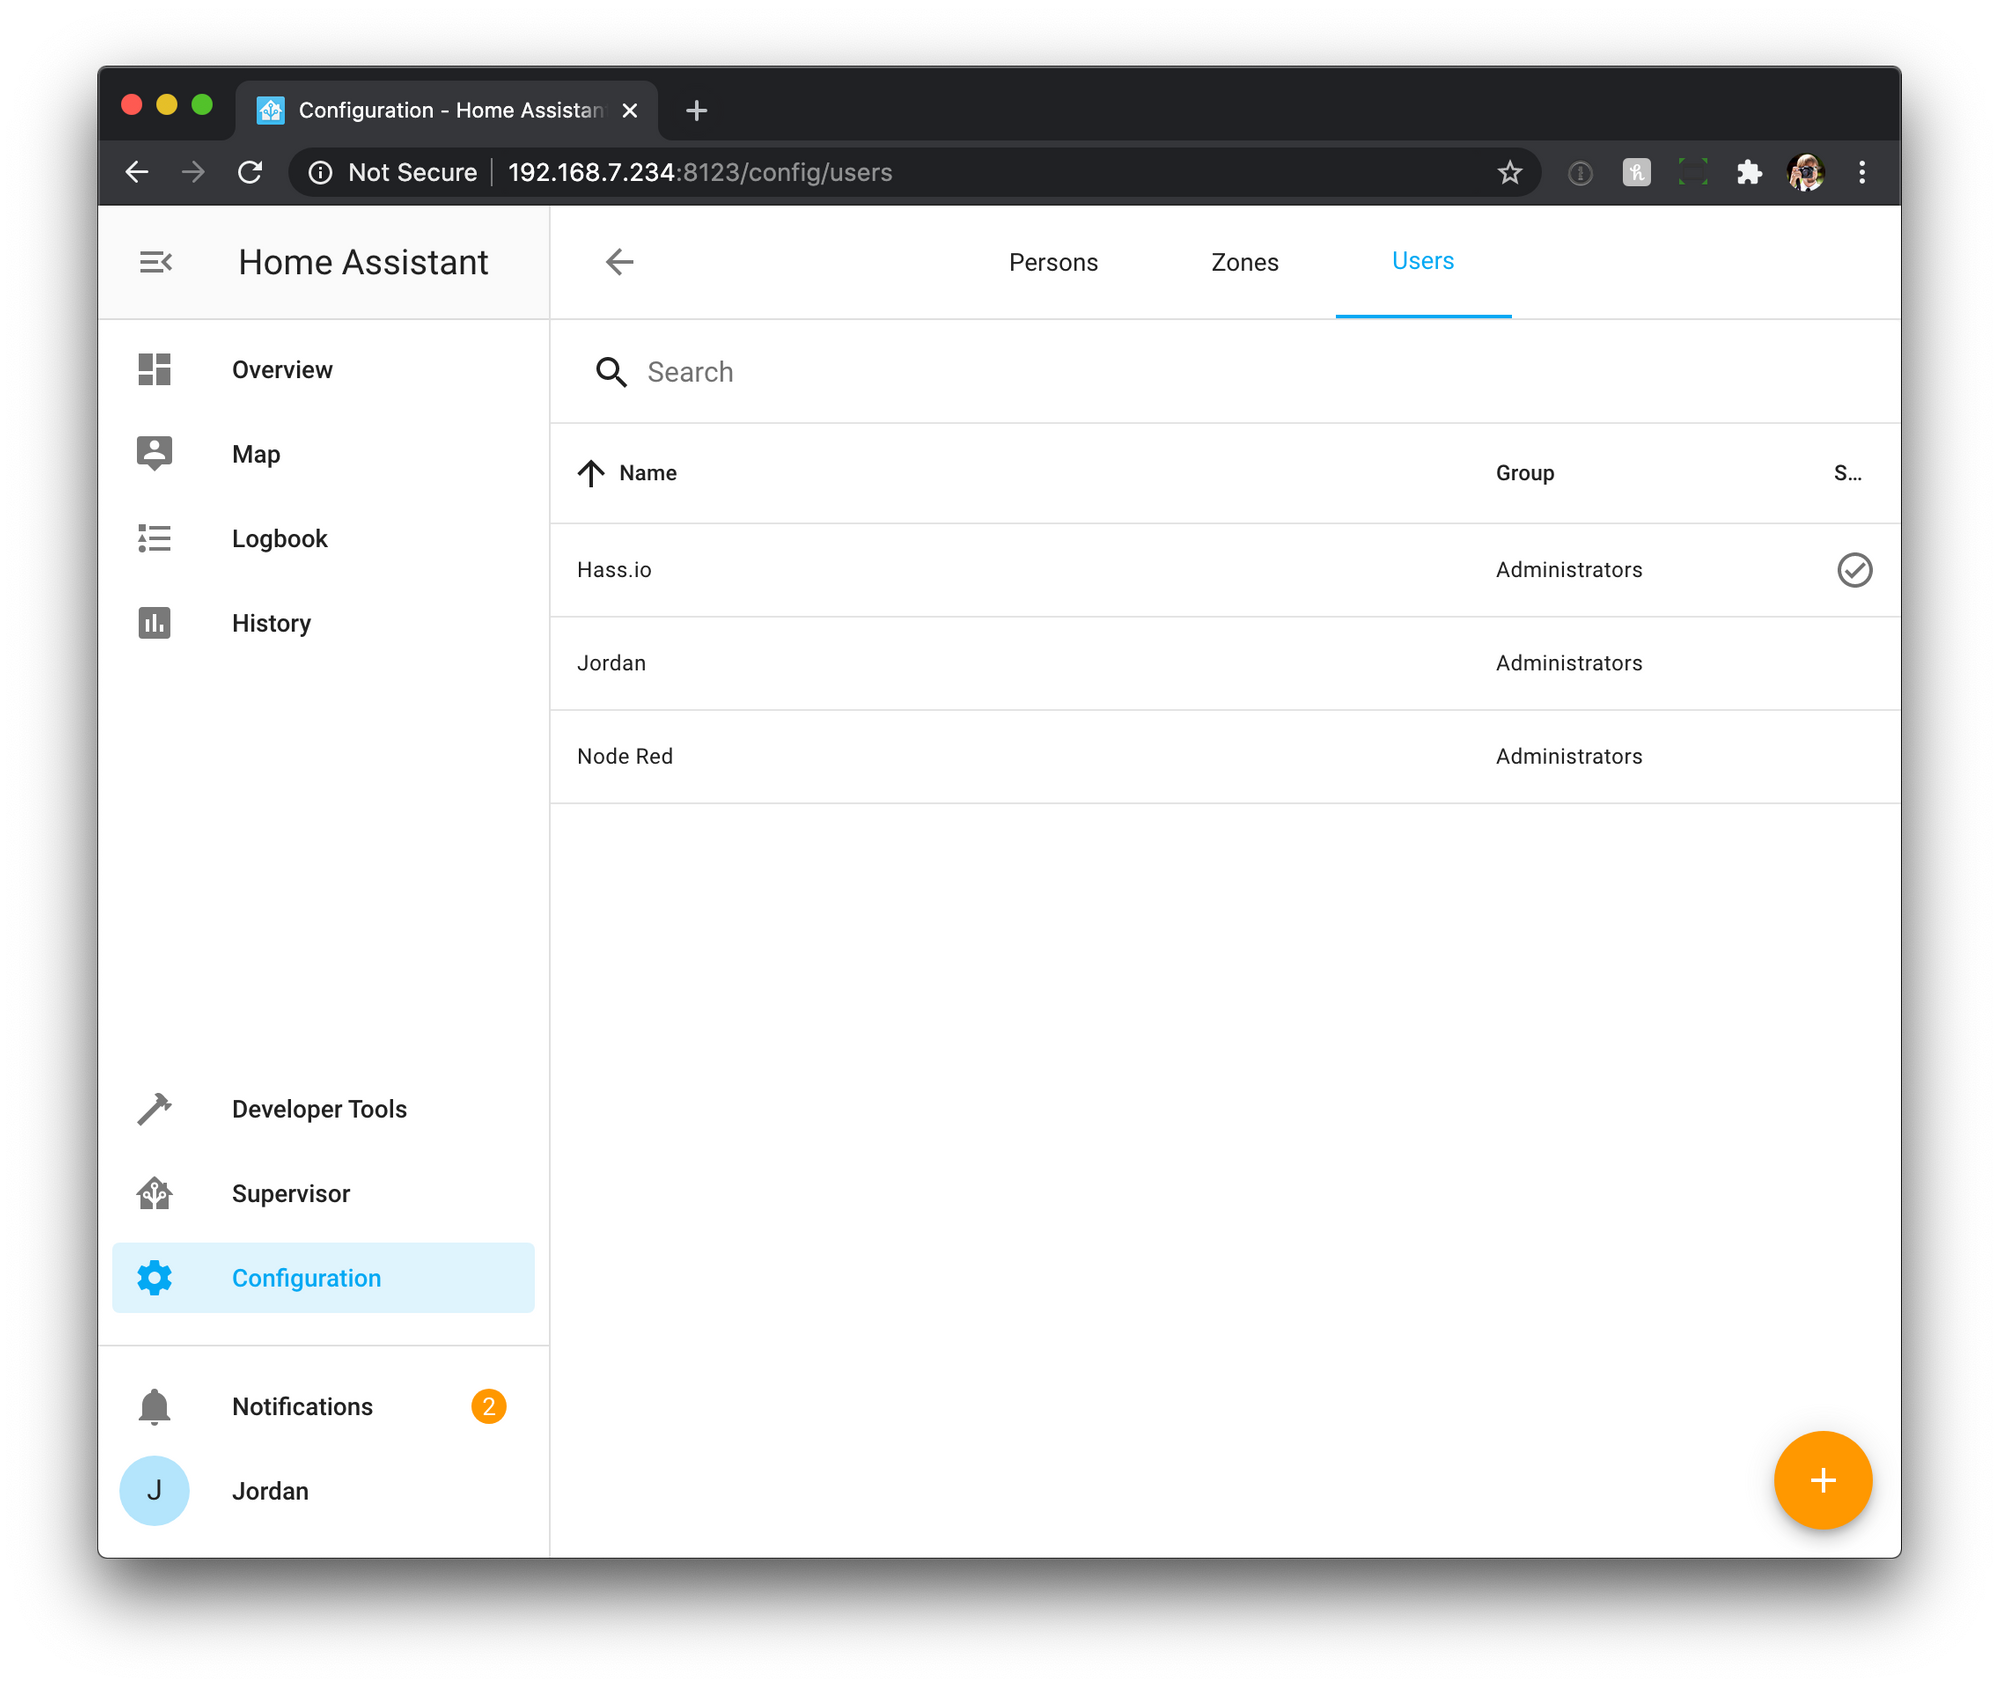
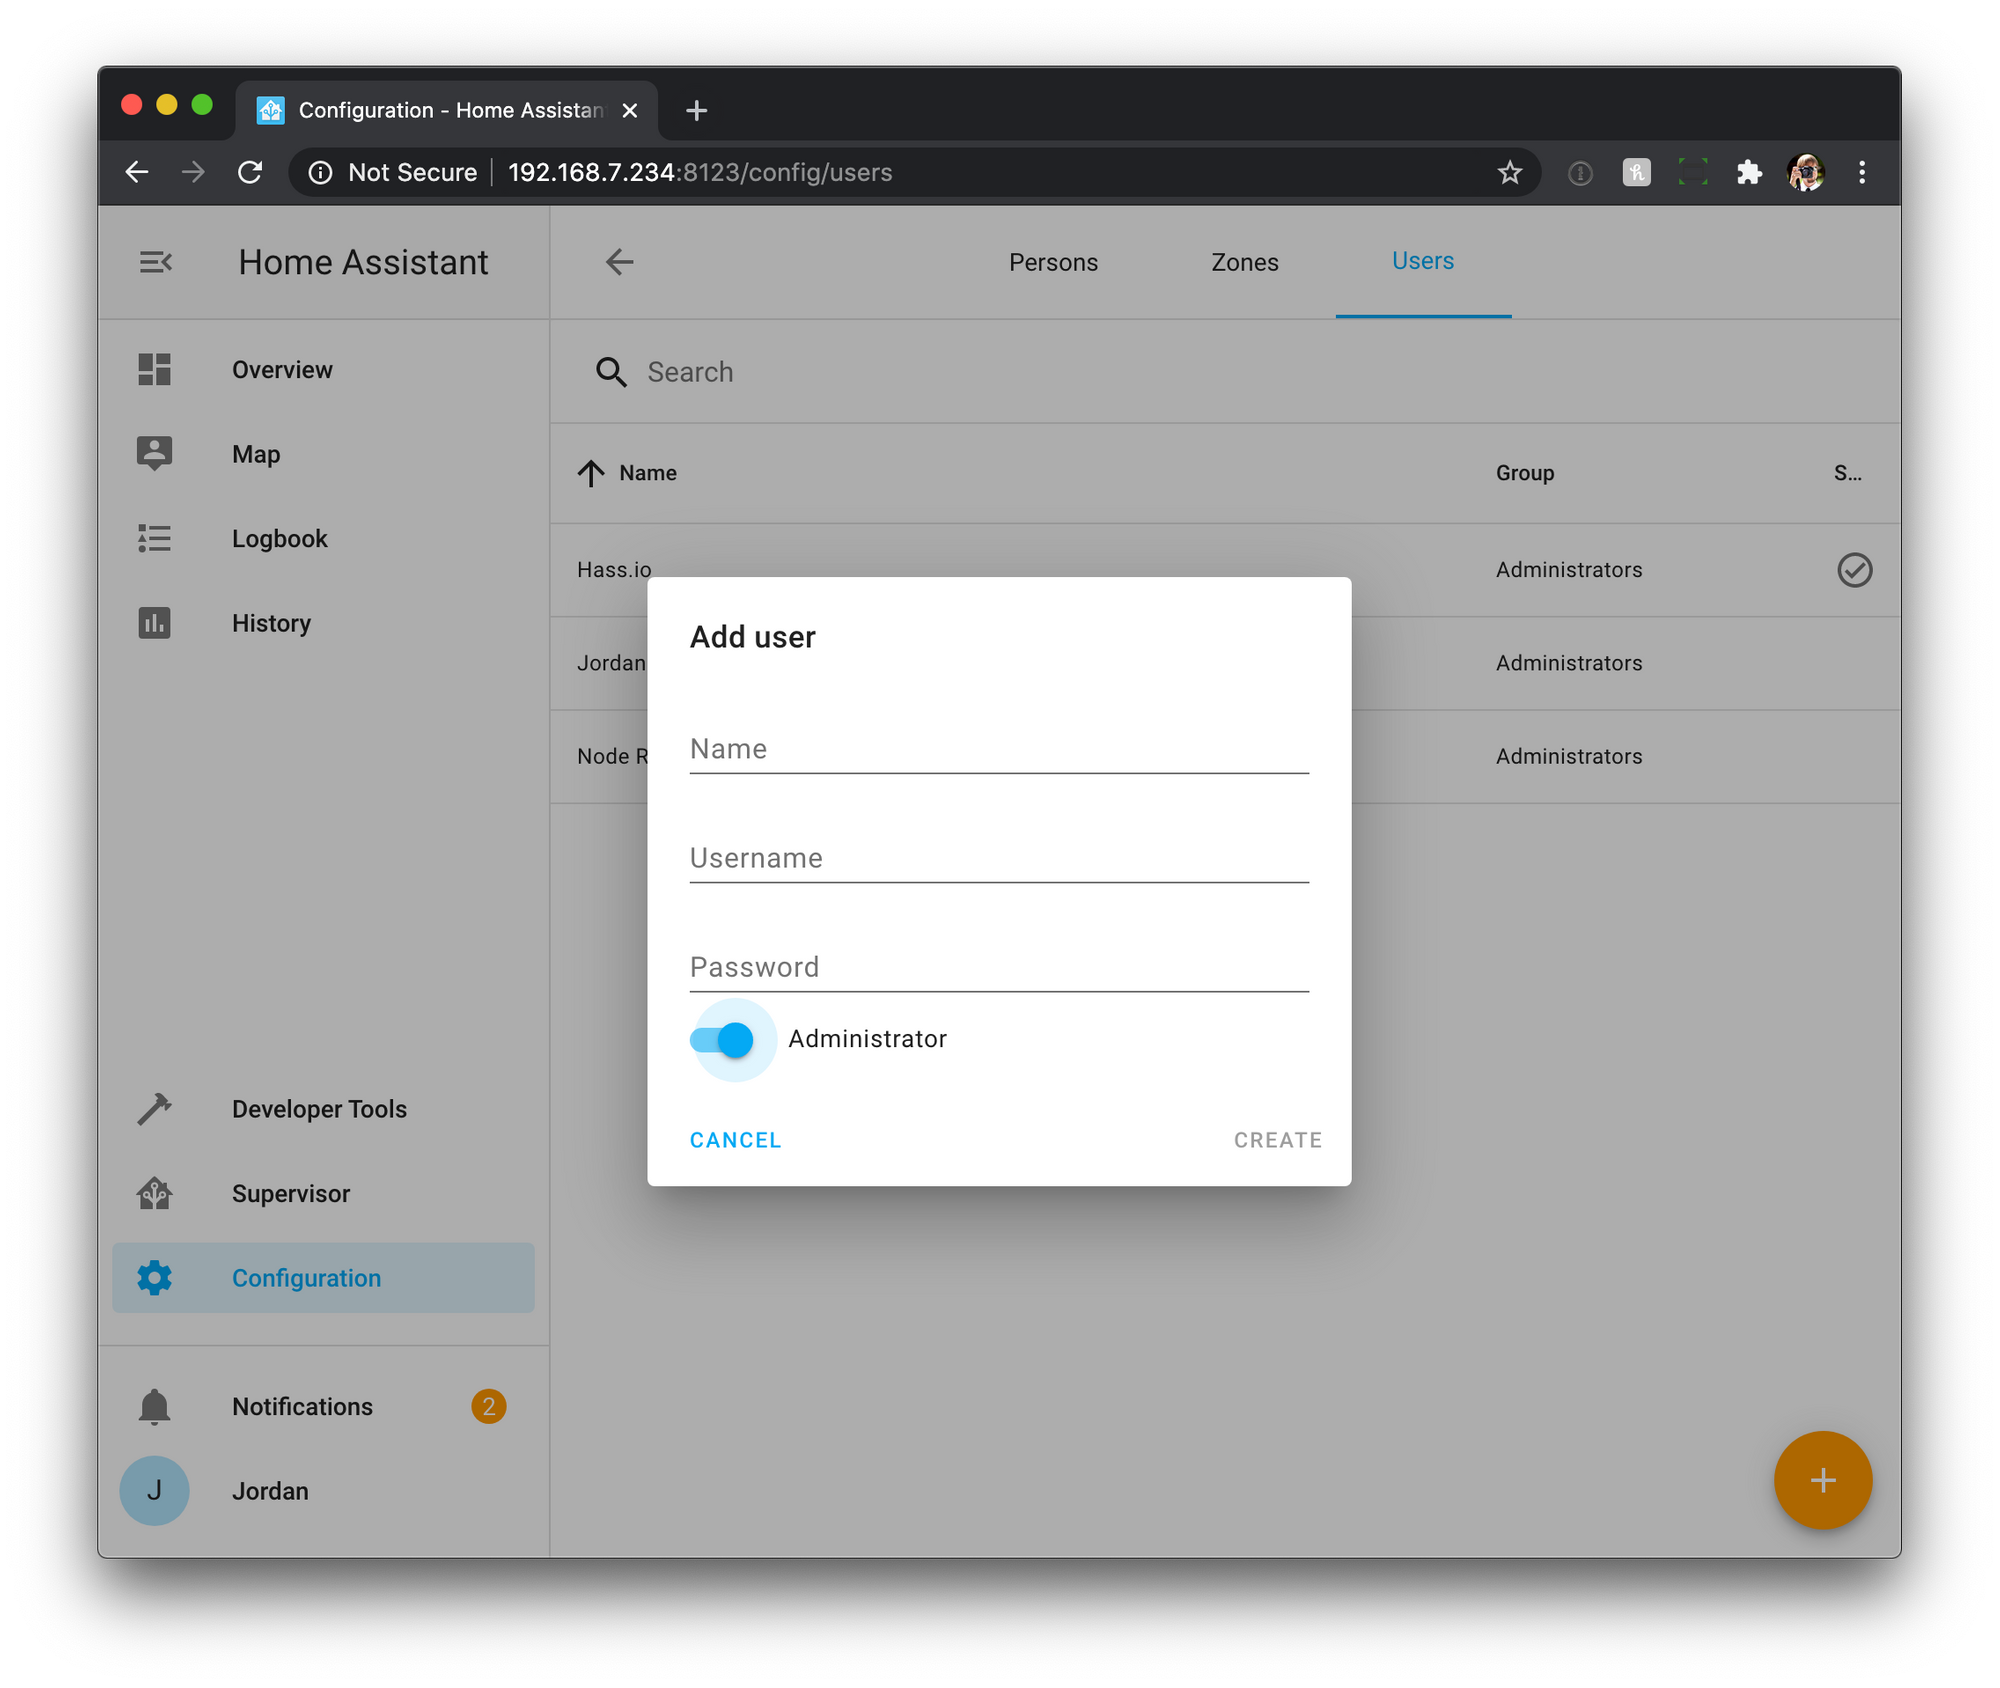
Click the add button in the lower right, and create a new admin user for node red.
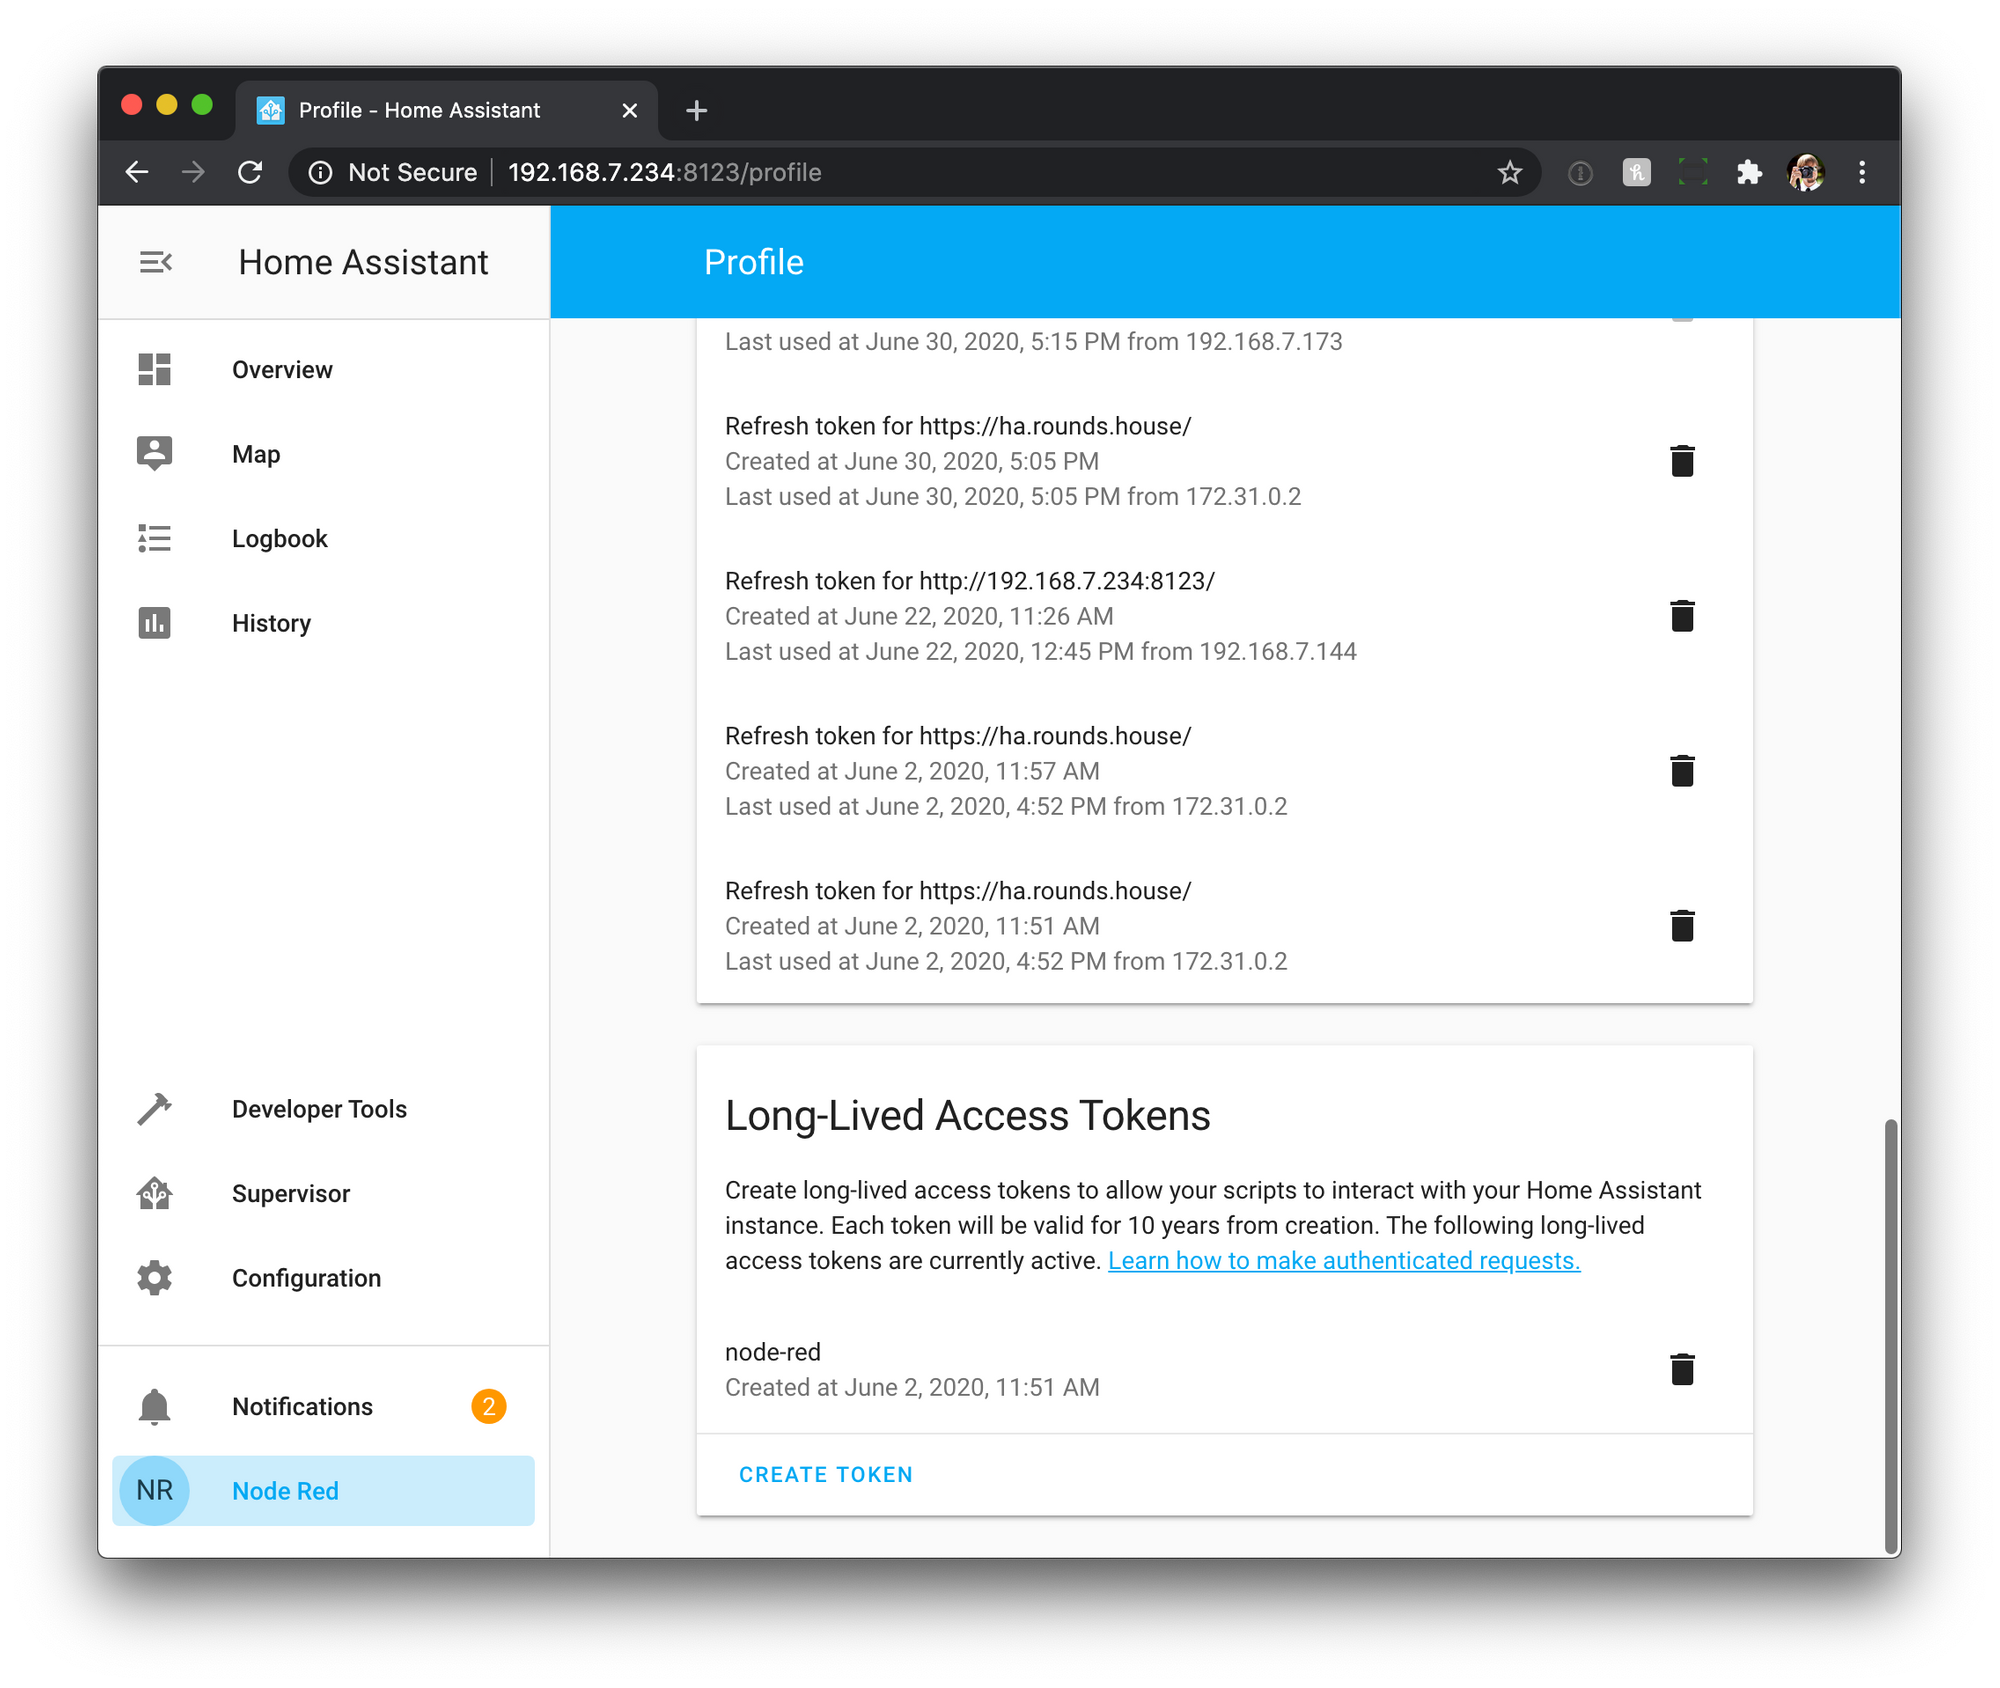
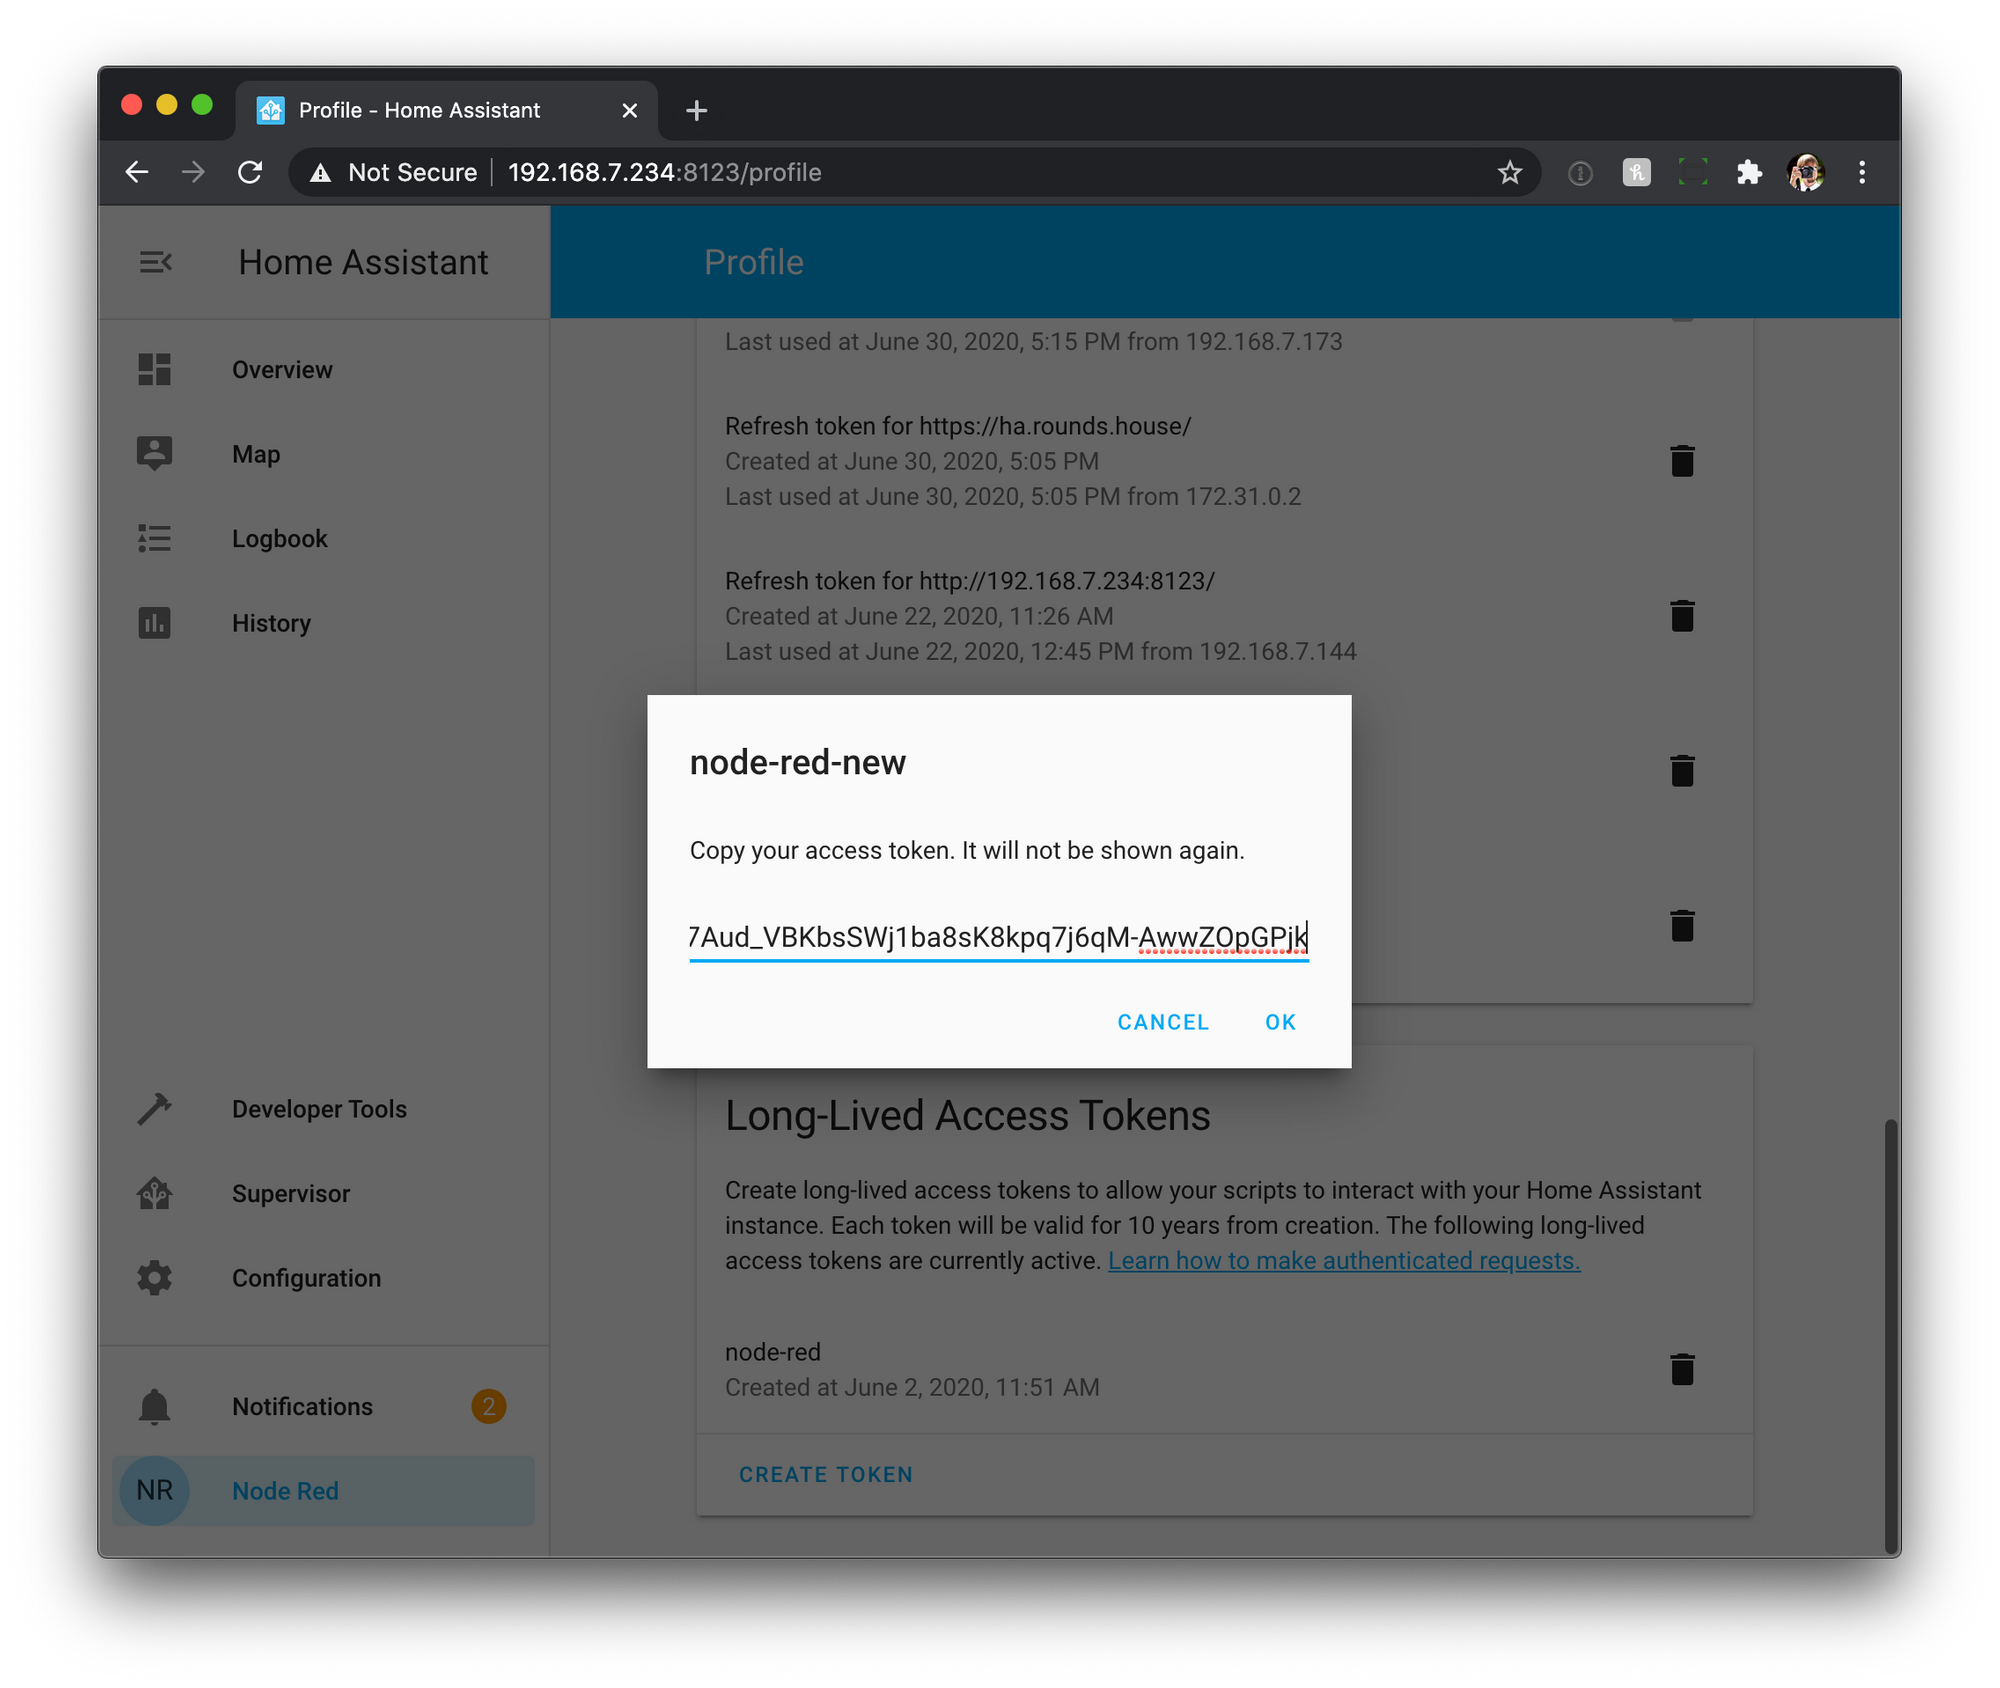
After your new user is created click on your current user in the lower left, and click logout. Next login as your node red user. Once logged in again click on the user in the lower left, and scroll down the profile page to the bottom section named Long-Lived Access Tokens and click Create Token.
You'll then give your token a name and click Ok.
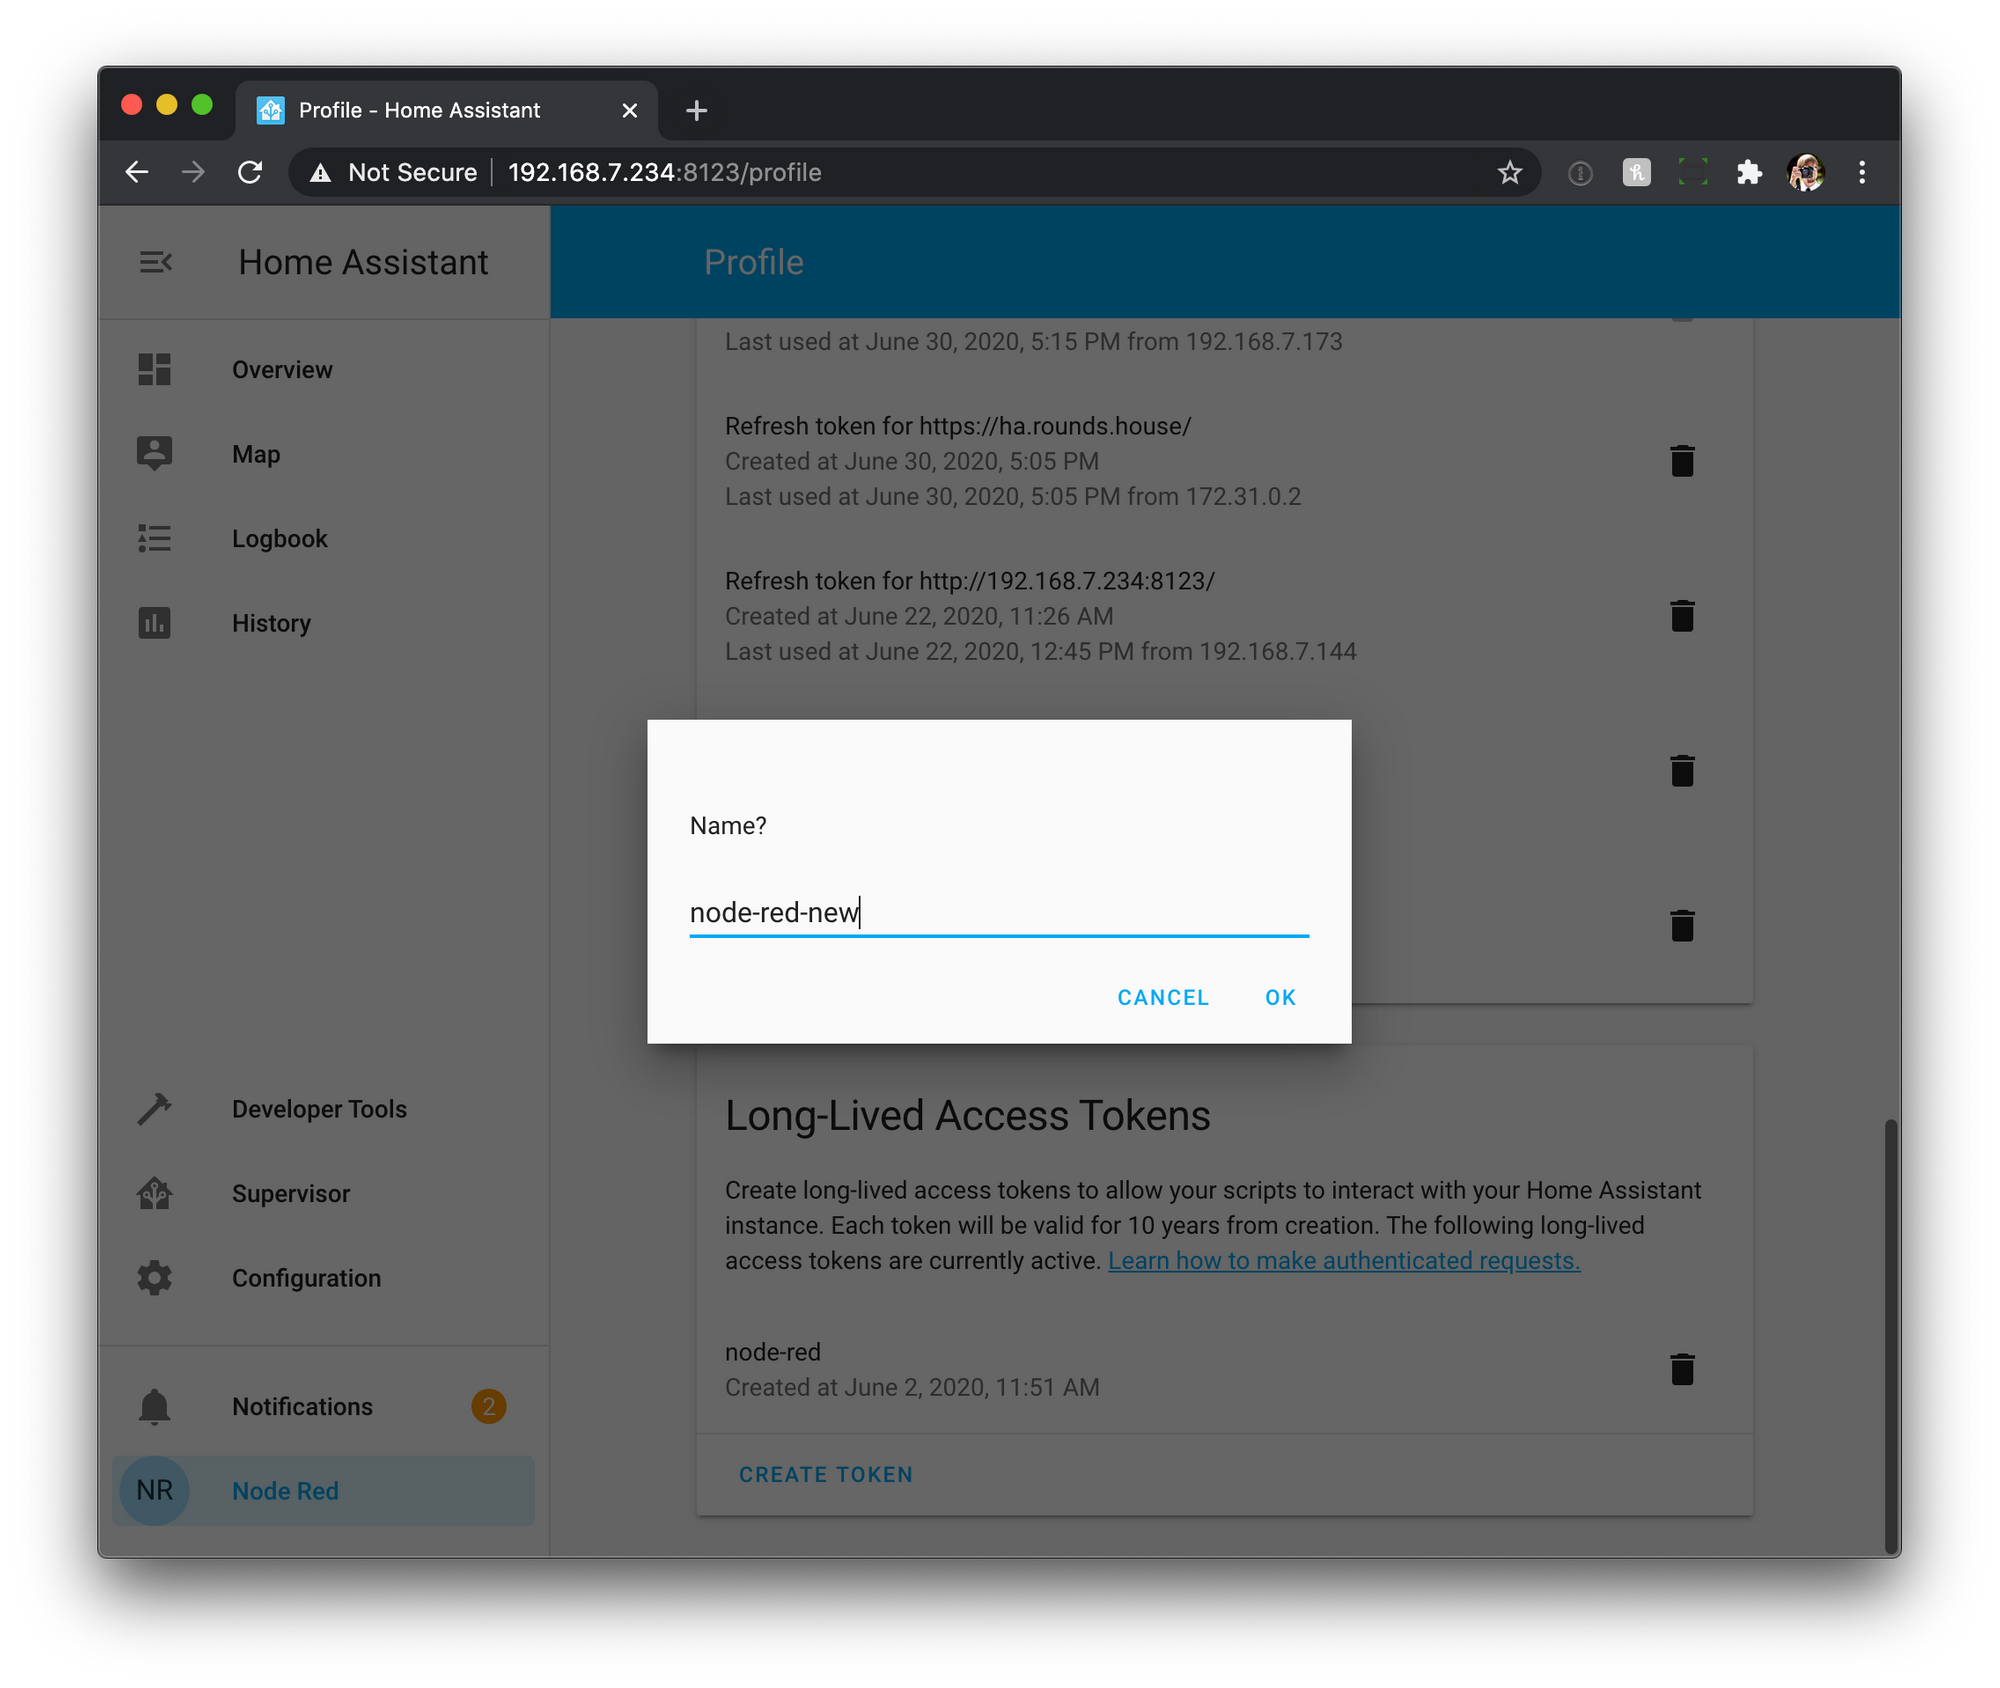
Next you'll see a modal displaying your access token. Be sure to copy and save it somewhere so we can enter it back in Node Red.
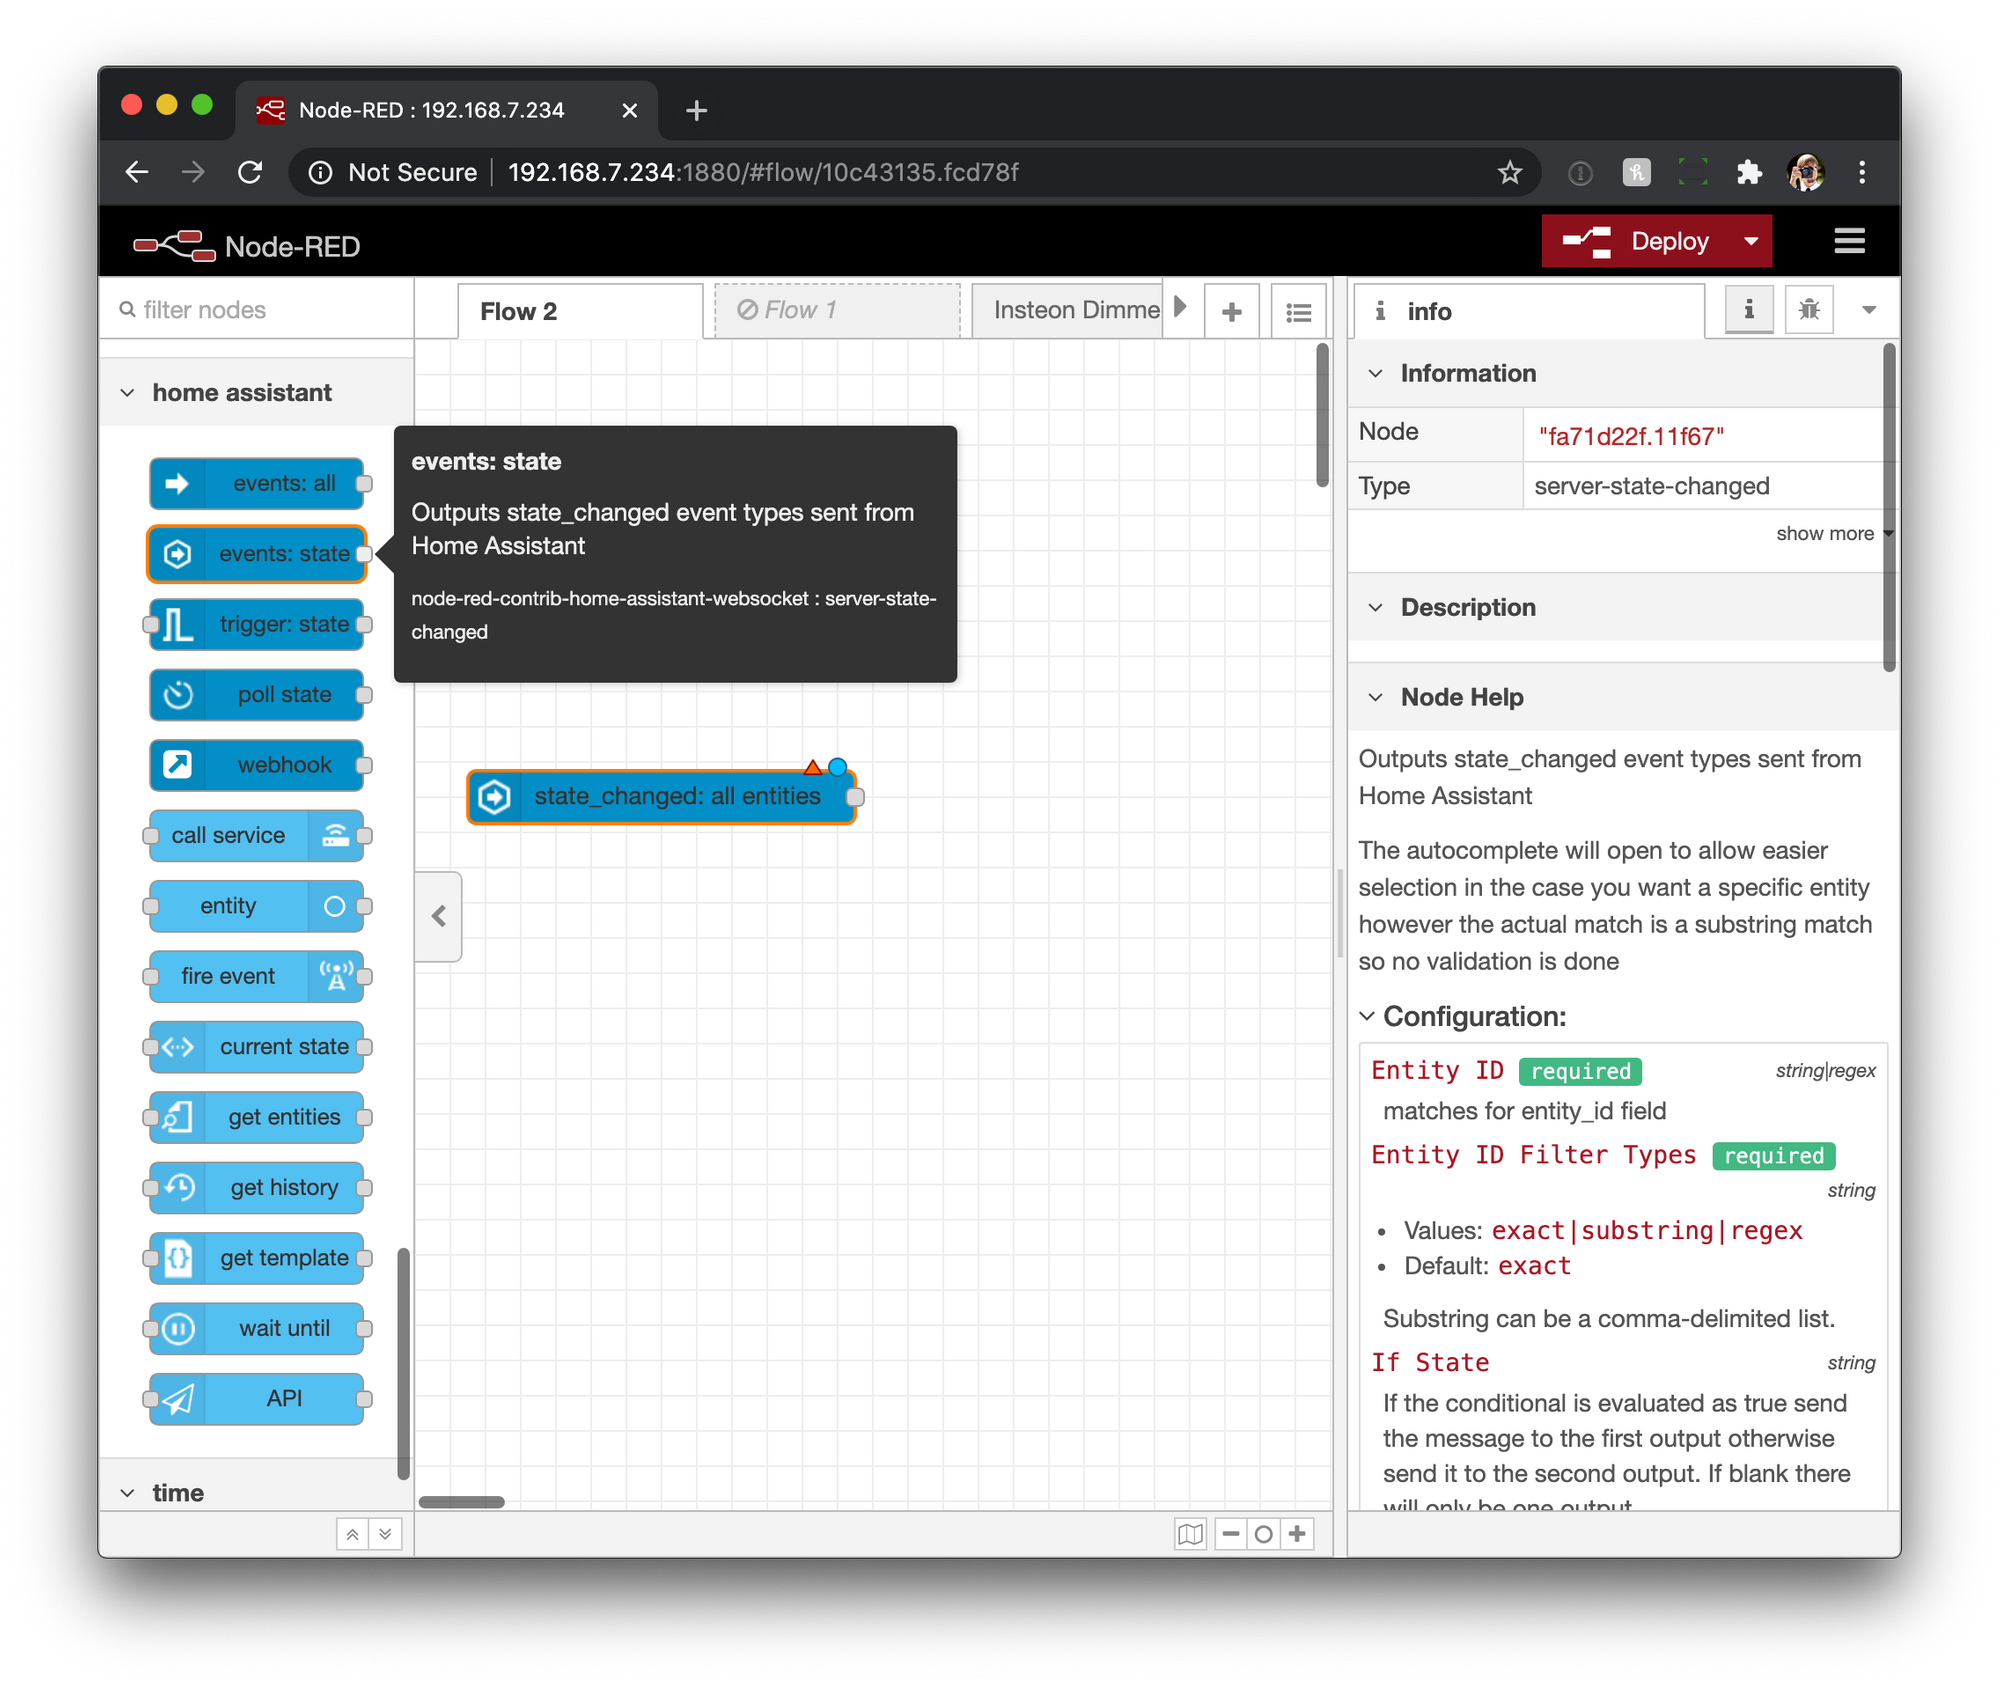
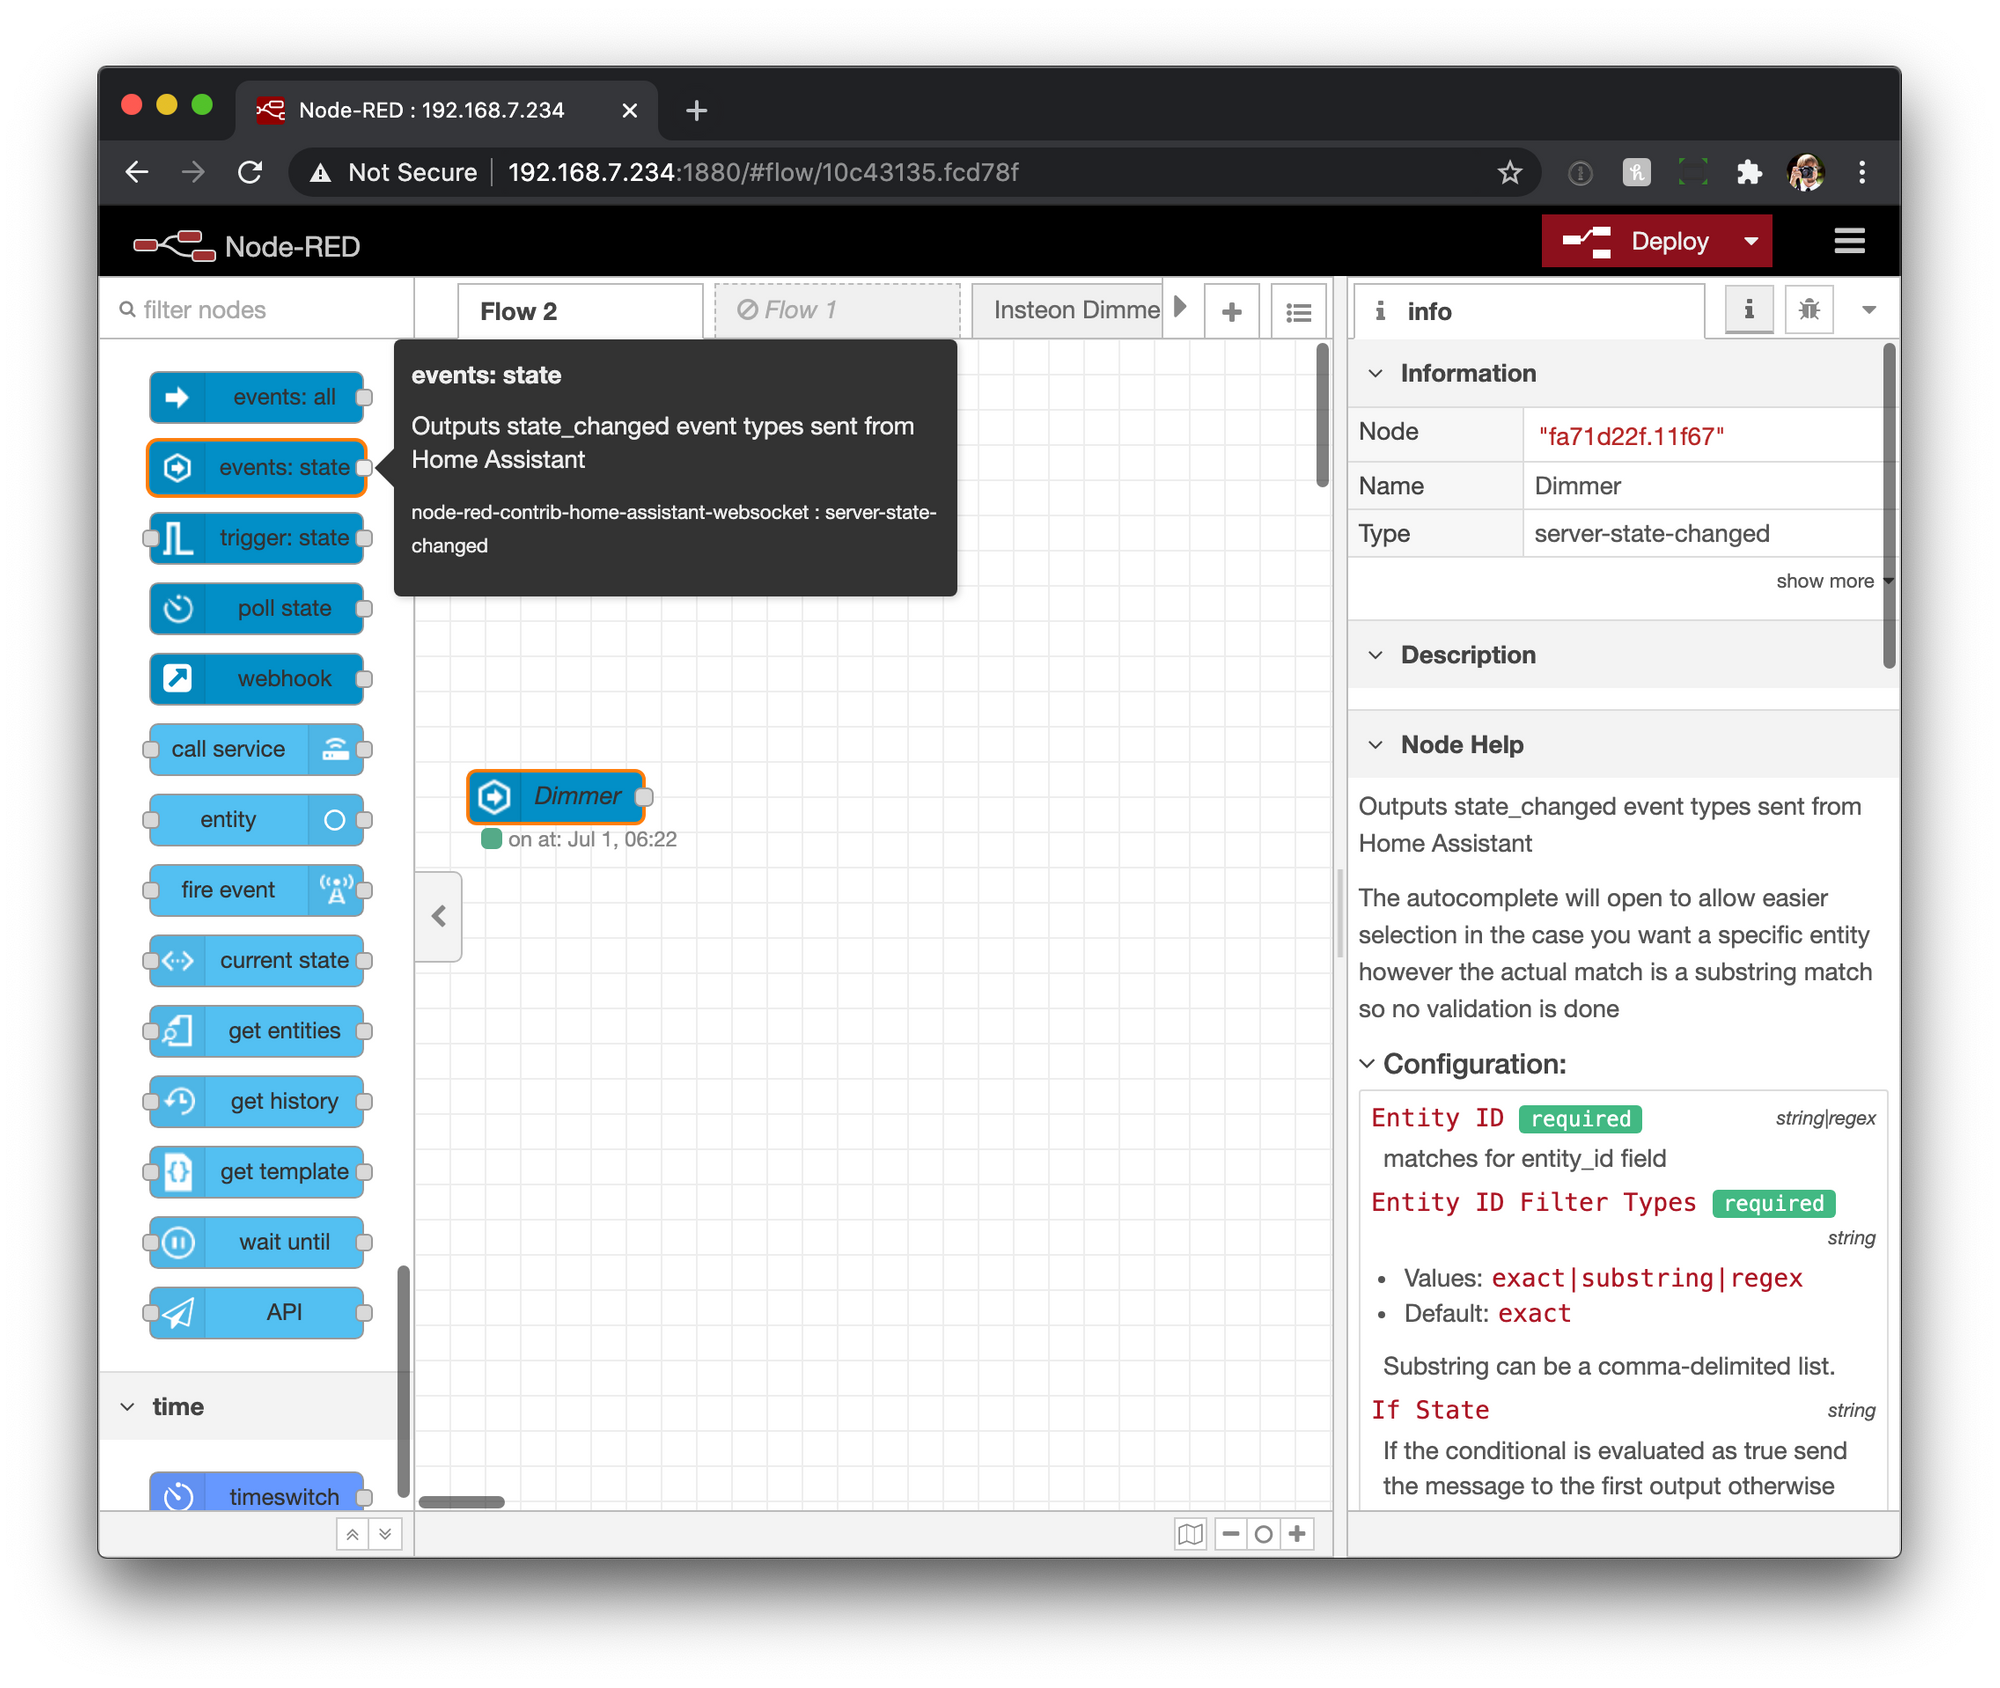
Now its time to go back over to Node Red, and the first thing we will do is drop a server-state-changed node, which is labeled "events: state" from the left hand nodes panel under the Home Assistant section.
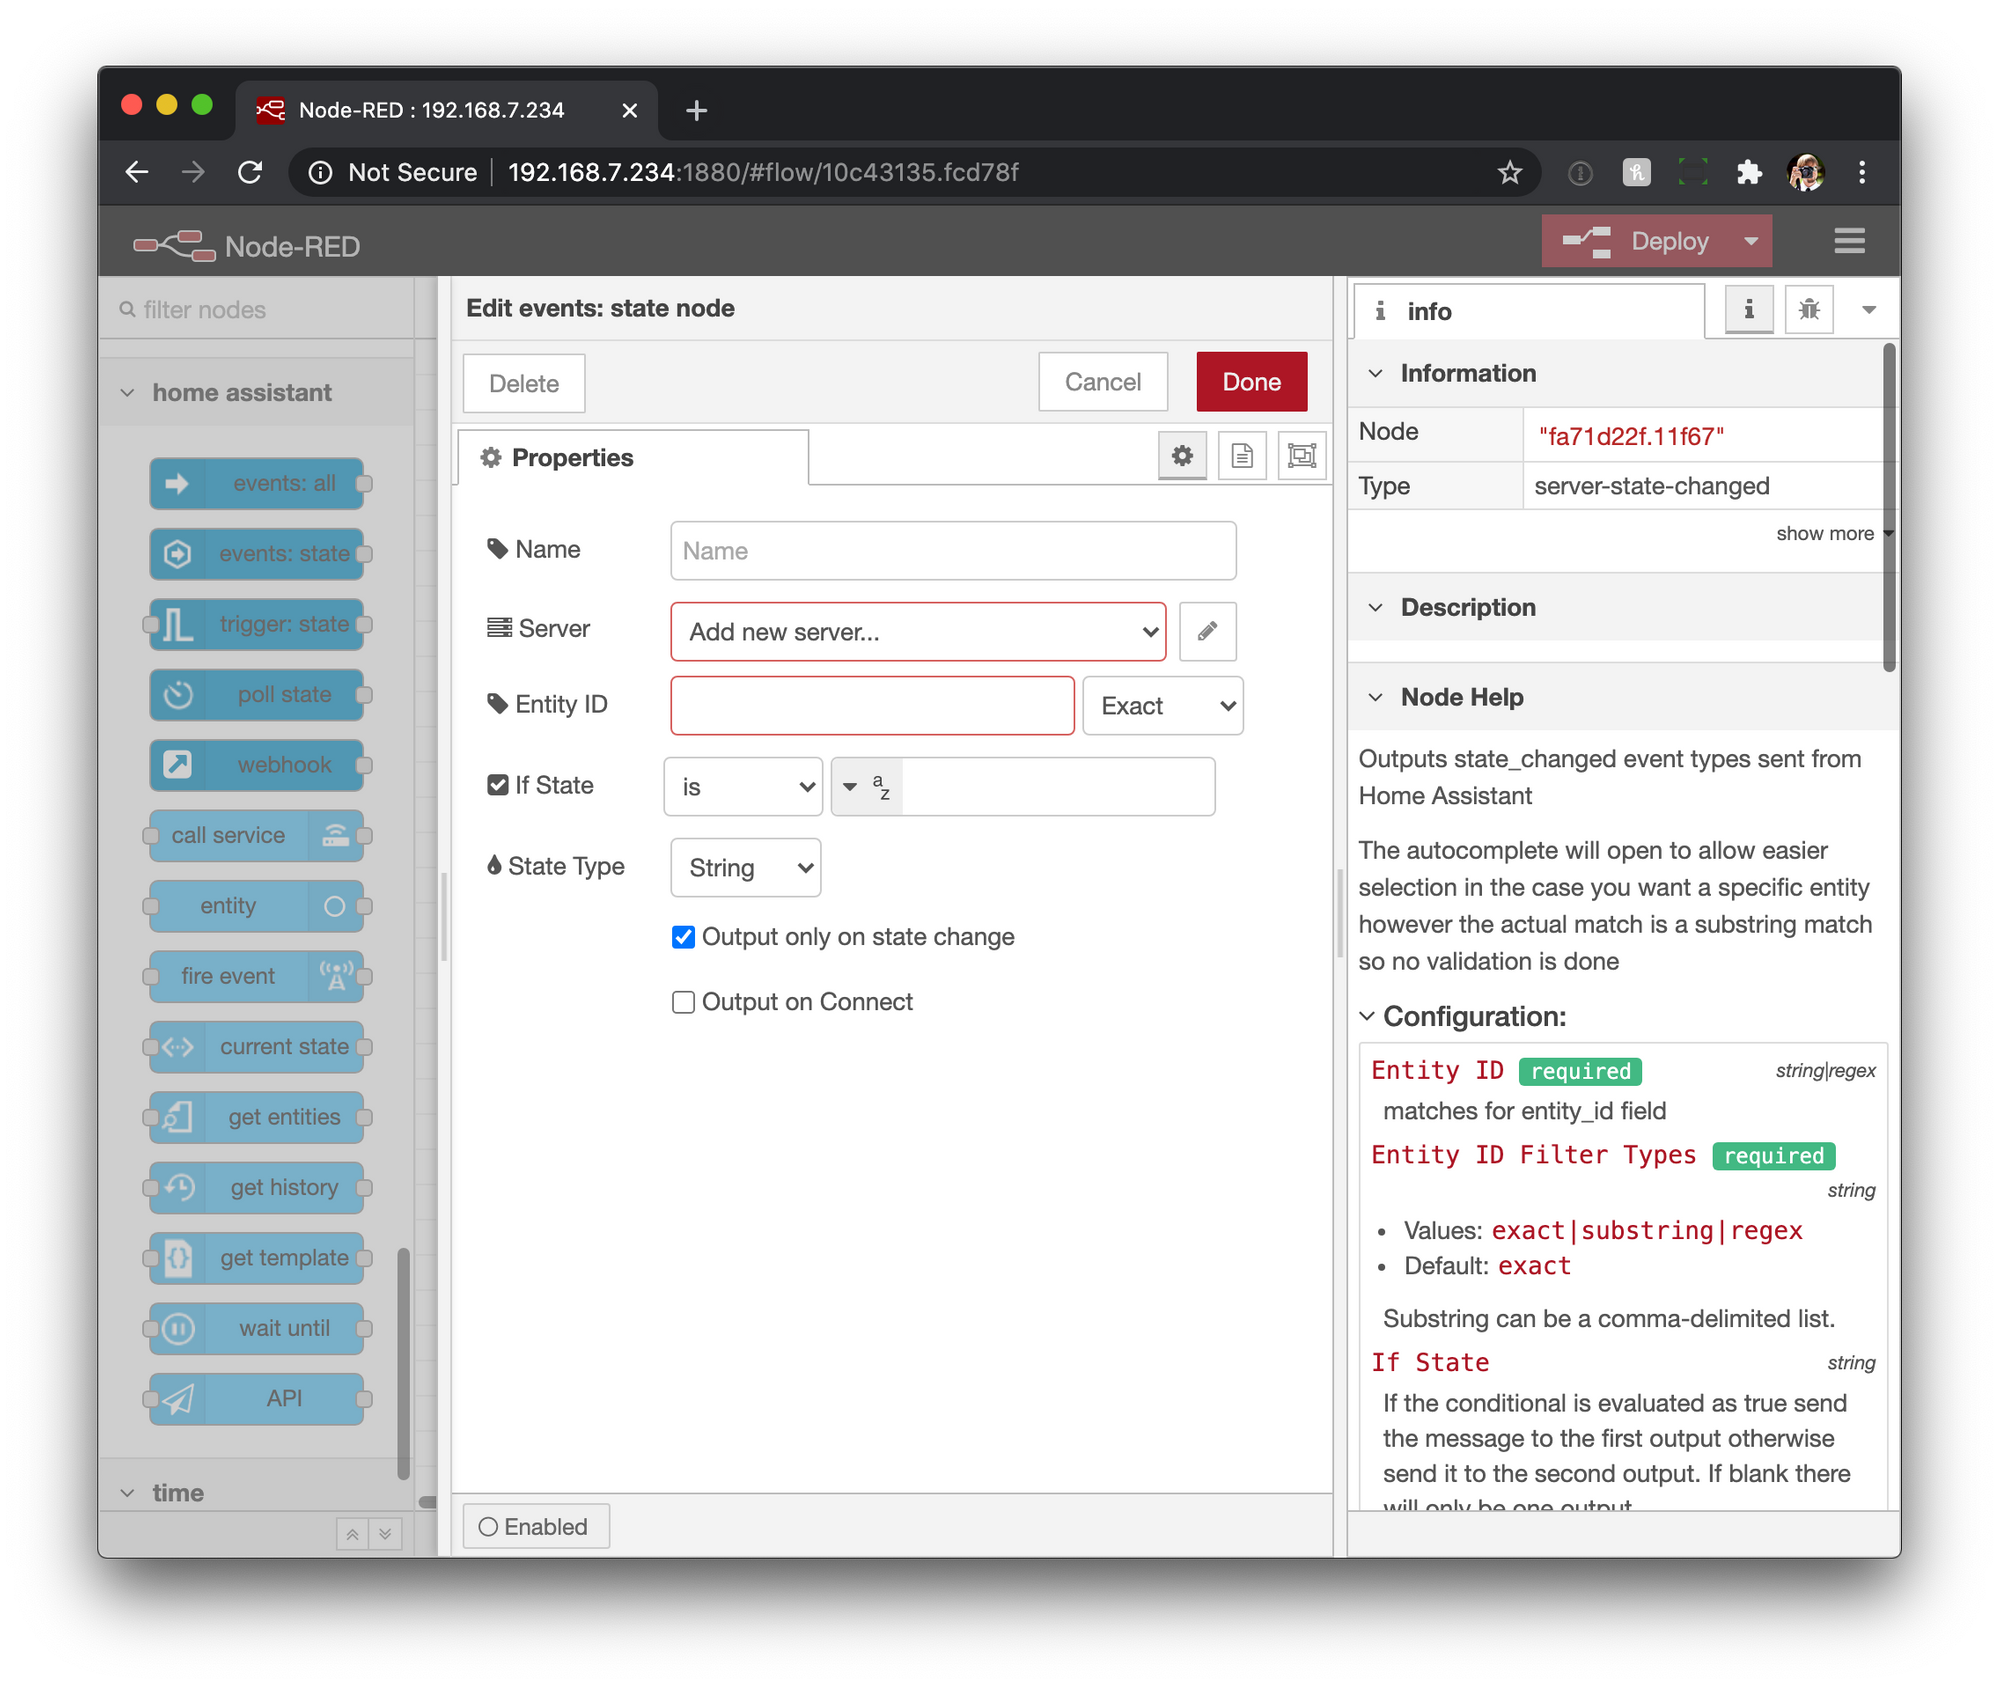
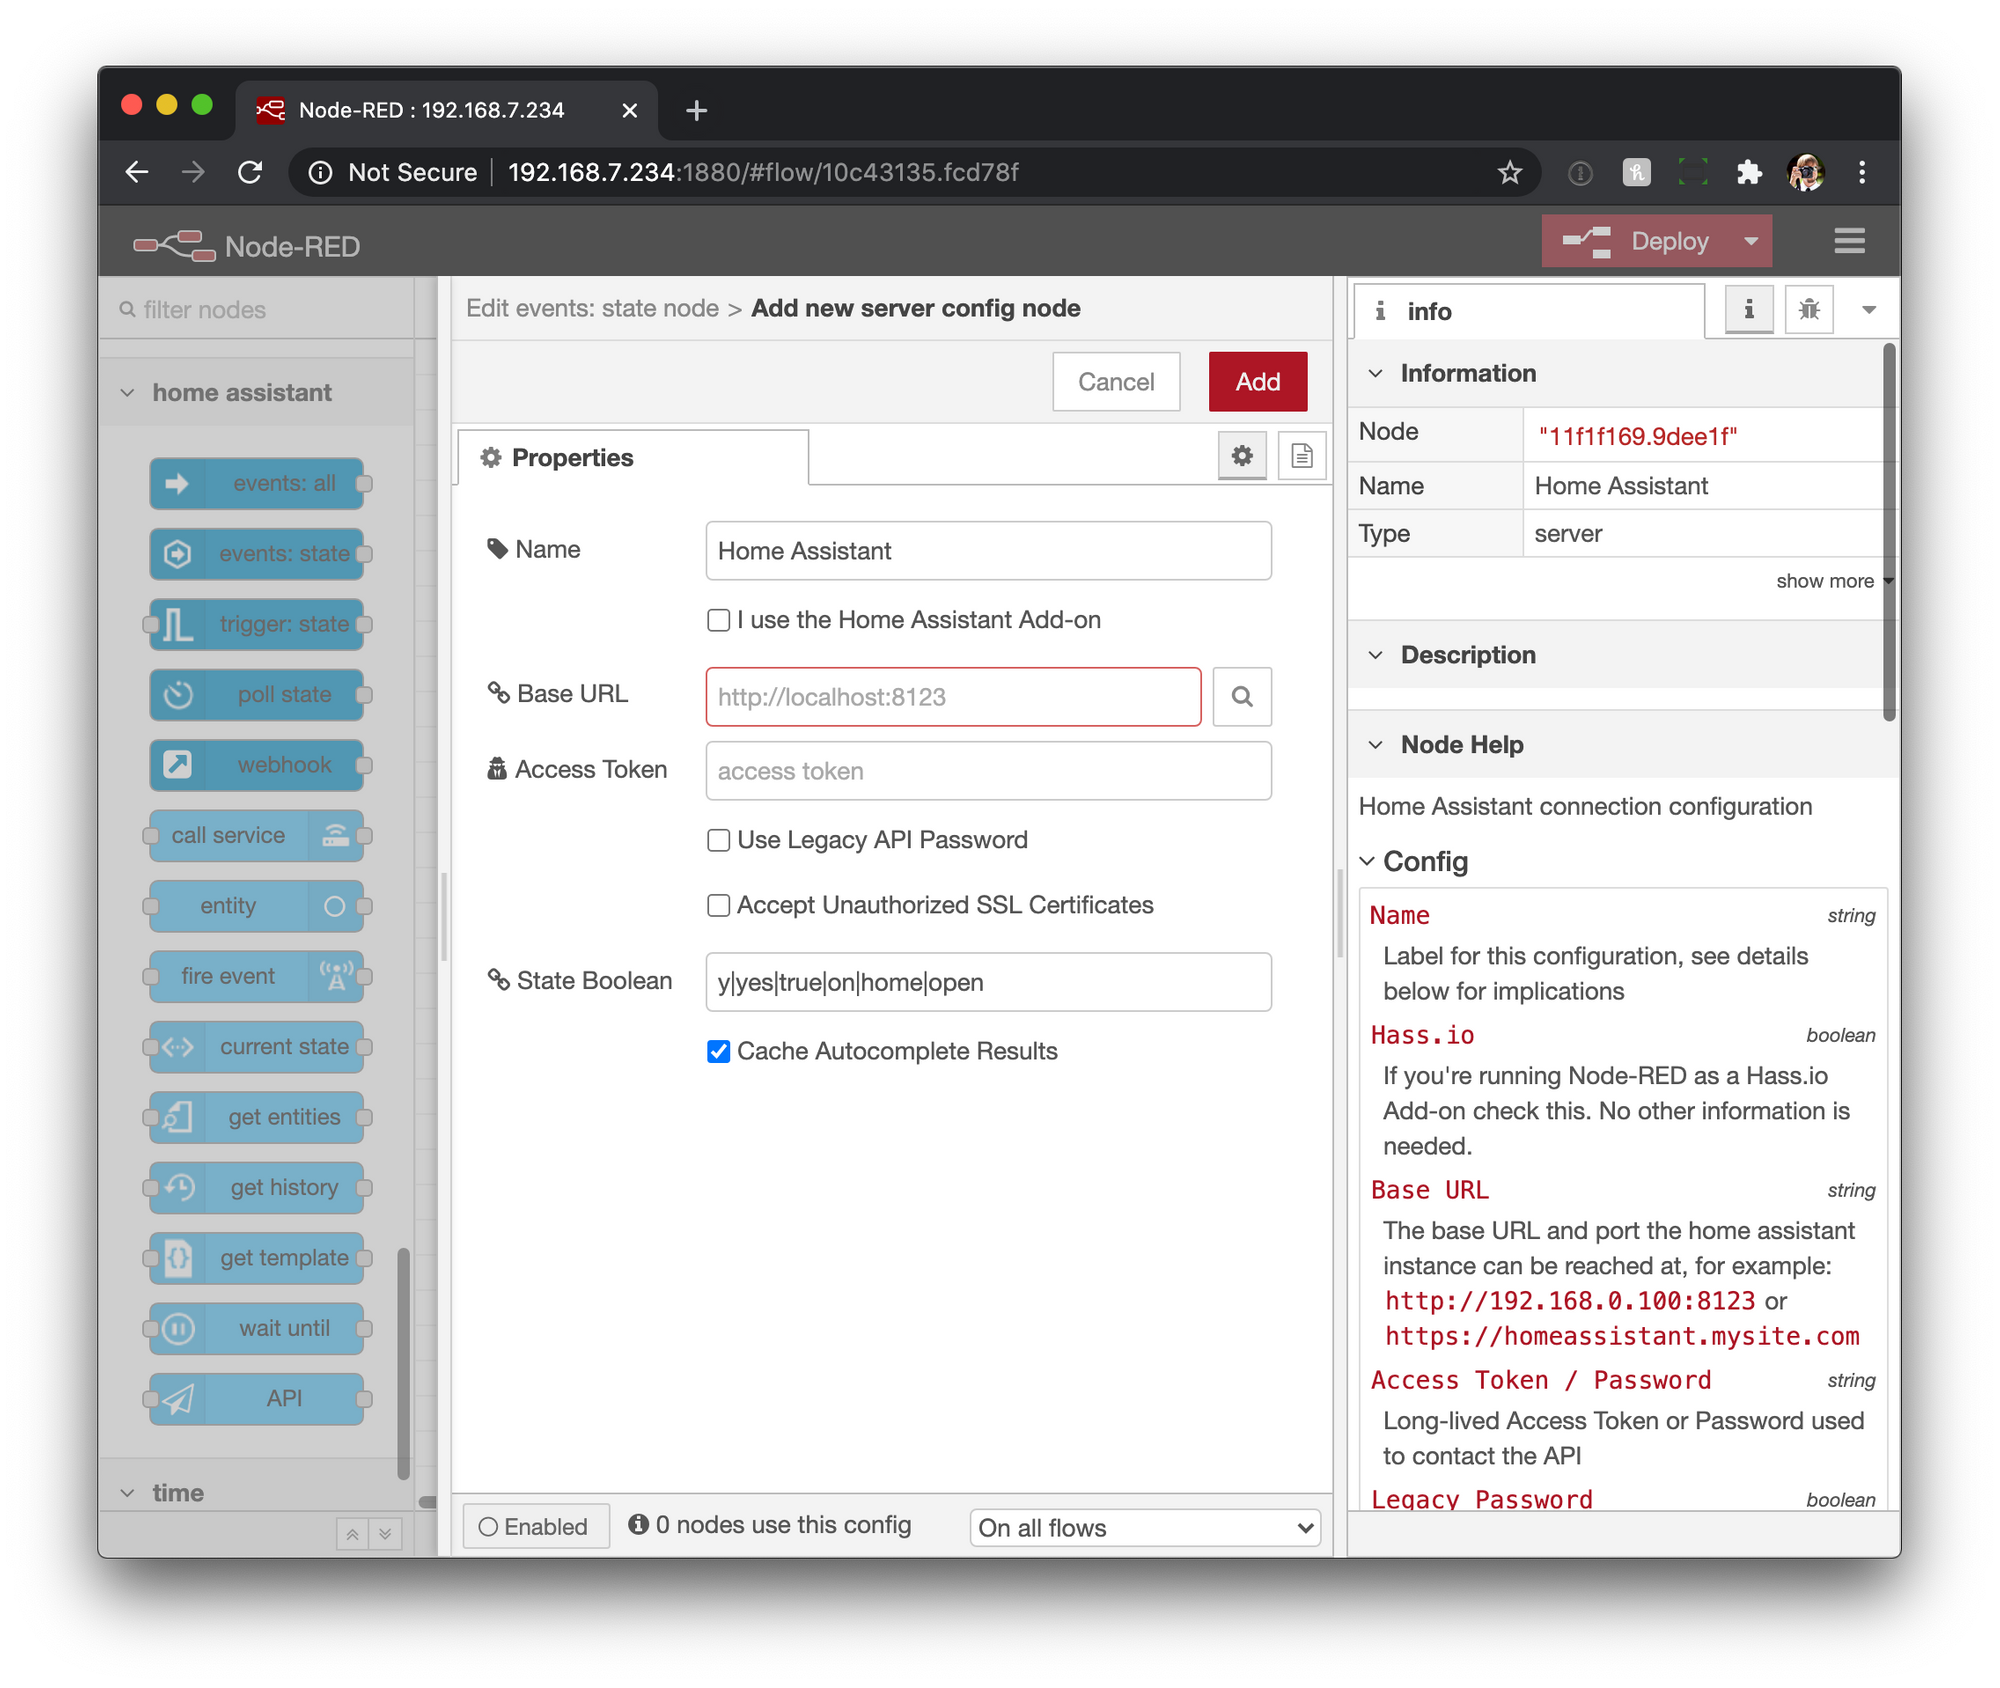
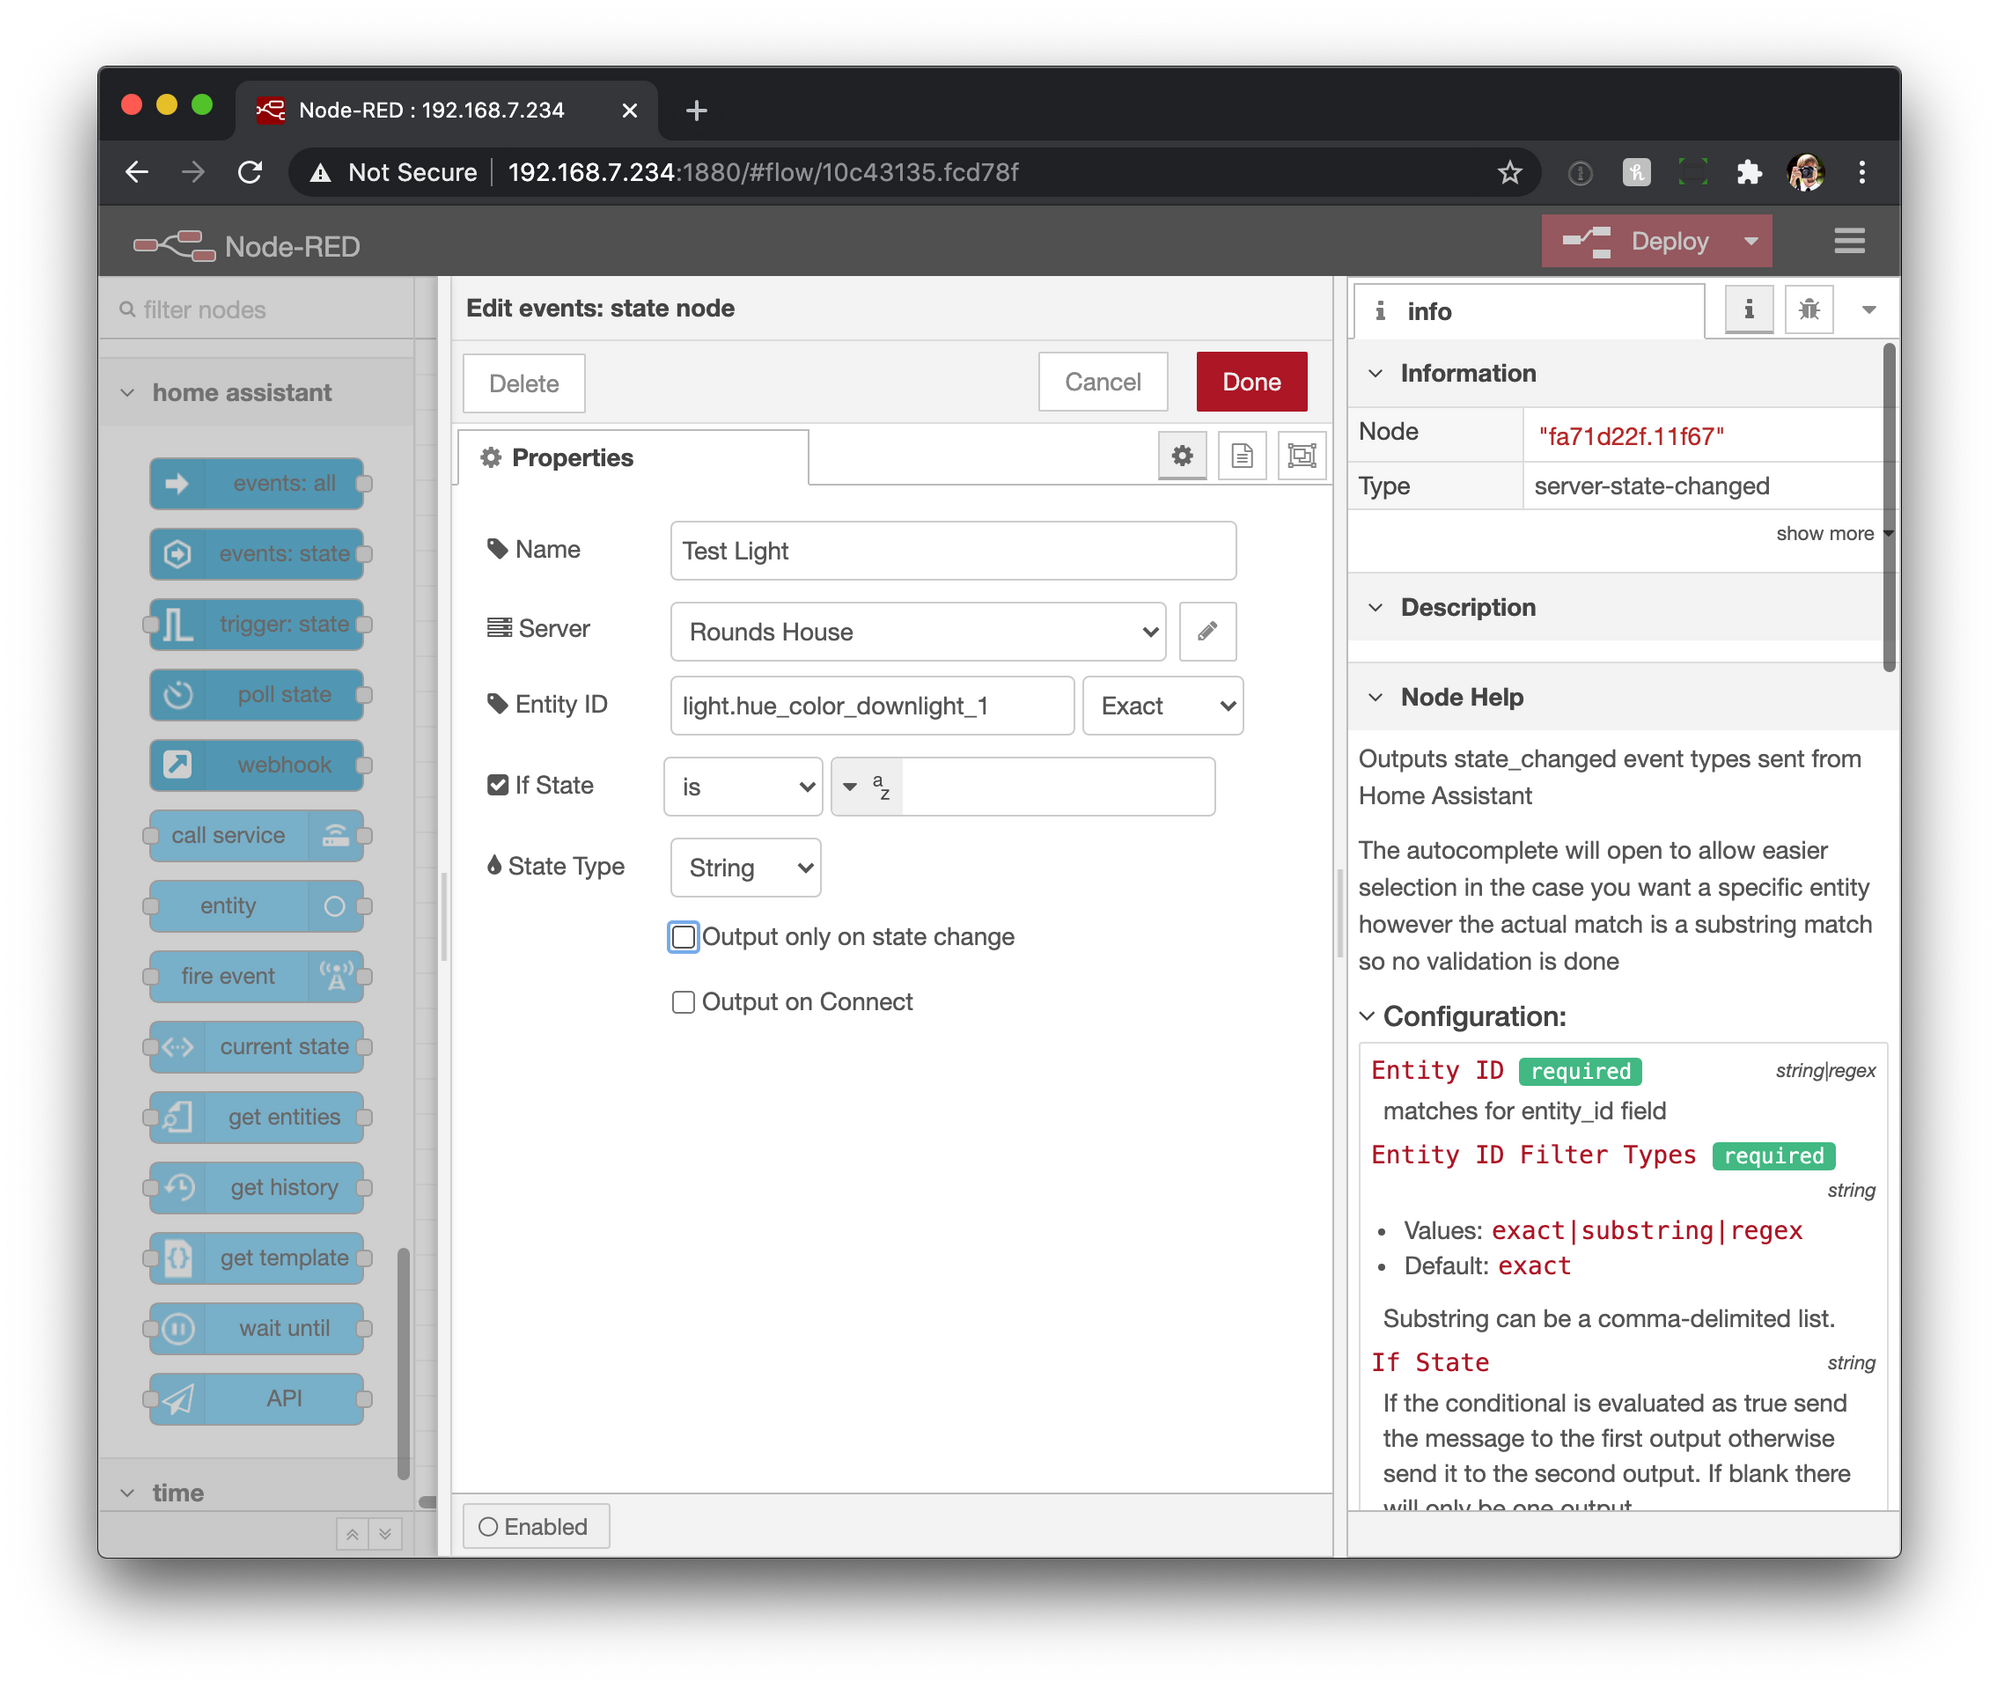
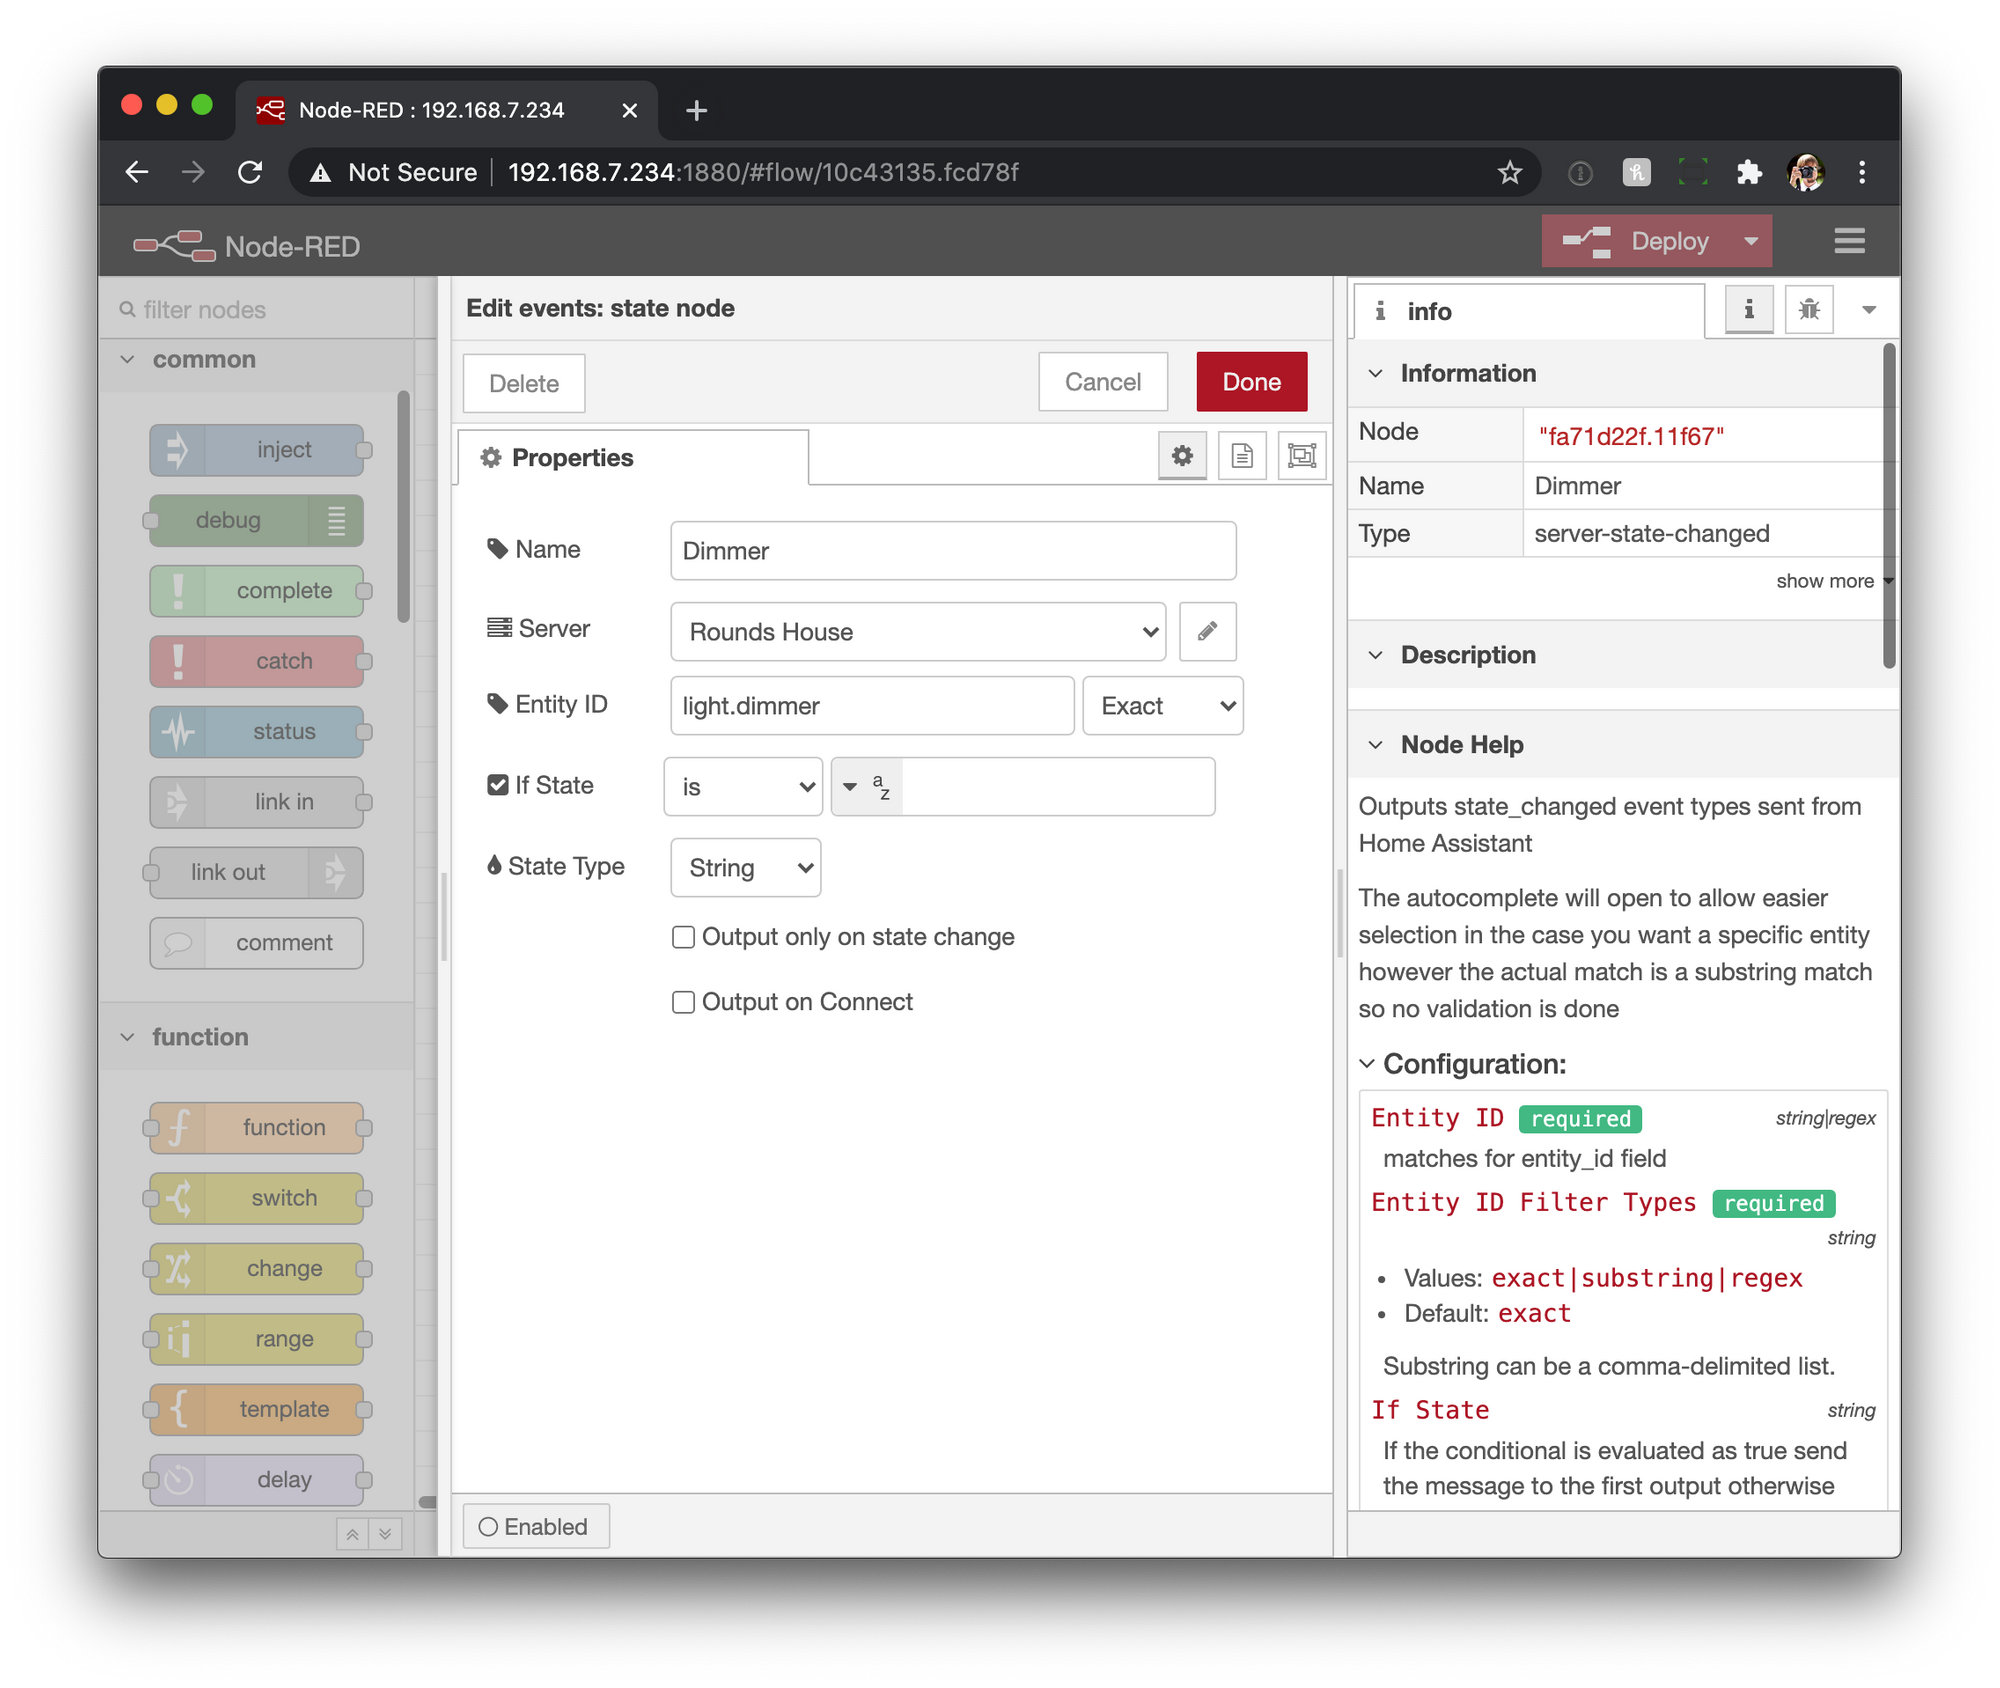
Next double click on the node you added, and you'll see the configuration for that node. Next to the Server field click the pencil icon to add a new server. Then give your server a name, enter its url, and put that access token we created in there. Finally click the add button.
Now you'll see the configuration for the node. We are just going to test that everything is working next so you can give it a name, pick an entity (one you can change state easily on), and then uncheck only on state change.
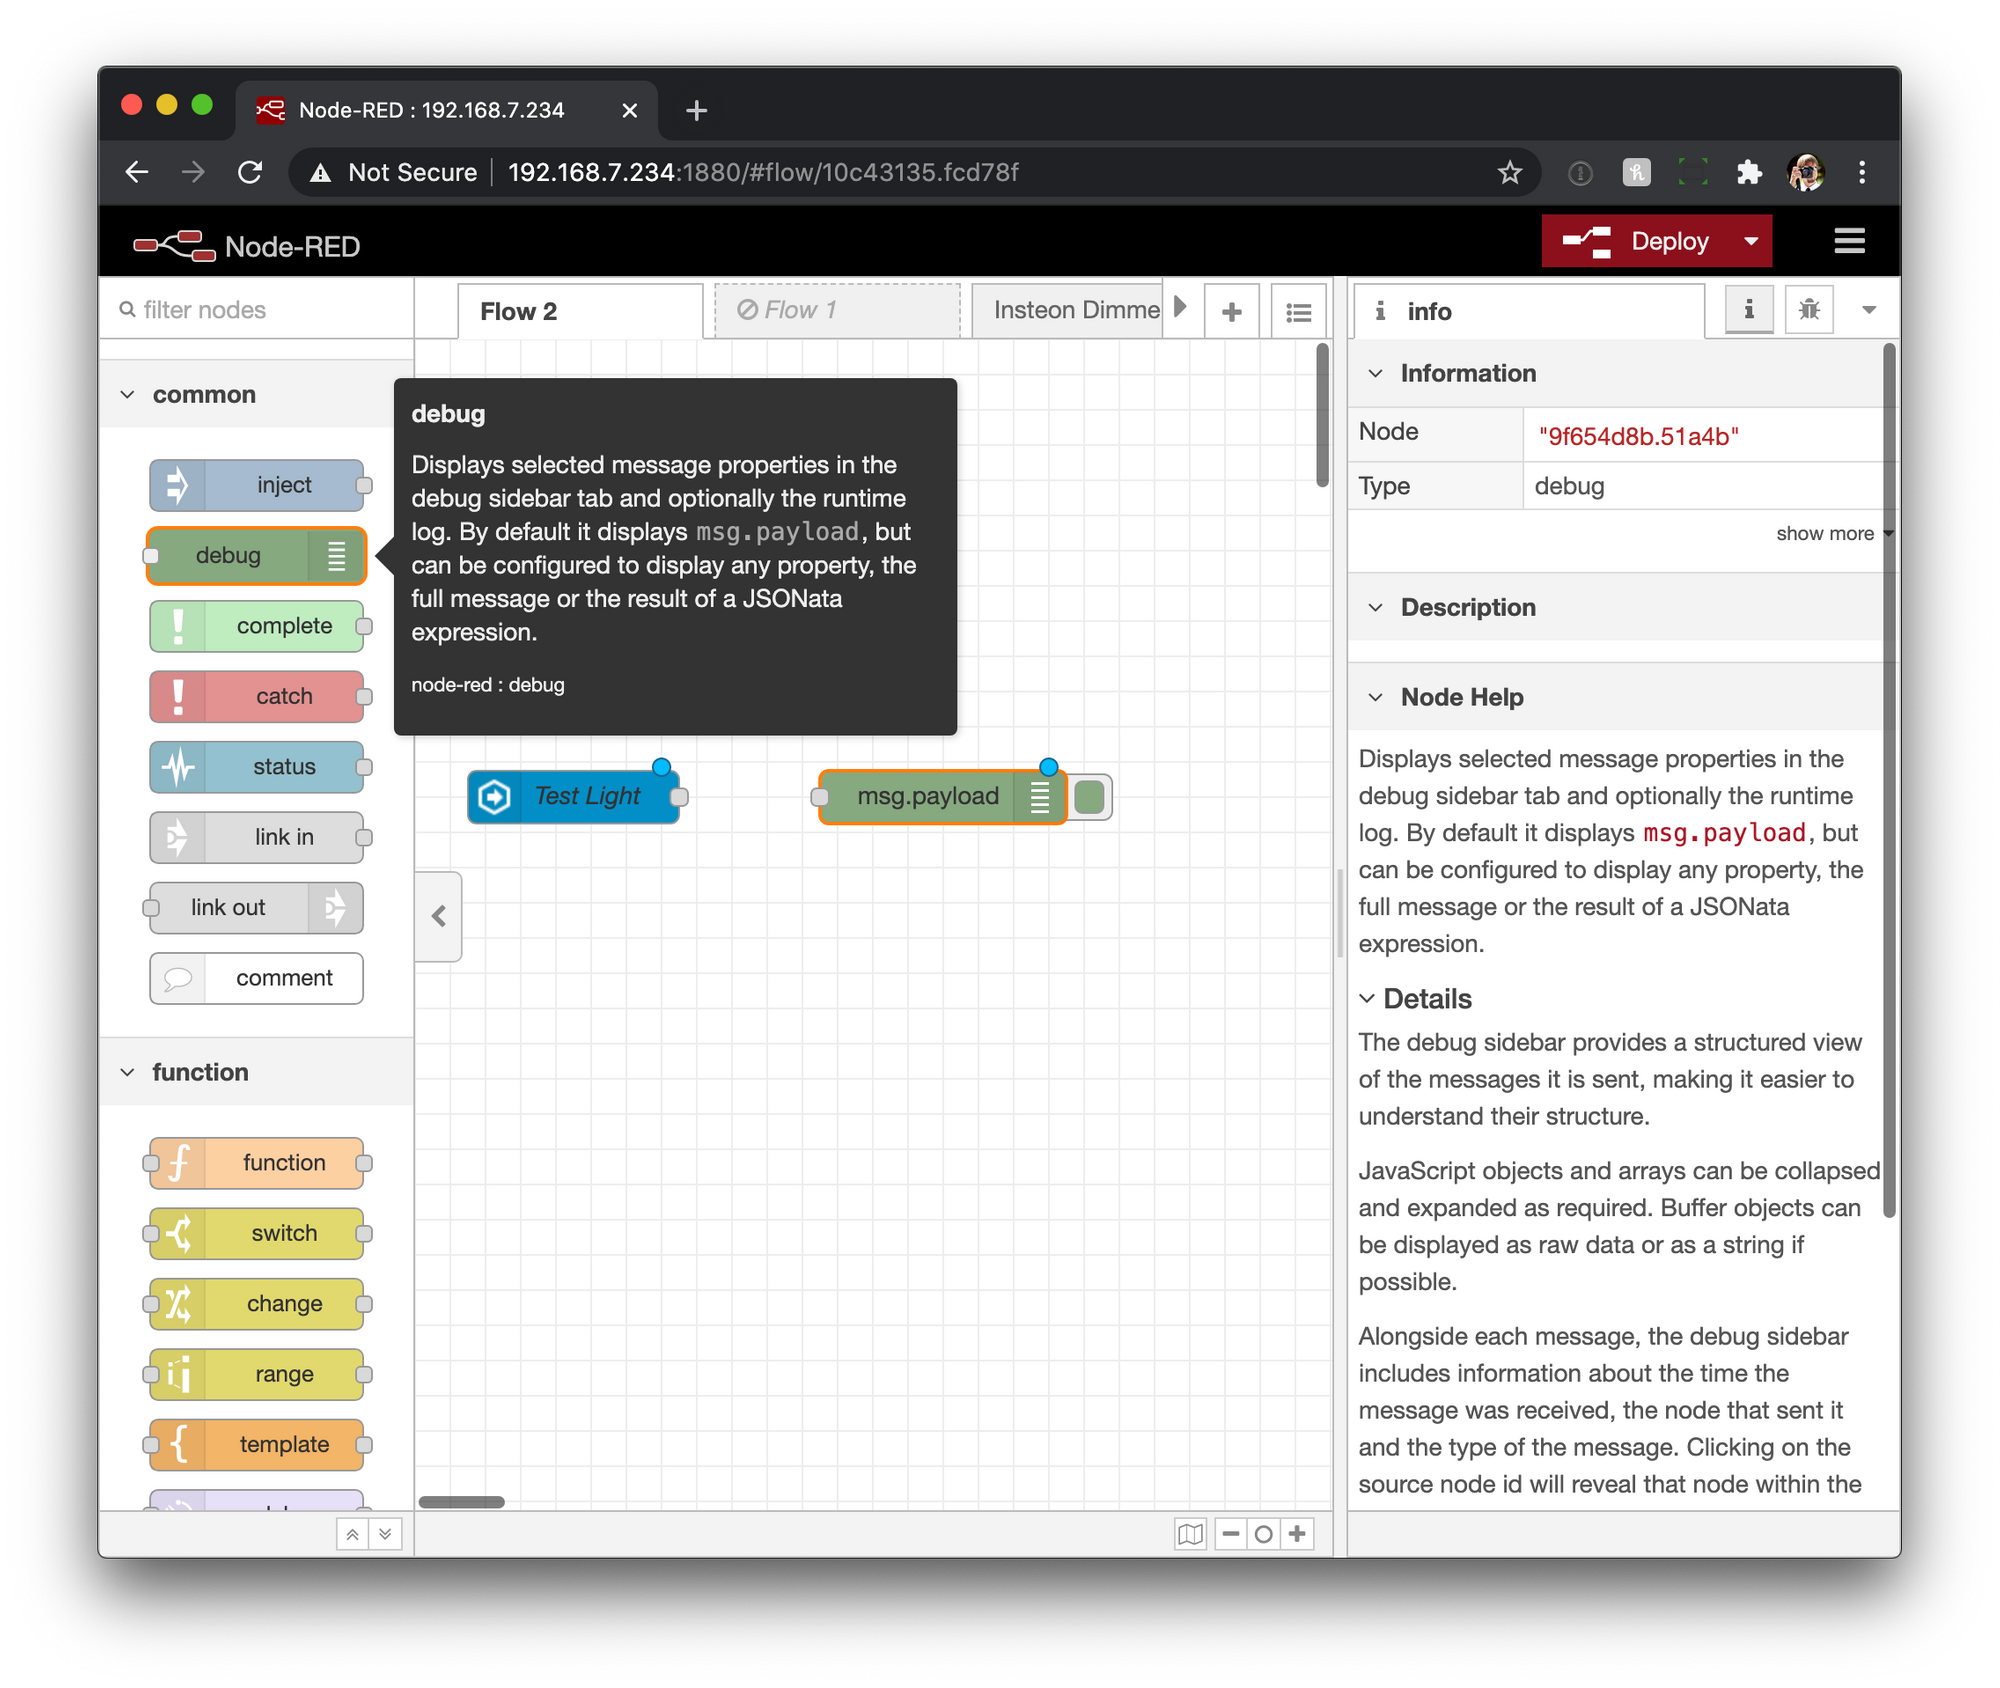
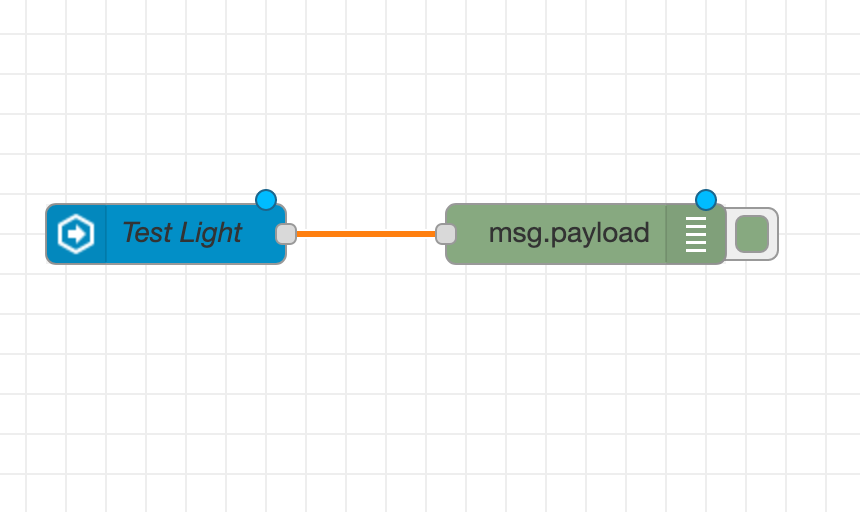
From here click done and you'll see the Flow canvas again with our new node. Next to see if everything's working scroll up to the top of the nodes list on the left and find the debug node. Drop one of those on the canvas. Once its there click and drag from the gray box on the event node to the debug node.
Finally we can click the Deploy button in the upper right. Click the debug button under it and change the state of the entity through Home Assistant or however you want to change it. Then sit back and watch the messages come through.
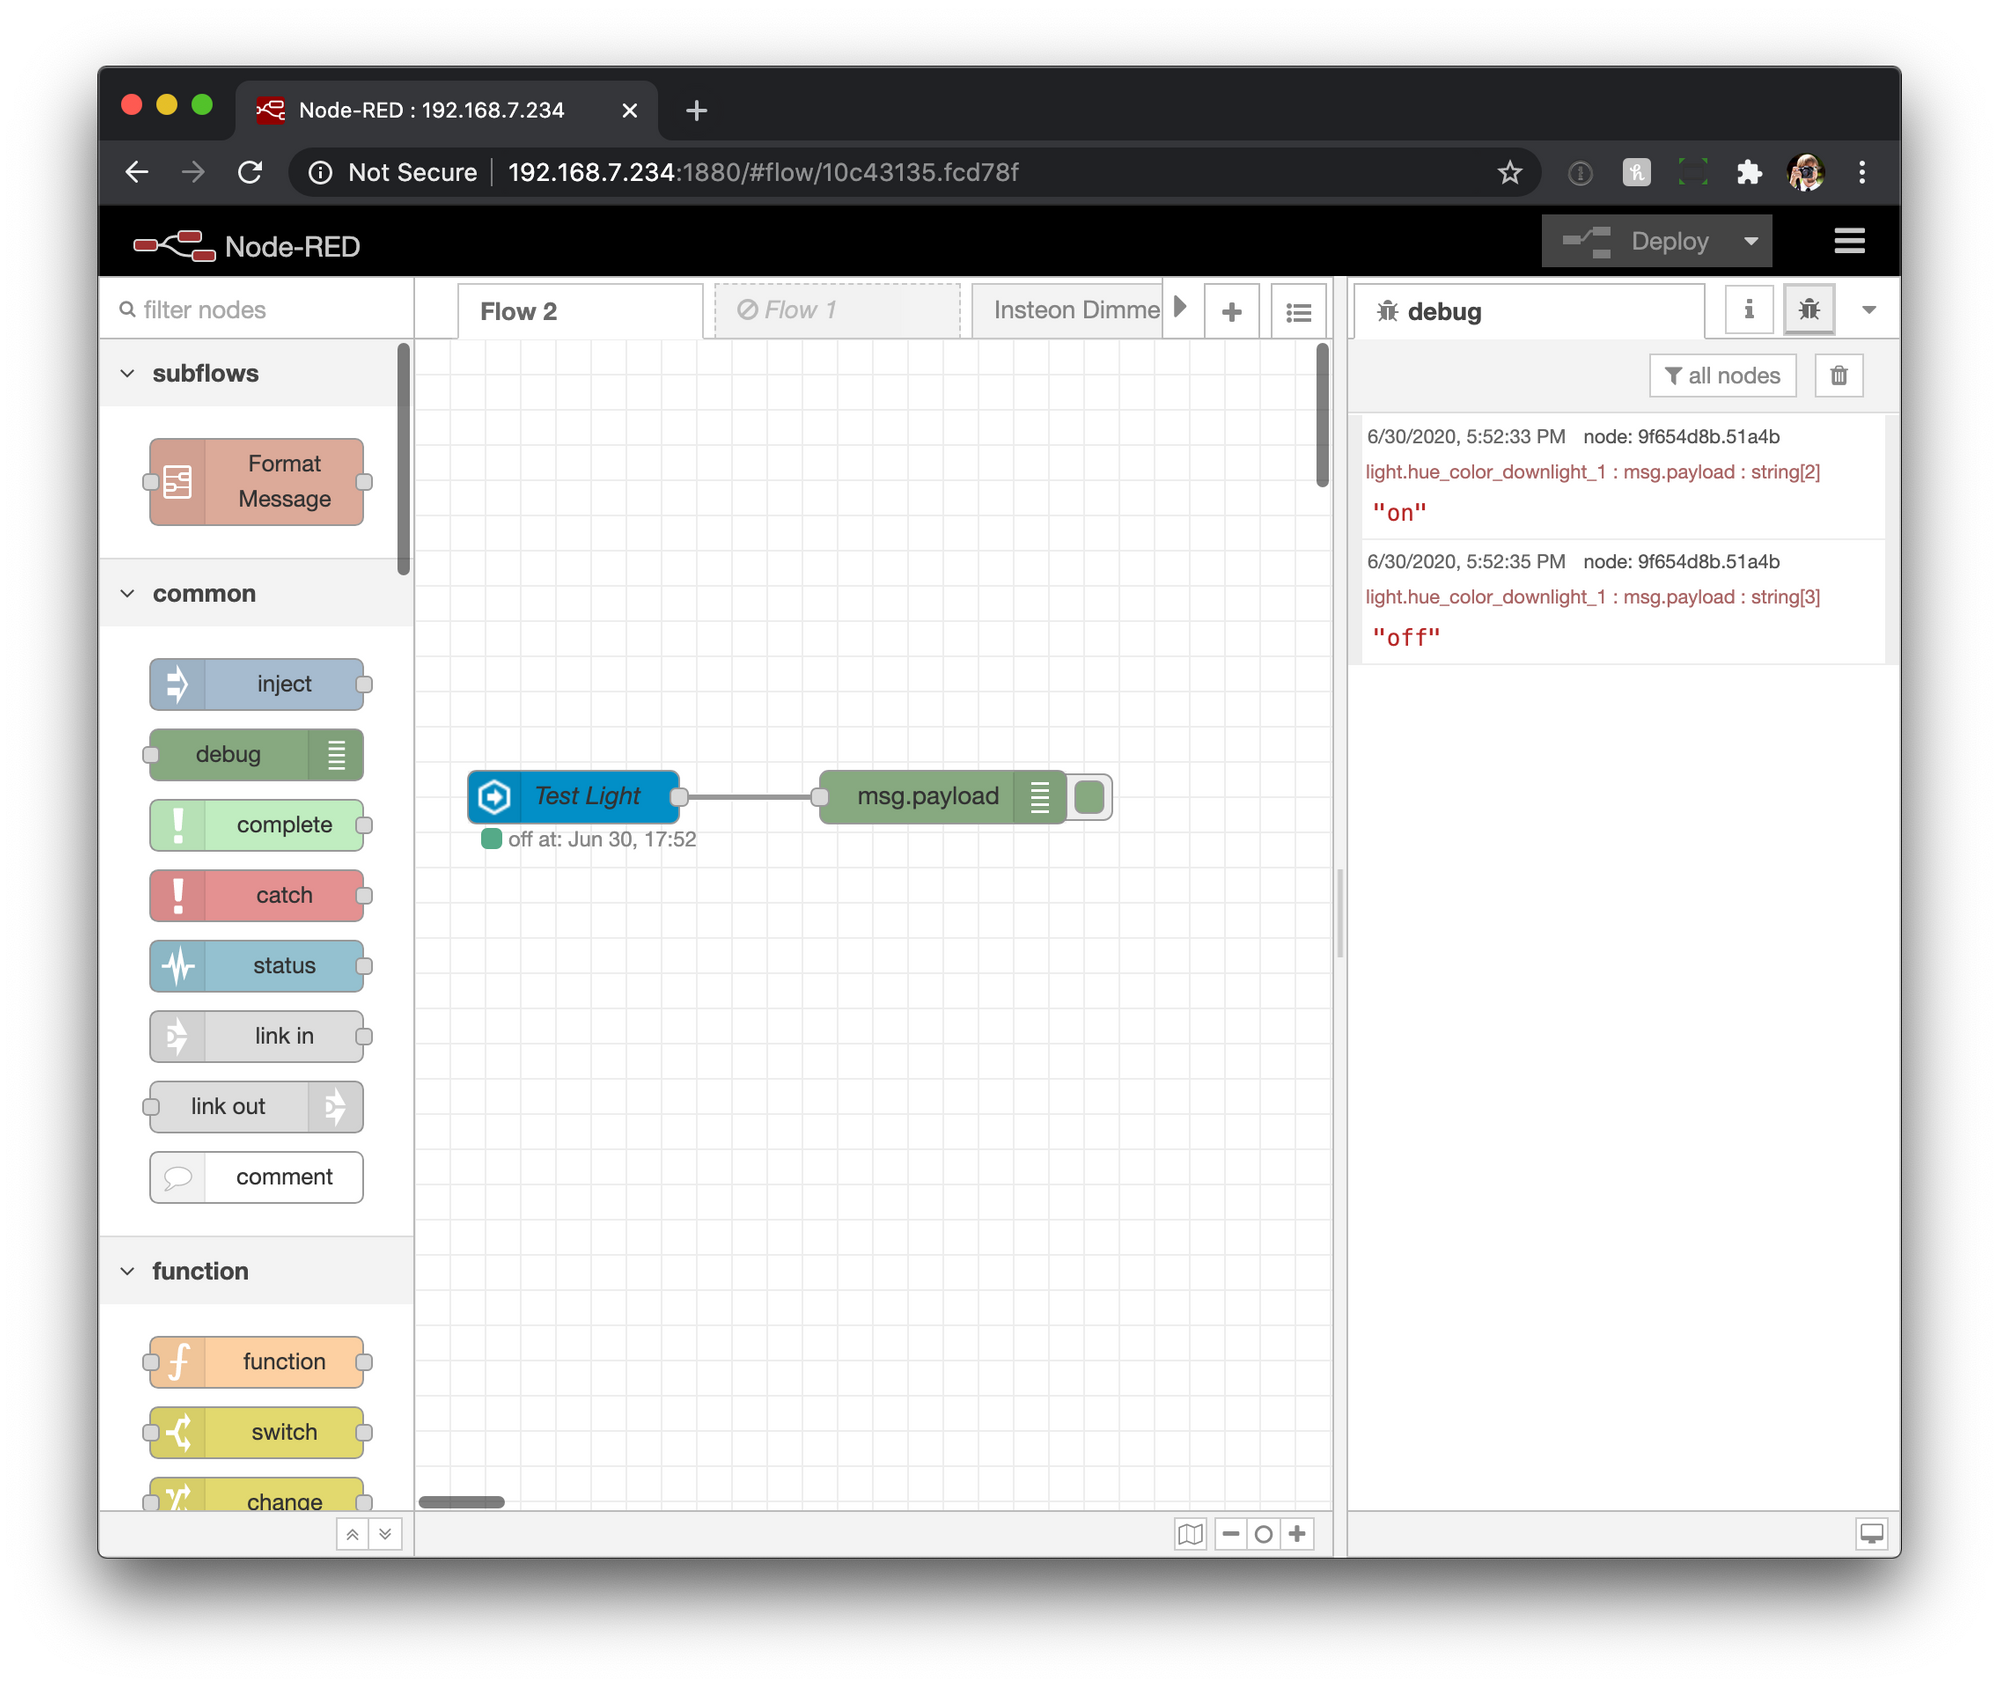
Now we've got Node Red Setup and working with Home Assistant, and used a debug node to confirm that.
Create a Simple Automation to Control a Light
This is probably the most basic thing we could do. We will use the dimmer and its payload to then trigger a light to either turn on or off. First lets drop an "events: state" node into the flow, and configure it to be an entity that is the dimmer.
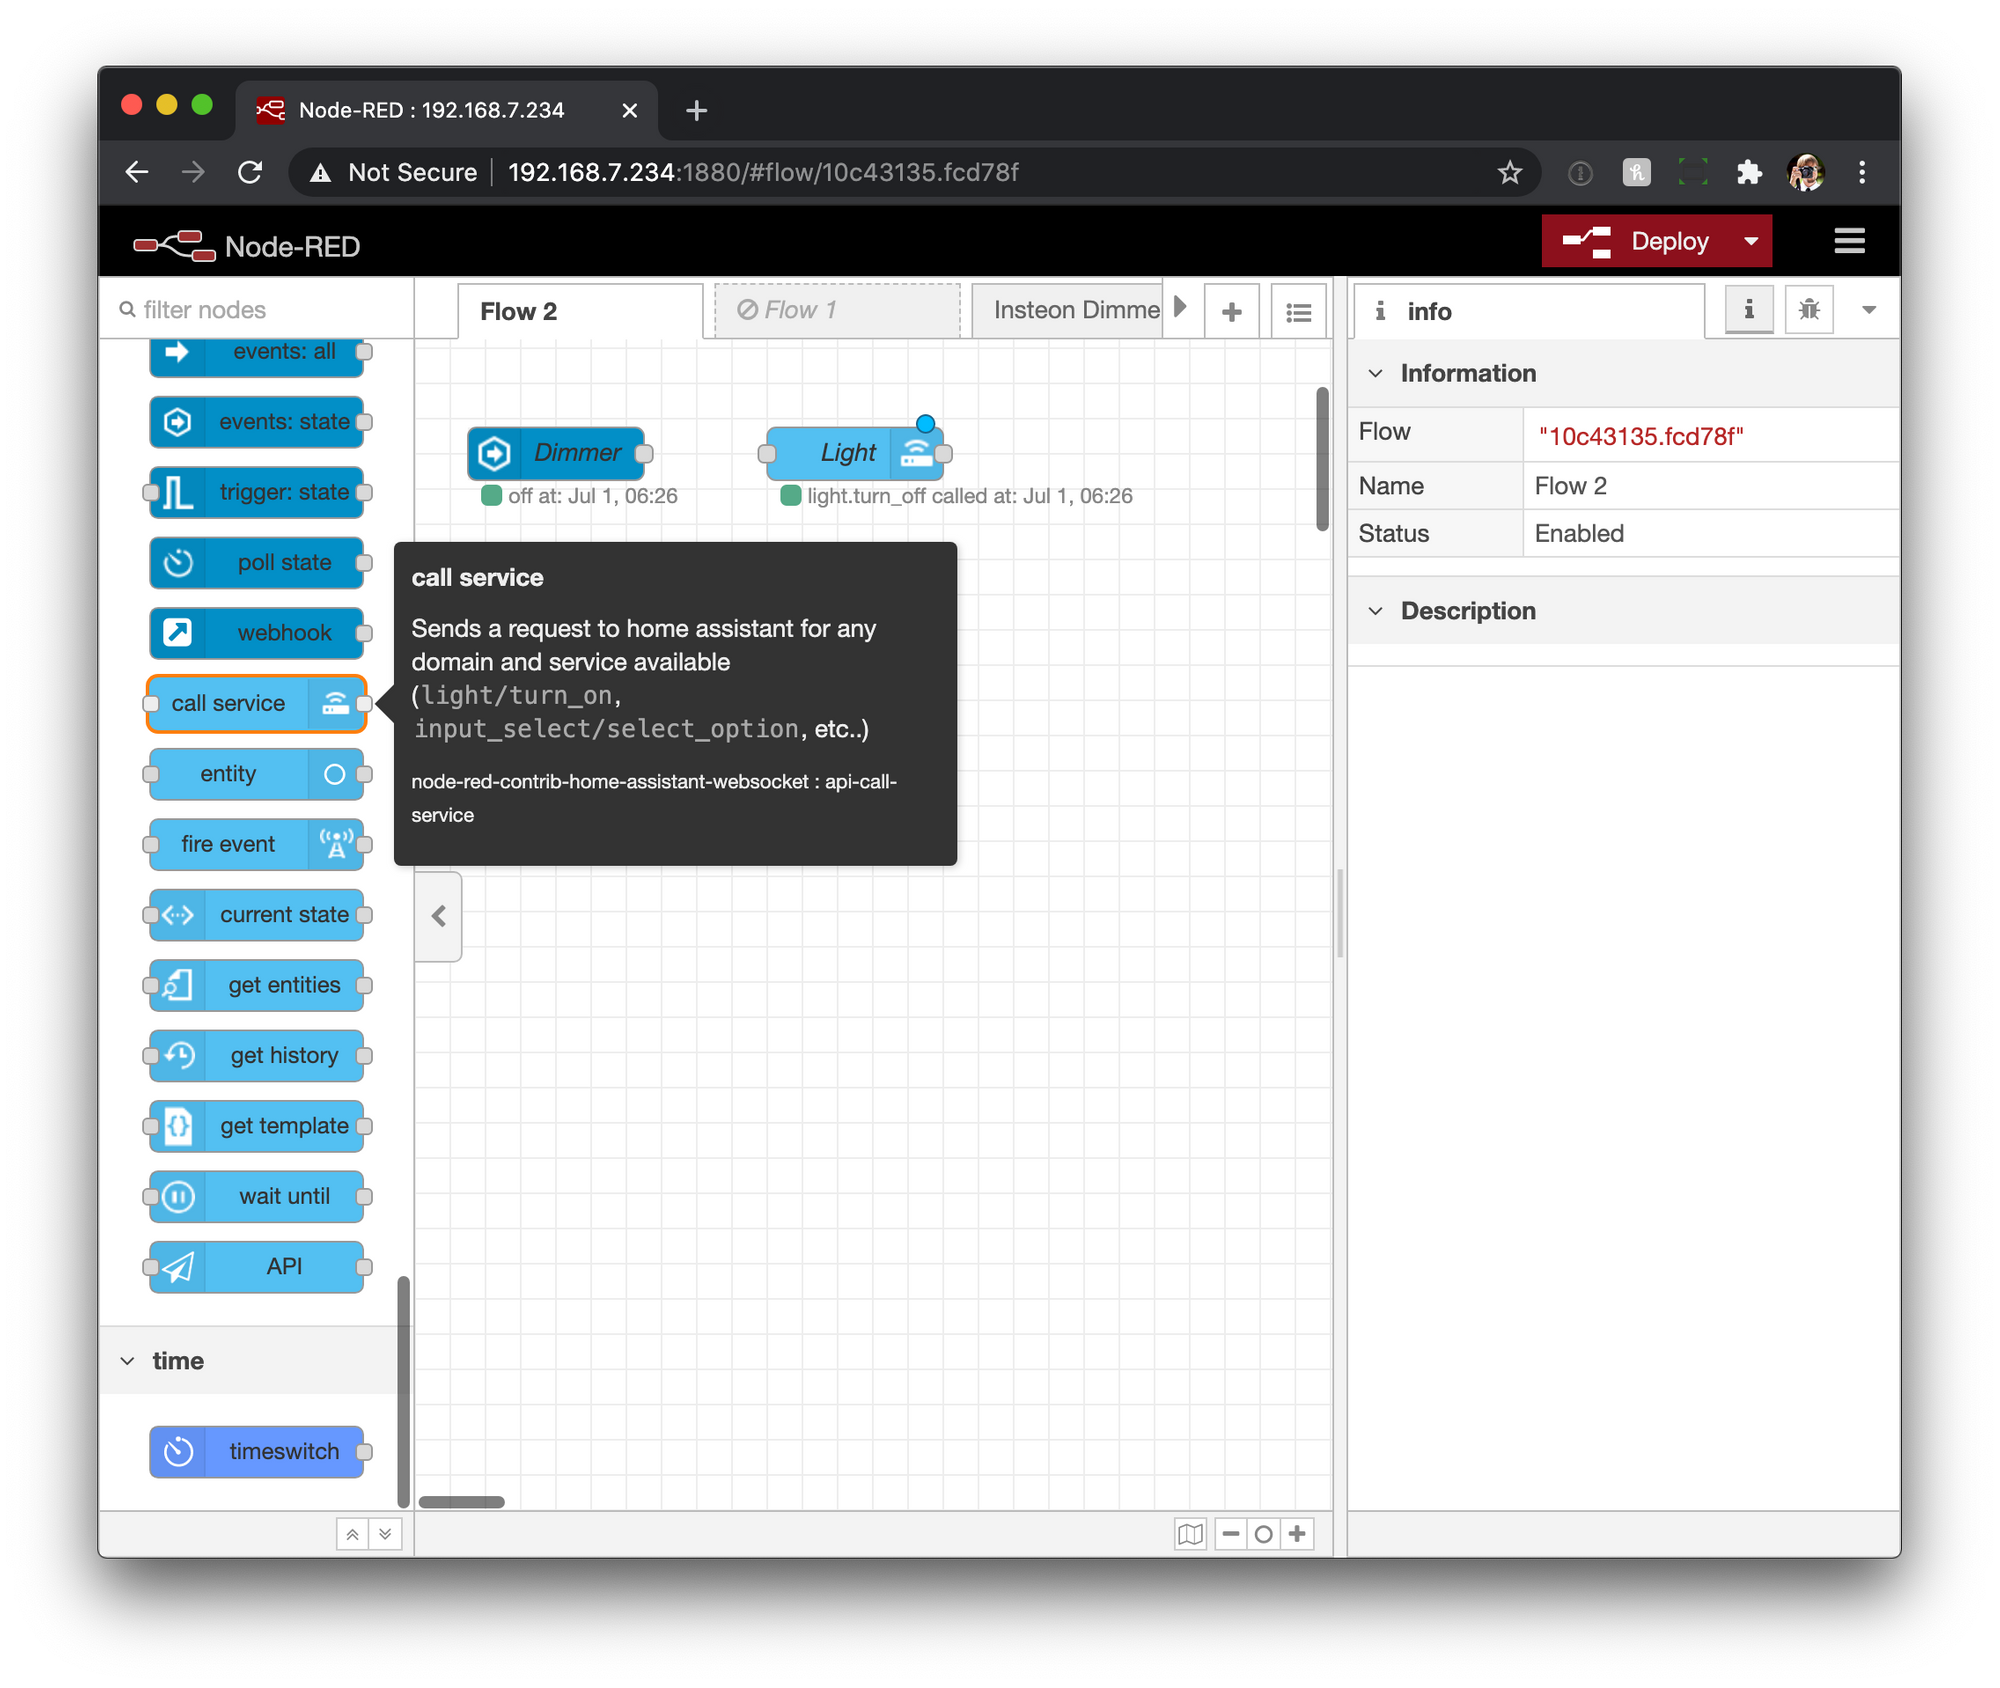
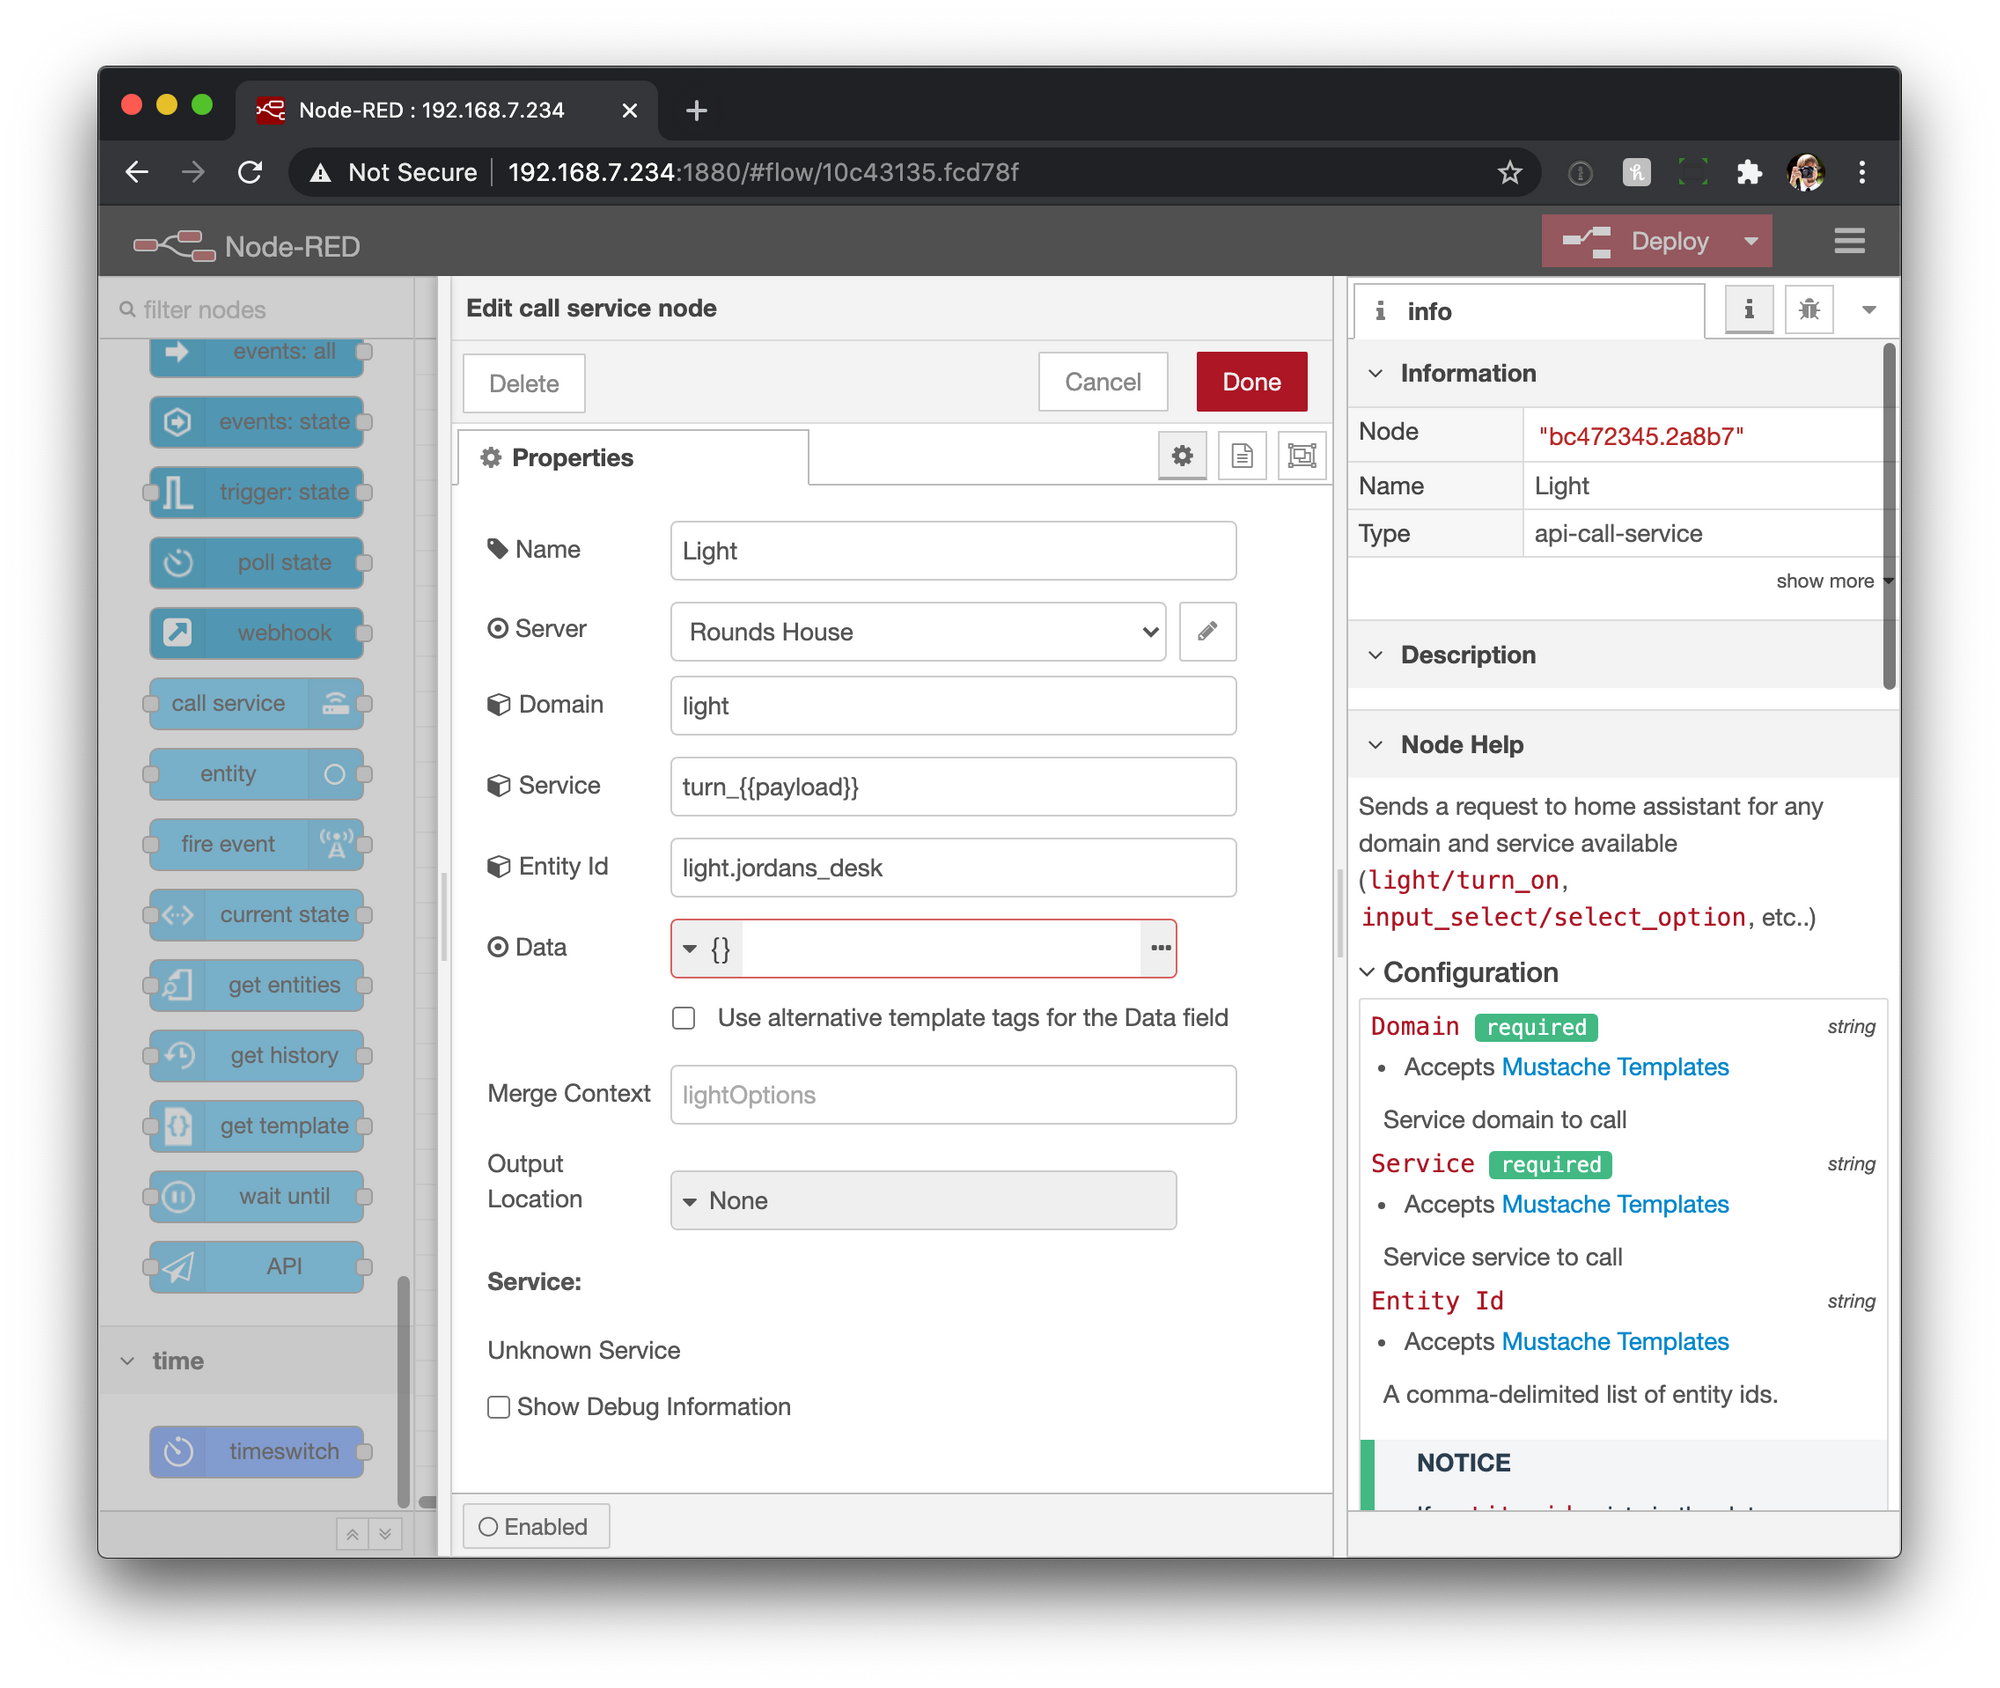
Next add a "call service" node to the flow. Double click it to configure it. W will give it a name of "Light", set the domain to light, set the service to be turn_{{payload}} , and set the entity id to the light entity you want to control in Home Assistant. The key piece to call out here is the service entry, which is essentially taking the payload from the msg object, which will either be on or off, therefore calling the appropriate service of turn_on or turn_off}.
Finally, make sure to connect the two nodes and then go toggle your dimmer and watch the light turn on and off.
What's Now?
From here we can use Node Red for any types of automations that can be imagined. Searching around the internet there are many great examples others have created, and many times provide the flow to be copied and pasted right into Node Red.
We've created this simple automation be the starting point of the automations that will be needed to control Hue lights with Insteon Dimmers coming up next.